Sisters' Ten Modern BOM July Block: Hattie's Trick

Sisters Ten BOM 1
Here we are at July's block.  Summer's in full swing, vacations, cookouts, baseball and fun.  I've chosen another easy block for this month in the Sisters' Ten Modern Block of the Month Club.  I know we've all got lots going on, so I didn't want to choose anything too time consuming.  So if you liked June's block, you'll breeze through this one.    
July blog cover BOM
Cutting Instructions.

For 12" blocks.
  • Cut (3) 5 1/4" x 5 1/4" squares of Fabric A (background).
  • Cut (1) 5 1/4" x 5 1/4" squares of Fabric C.
  • Cut (1) 5 1/4" x 5 1/4" squares of Fabric D.
  • Cut (1) 5 1/4" x 5 1/4" squares of Fabric E.
  • Cut (2) 4 1/2" x 4 1/2" squares of Fabric A (background).
  • Cut (1) 4 1/2" x 4 1/2" squares of Fabric B (for center).  
fabric cuts July

For 9" blocks.
  • Cut (3) 4 1/4" x 4 1/4" squares of Fabric A (background).
  • Cut (1) 4 1/4" x 4 1/4" squares of Fabric C.
  • Cut (1) 4 1/4" x 4 1/4" squares of Fabric D.
  • Cut (1) 4 1/4" x 4 1/4" squares of Fabric E.
  • Cut (2) 3 1/2" x 3 1/2" squares of Fabric A (background).
  • Cut (1) 3 1/2" x 3 1/2" squares of Fabric B (for center).  
Piecing Instructions.
*Use a scant 1/4" on all seam allowances. See the Scant Rant series for details.

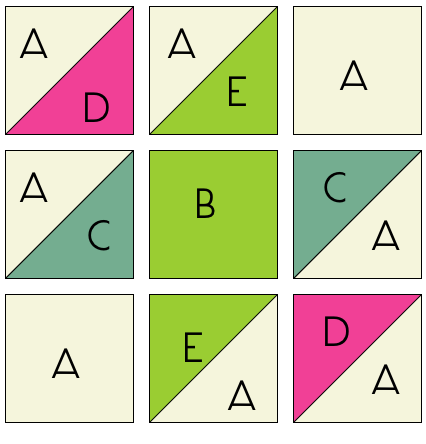
1.  Make 6 Half-Square Triangle (HST) units pairing the 3 Fabric A squares with Fabric C, D, and E respectively.  Use (1) Fabric A square and the (1) Fabric C square to make (2) total Half-Square Triangle units using the method in this tutorial.  Repeat the process, pairing the remaining 2 Fabric A squares with (1) Fabric D square and (1) Fabric E square.  Make 6 HST blocks total (2 of each color).  The HSTs should be trimmed down to:
                      12" blocks:  4 1/2" (unfinished size).
                        9" blocks:  3 1/2" (unfinished size).

2.  Layout the Half-Square Triangle Units, remaining Fabric A squares and Fabric B square as shown below.
 
 photo Julyhattietrick1_zps4d68dcac.png

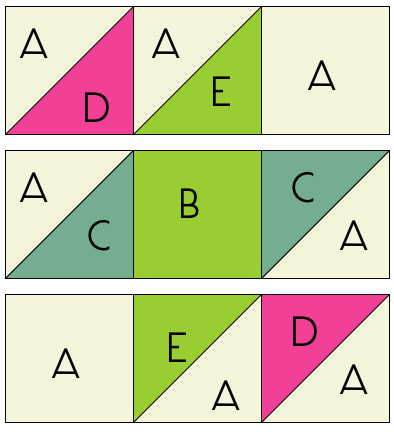
3.  Sew each of the three rows together, alternating the direction the seams are pressed.
 photo Julyhattietrick2_zpsd625202c.png


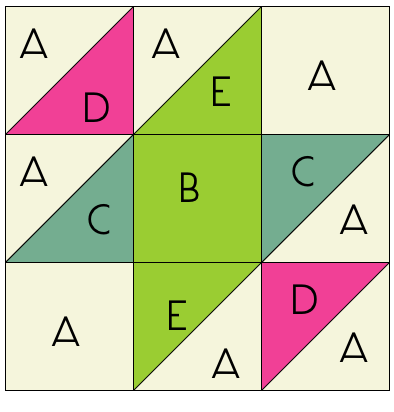
4.   Sew the rows together and you're done!

 photo Julyhattietrick3_zpsd4c2b17e.png
5.   Make (2) blocks.  They may be identical blocks or made from differing fabrics for a scrappier look.  

two july blocks sisters' ten bom  
Fabric is Alison Glass for Andover, Lucky Penny with background Quilter's Linen in Straw by Robert Kaufman.

ripple quilt finish/published!

ripple quilt full shot

FREE PATTERN DOWNLOAD

.

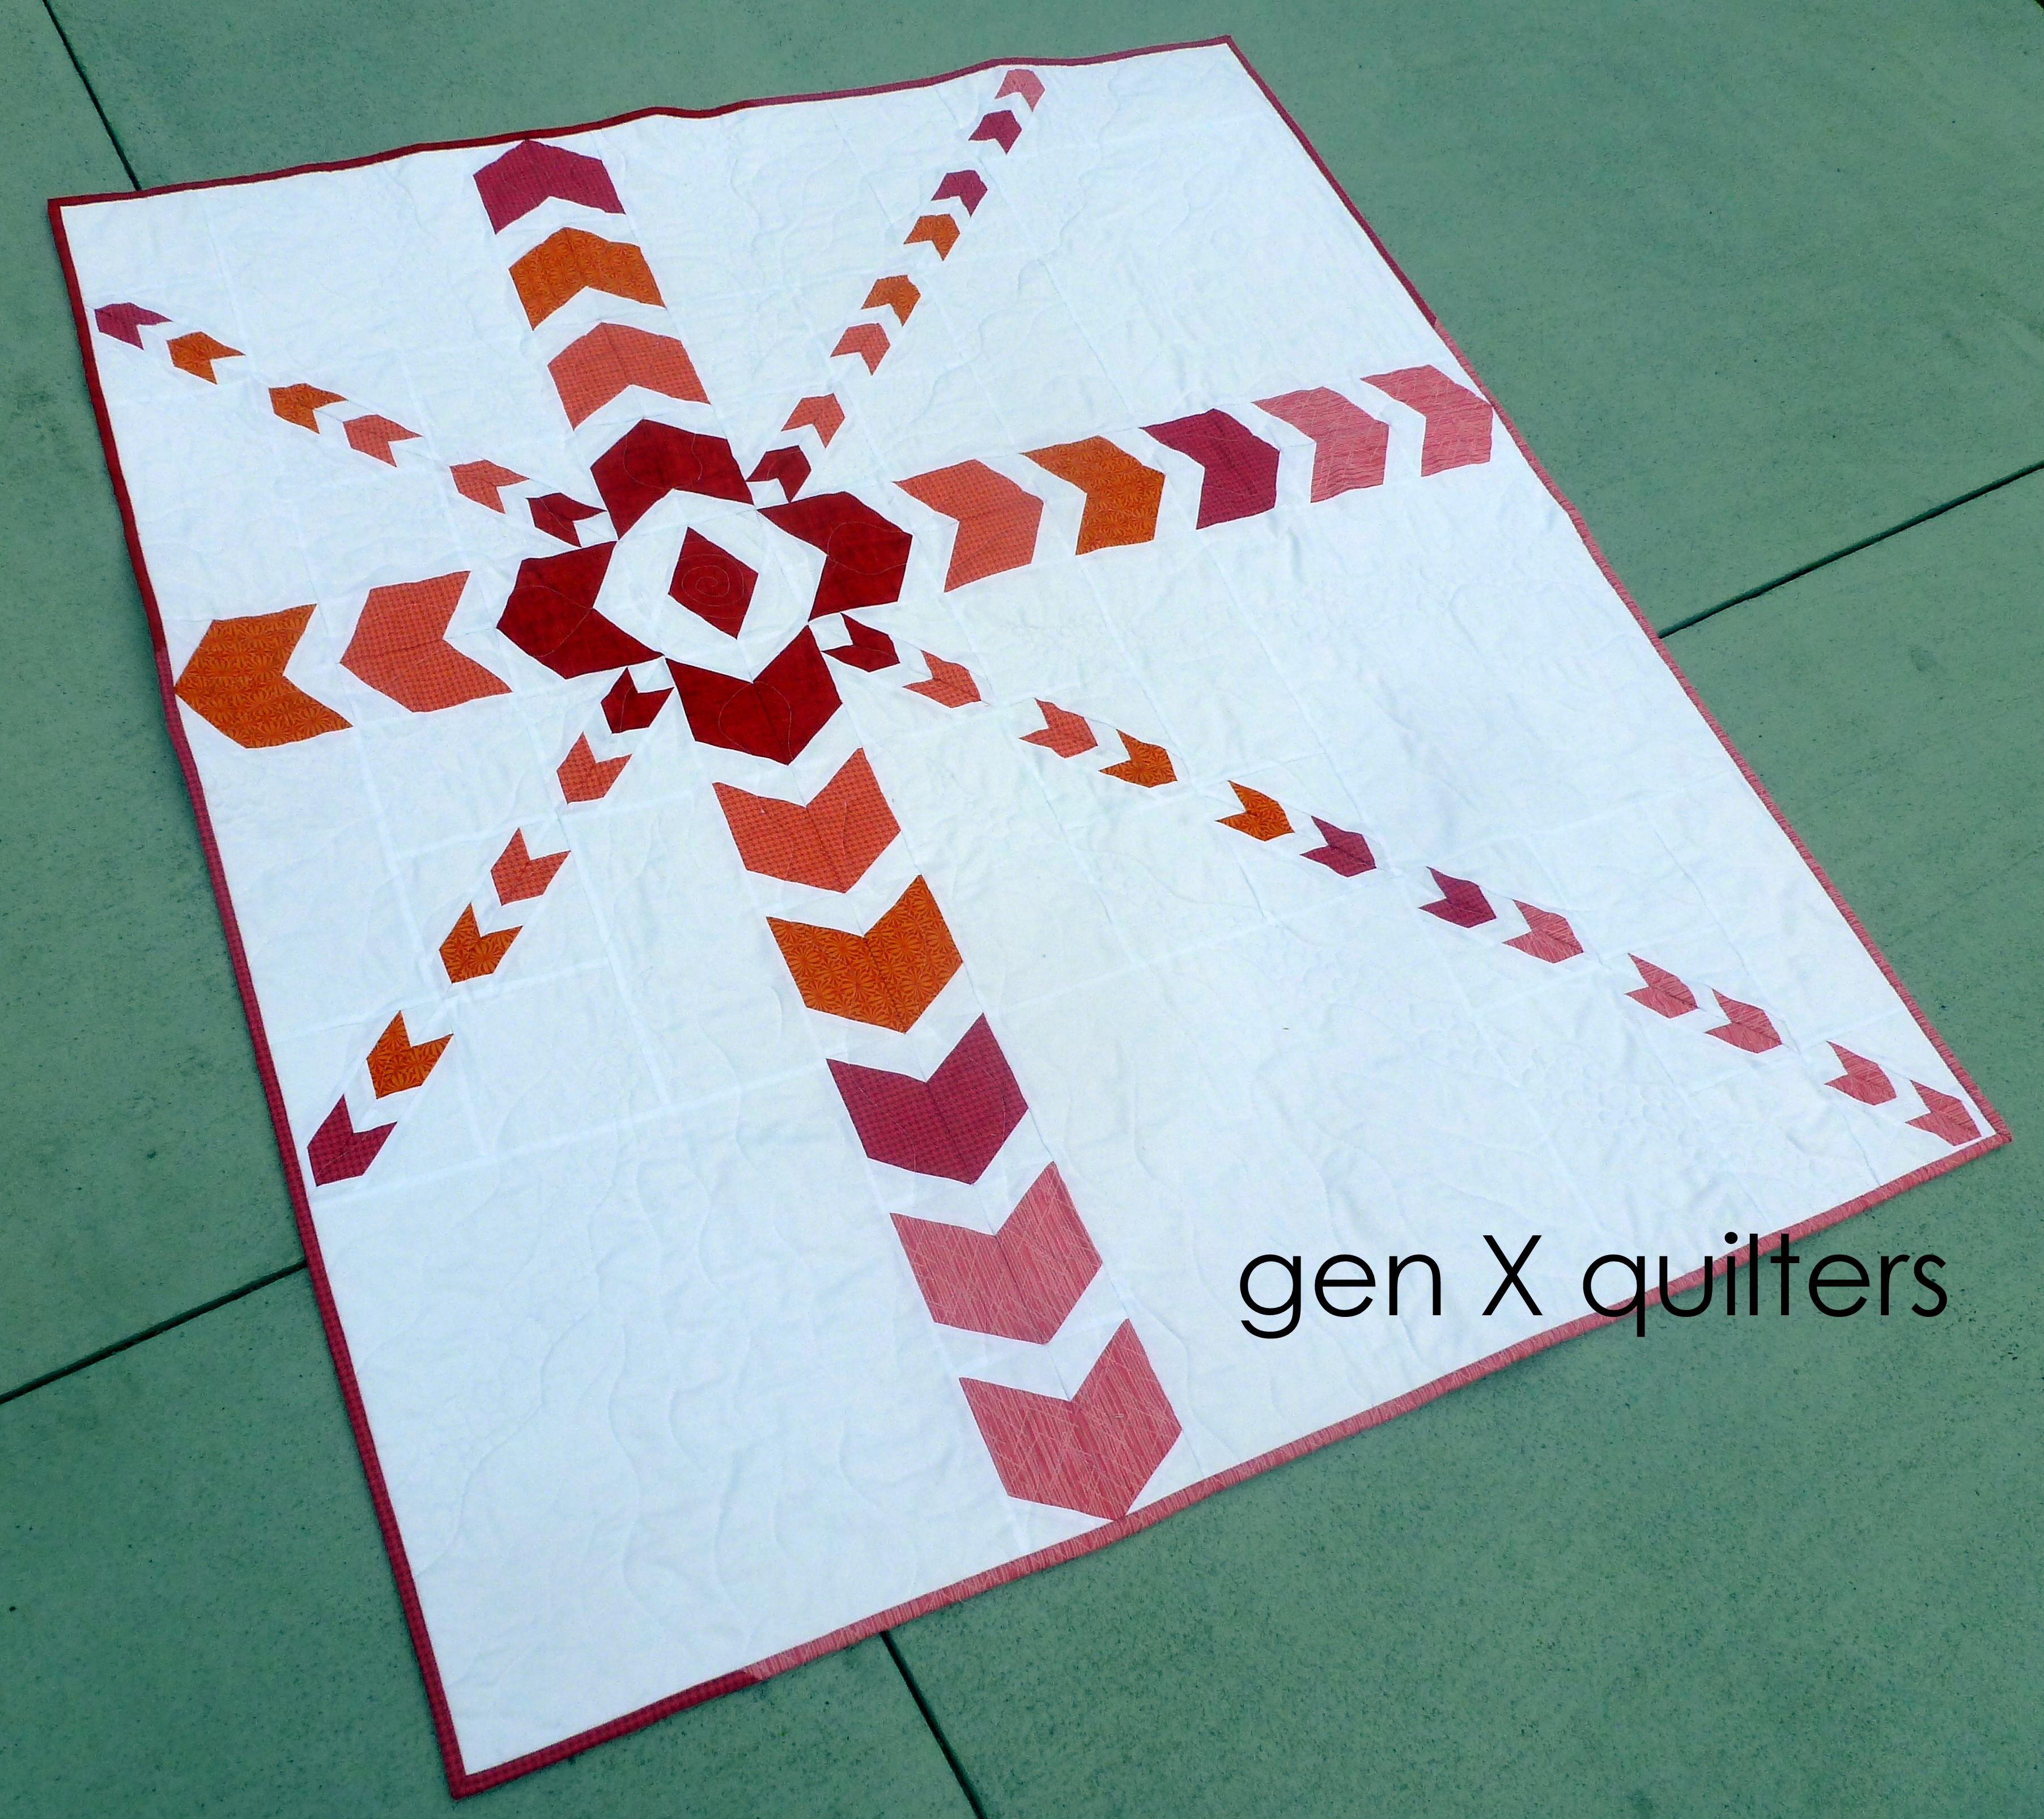
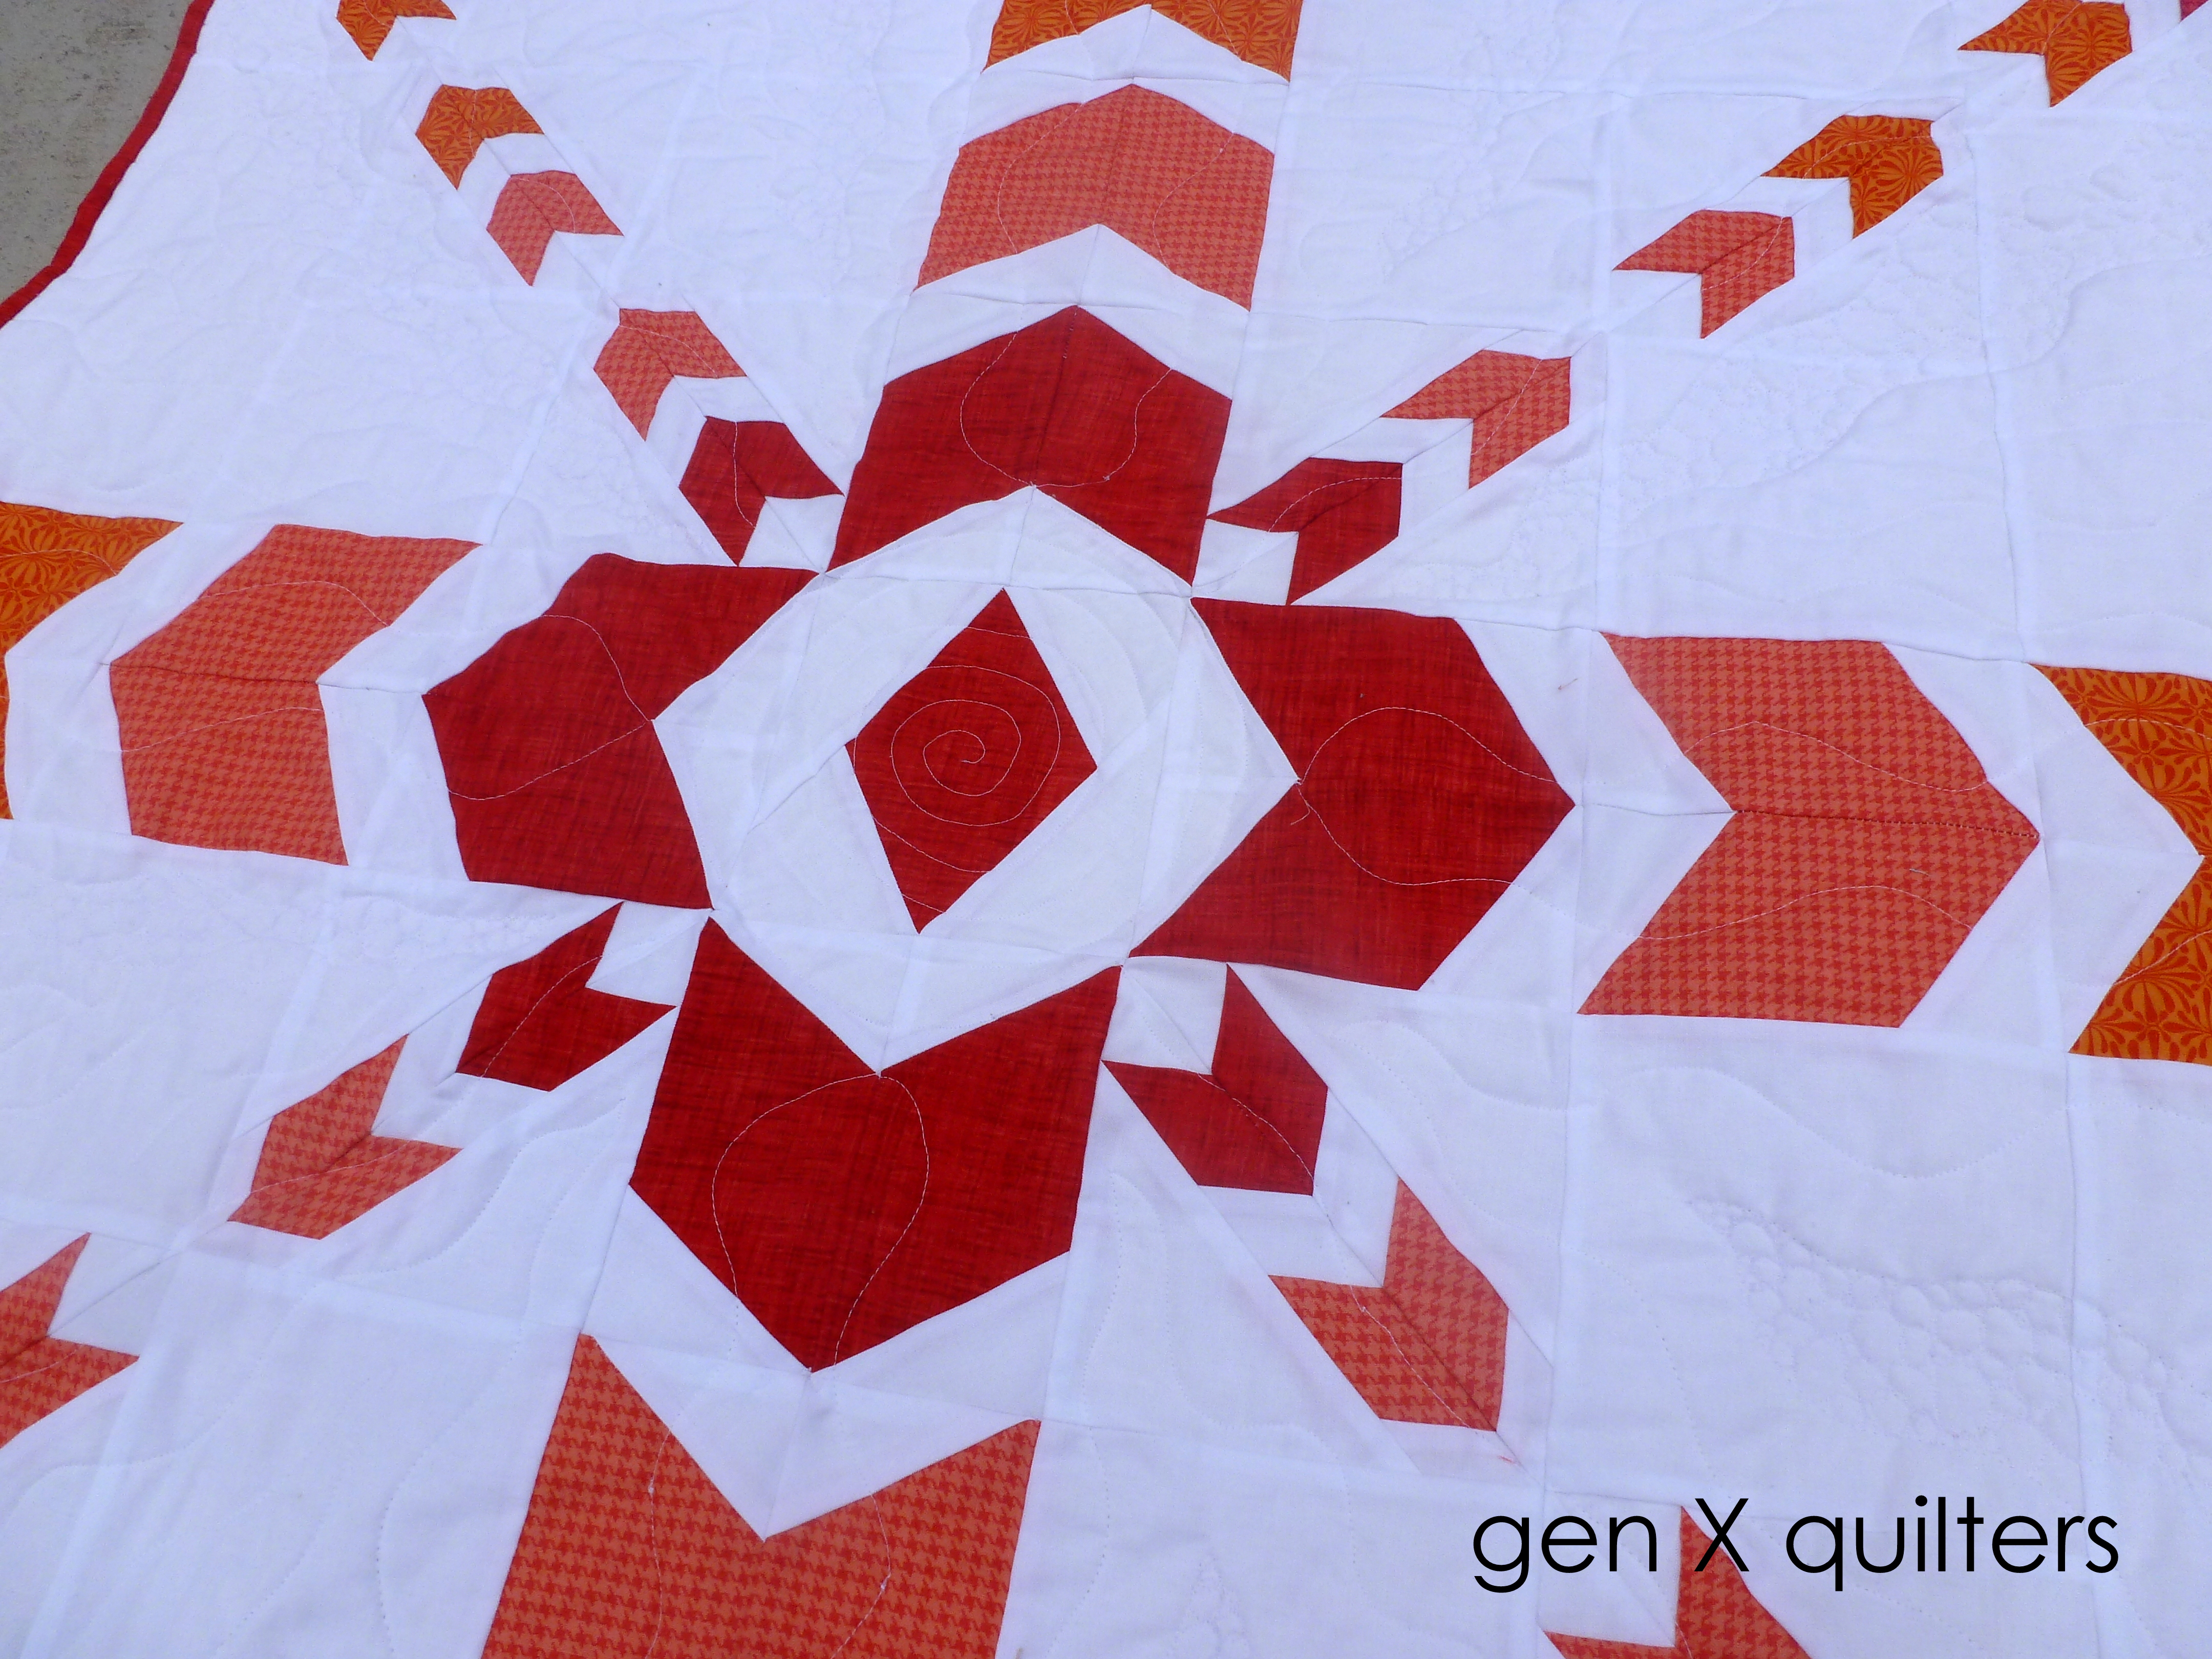
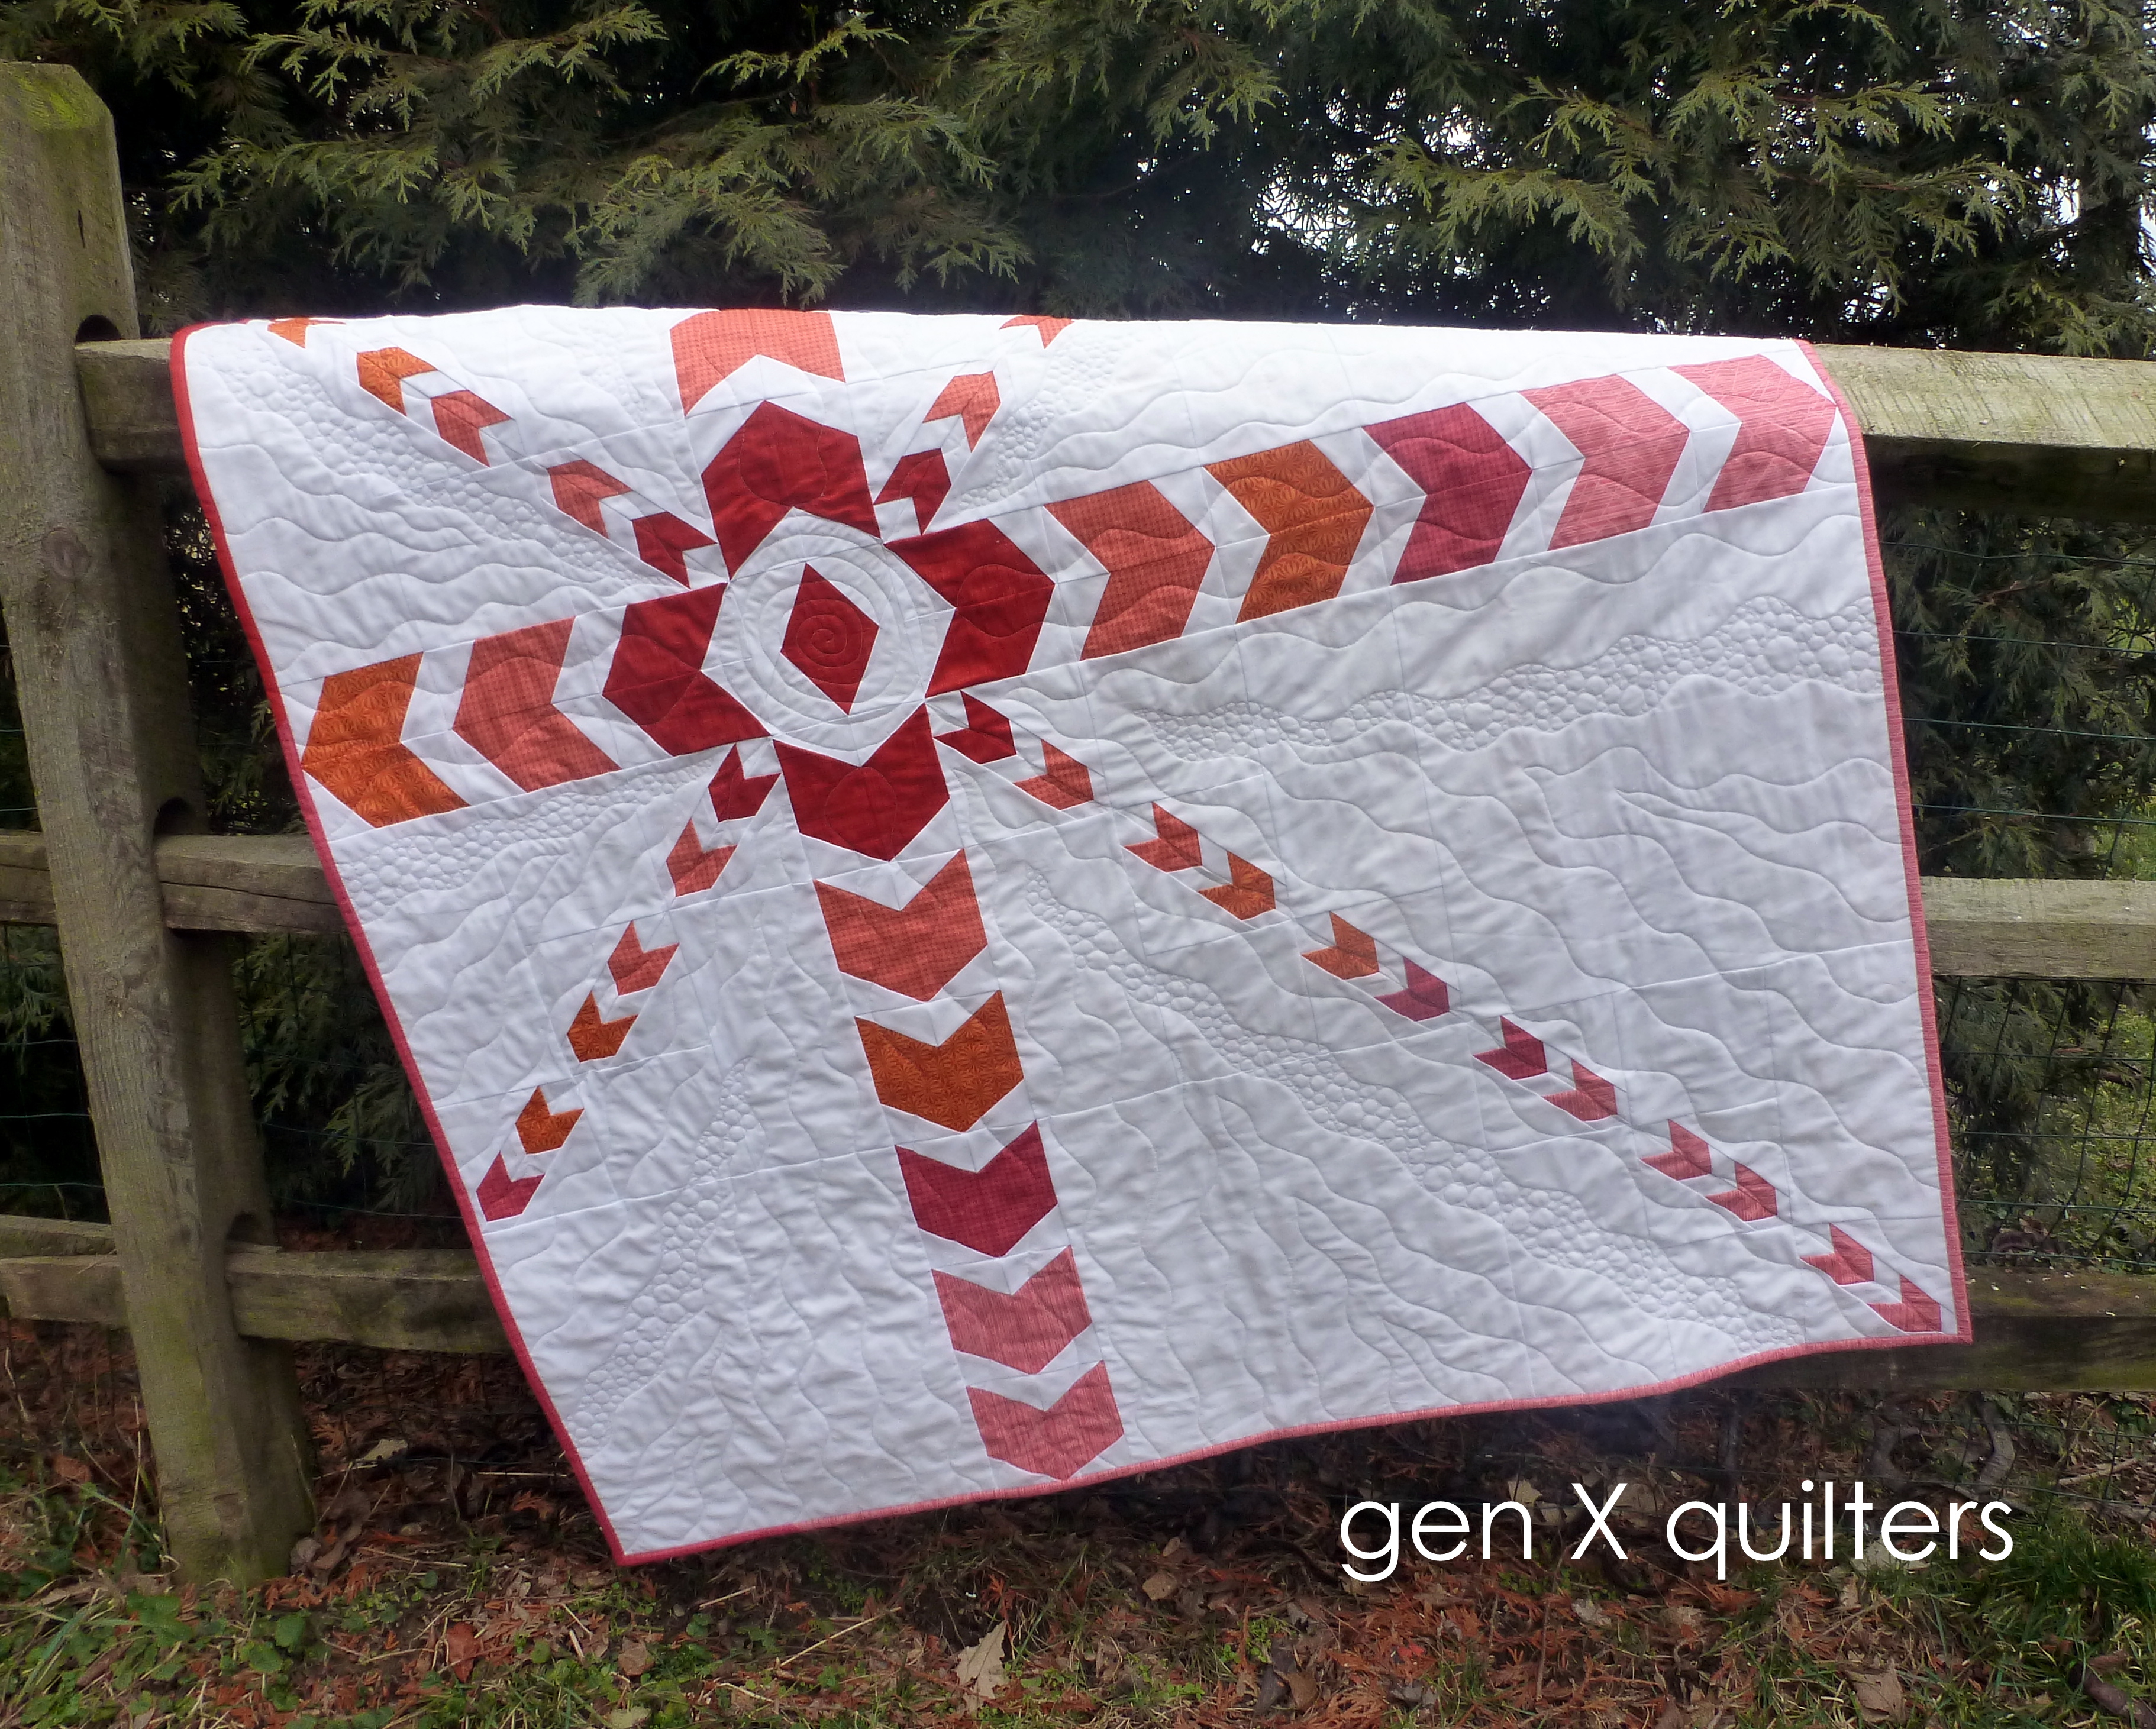
Meet ripple... A new finish.  This quilt is one of my favorites (but aren't they all?) - and has a stunning visual impact.  Ripple is a very BASIC paper pieced pattern.  Have you ever tried paper piecing?  This quilt would be a great way to start.  It uses only 5 fat quarters plus a background fabric.  It is  in the June-July 2013 issue at

Generation Q magazine

.

ripple close up

Although I used pinks, oranges and reds, you can still feel the ripple effect of a stone dropped in the water.  I guess water is on my mind lately, or maybe it just inspires my quilt patterns with this quilt, ripple and

Lagoon

lately... :)

ripple quilting

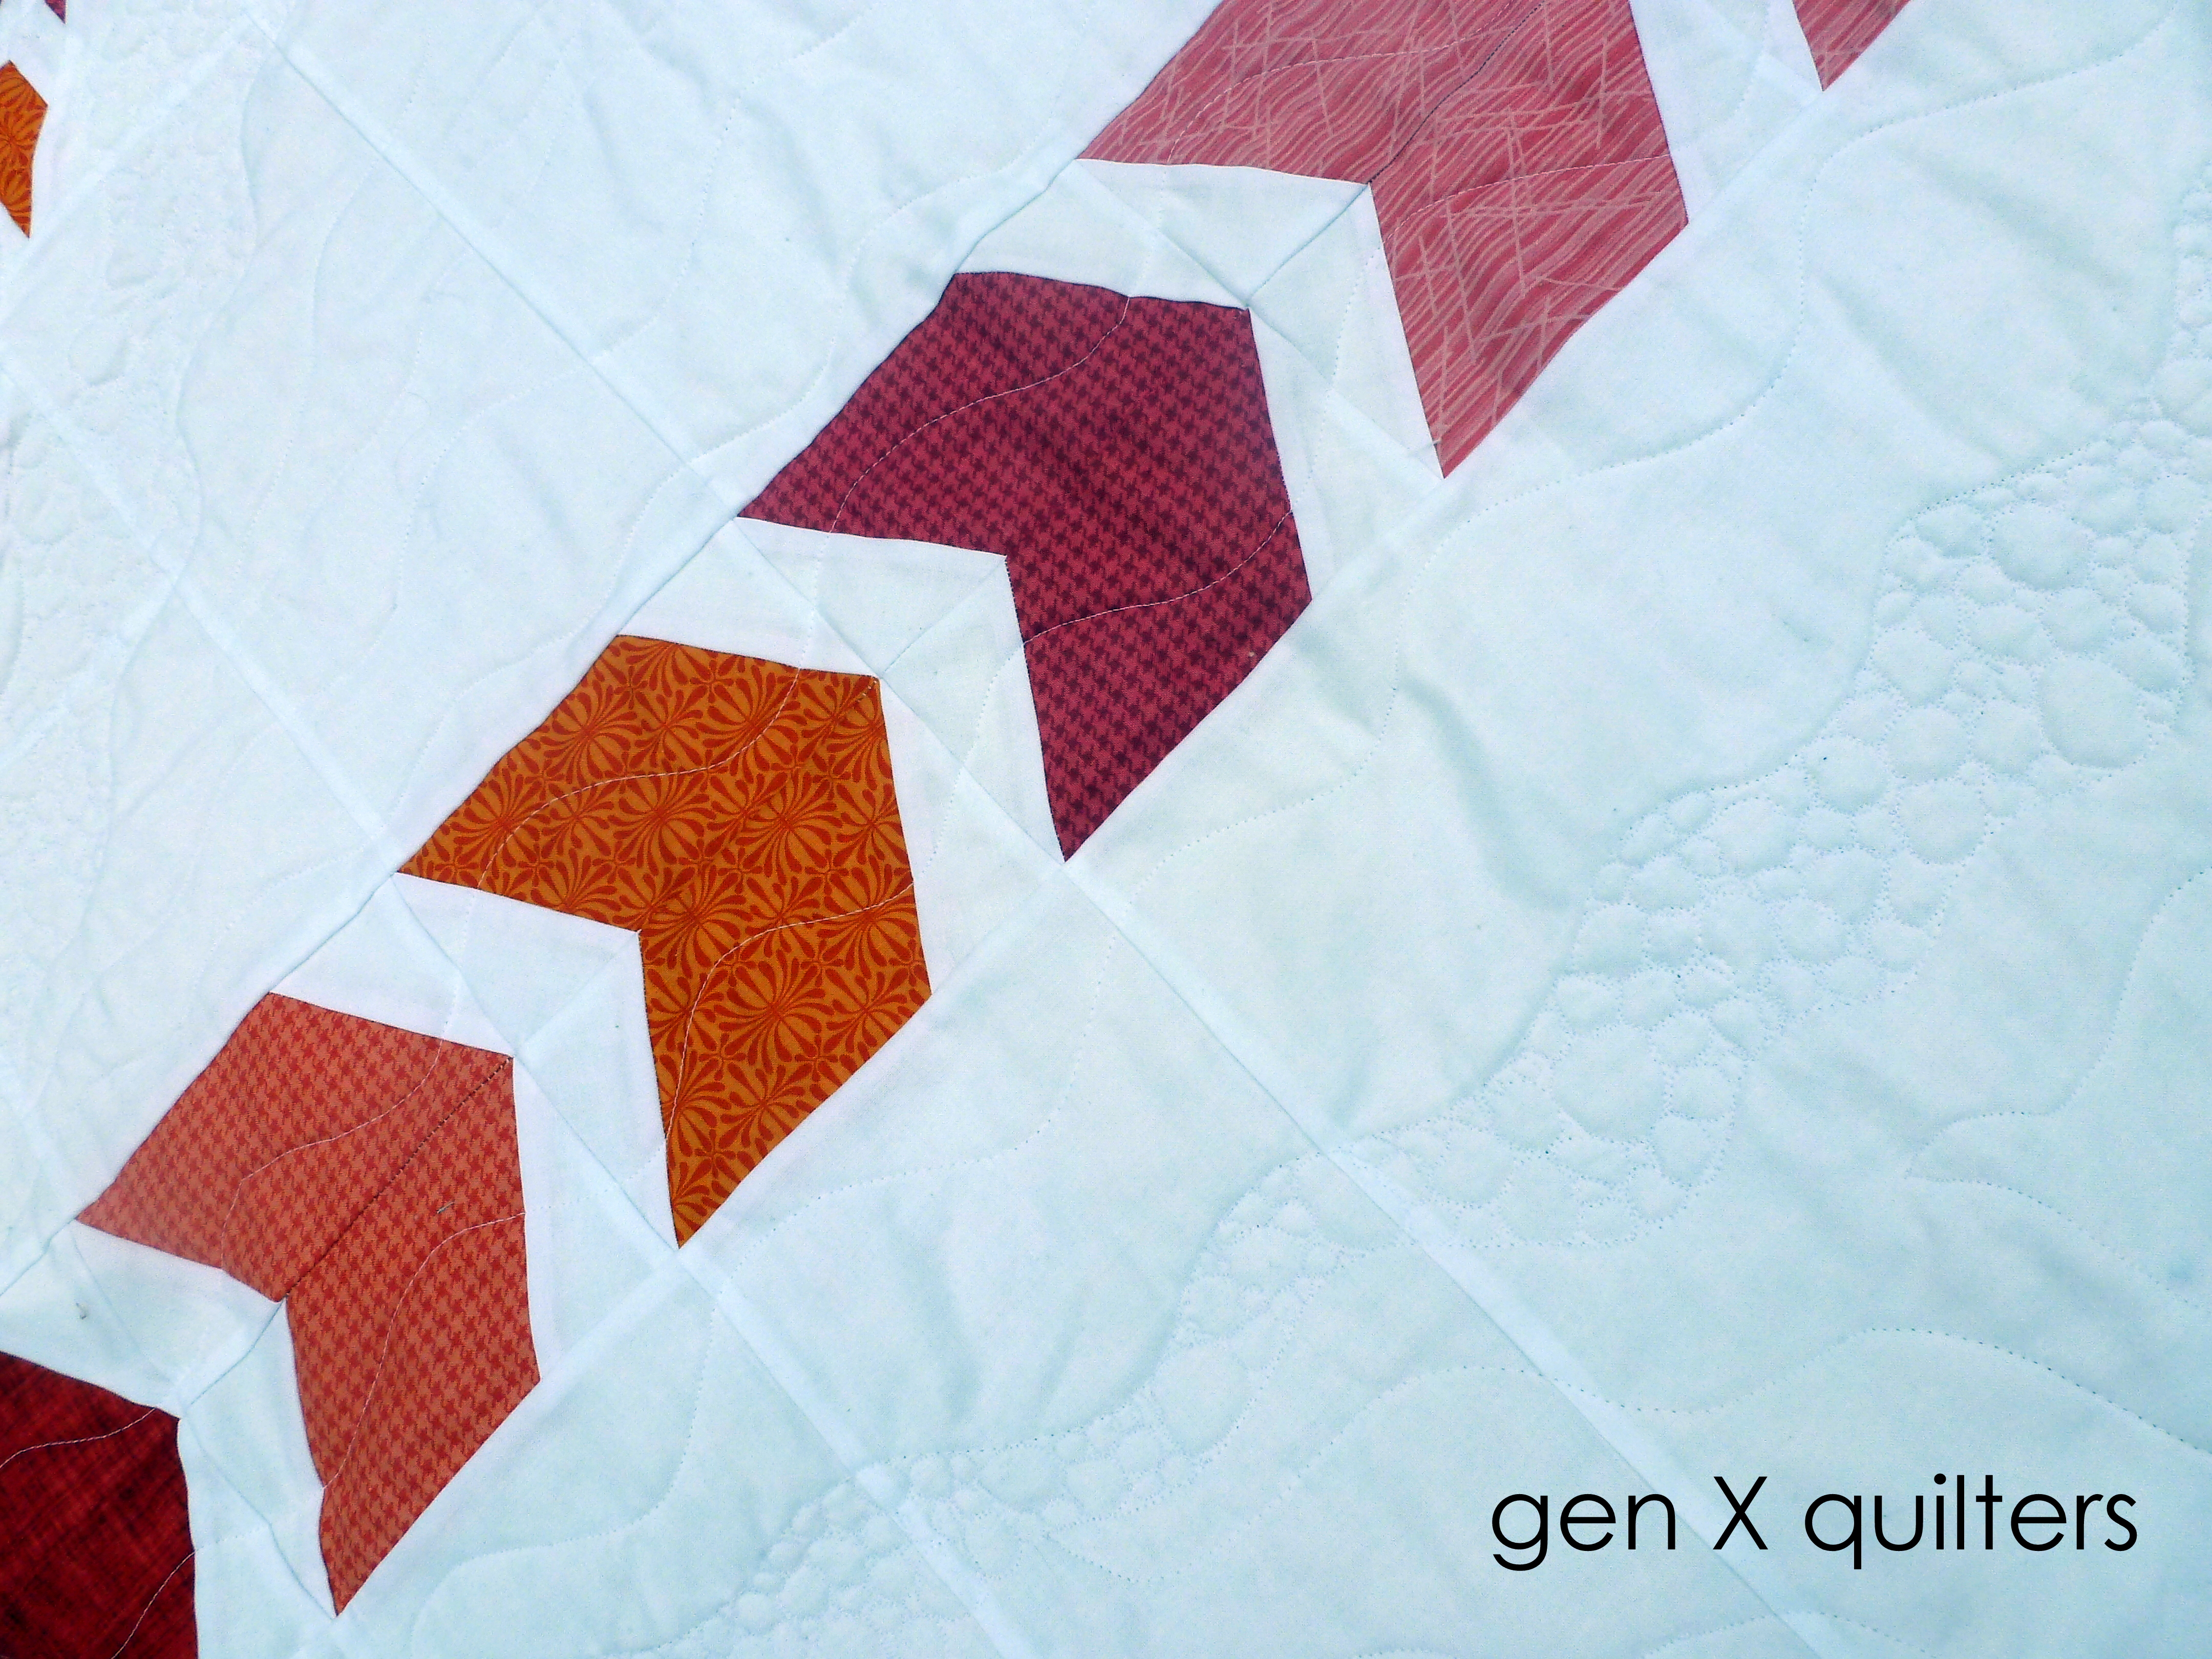
I found it hard to photograph the quilting I did on the Kona White.  But if you look closely, you can see I did wavy lines radiating out from the center of the ripple.  In between some of the wavy lines, I quilted pebbles or bubbles to add to that water ripple effect.  Or maybe with the reds, it should be hot lava...

ripple quilting take 2

One of the other things I love about this quilt is that I made scrappy binding.  But not just any scrappy binding, instead it has an ombre effect starting at the top left corner.  It starts red and then radiates around the quilt ending with a cool pink in the lower right corner.  Cool huh?  I'd never tried that before, but I really love how to came out.

mag pic

Quilt Stats.

Name:

 ripple

Size:

 51" x 56"

Design:

 easy paper-pieced block design and layout by me

Fabric:

  fat quarters from my stash, some Sketch, some Houndstooth, Terrain Orange print on Kona White.

Piecing:

  Me

Quilting:

 Me

Lagoon Appearing on Quilting Arts TV on PBS

purple pinwheel Lagoon quilt
I have been waiting forever to show this quilt to you.  I am calling it Lagoon for it's watery palette of color and the large pinwheels that make me think of gently flowing water. Lagoon edited full shot
At the beginning of this 2012, Penny McMorris (co-founder and vice-president of Electric Quilt) contacted me about guesting along with her on a segment for Quilting Arts TV with host Pokey Bolton.  She proposed a design challenge that we present on the segment of the show.  [For behind the scenes shots and an account of my first TV appearance, go here.]
pan Lagoon quilt

The challenge: both of us started with the same basic block.  Then independently, we used EQ7 to create a new block design based upon the original. Also, we created several quilt top designs.  The segment demonstrates some of the interesting ways that quilts can be designed on the computer - before you cut up your fabric.  Both Penny and I chose one quilt design to make into a sample.  Lagoon is the product of this fun experiment!
corner Lagoon quilt
Look closely!  Although there was no reason, I was particularly nervous about making everything perfect on this quilt.  Hey, if the camera adds 10 pounds, who knows how it makes a quilt look? You have never seen such a fine example of squareness and precise binding from this woman.   
Lagoon close up quilting edited

Check out Quilting Arts TV Episode 1107.  Below I have the little teaser video clip that introduces this episode.


Quilt Stats.
Name: Lagoon
Size: 65" x 65"
Design: pixelated block design and layout by me
Fabric:  Robert Kaufman Konas in greens, blues, and purples on Kona White.
Piecing:  Me
Quilting: Beany of Quilty Pleasures

(Thank you so much to Robert Kaufman for providing the Kona Cottons for this project.  And also a huge Thank You to Penny McMorris for asking me to join her - it was such a fun experience!)