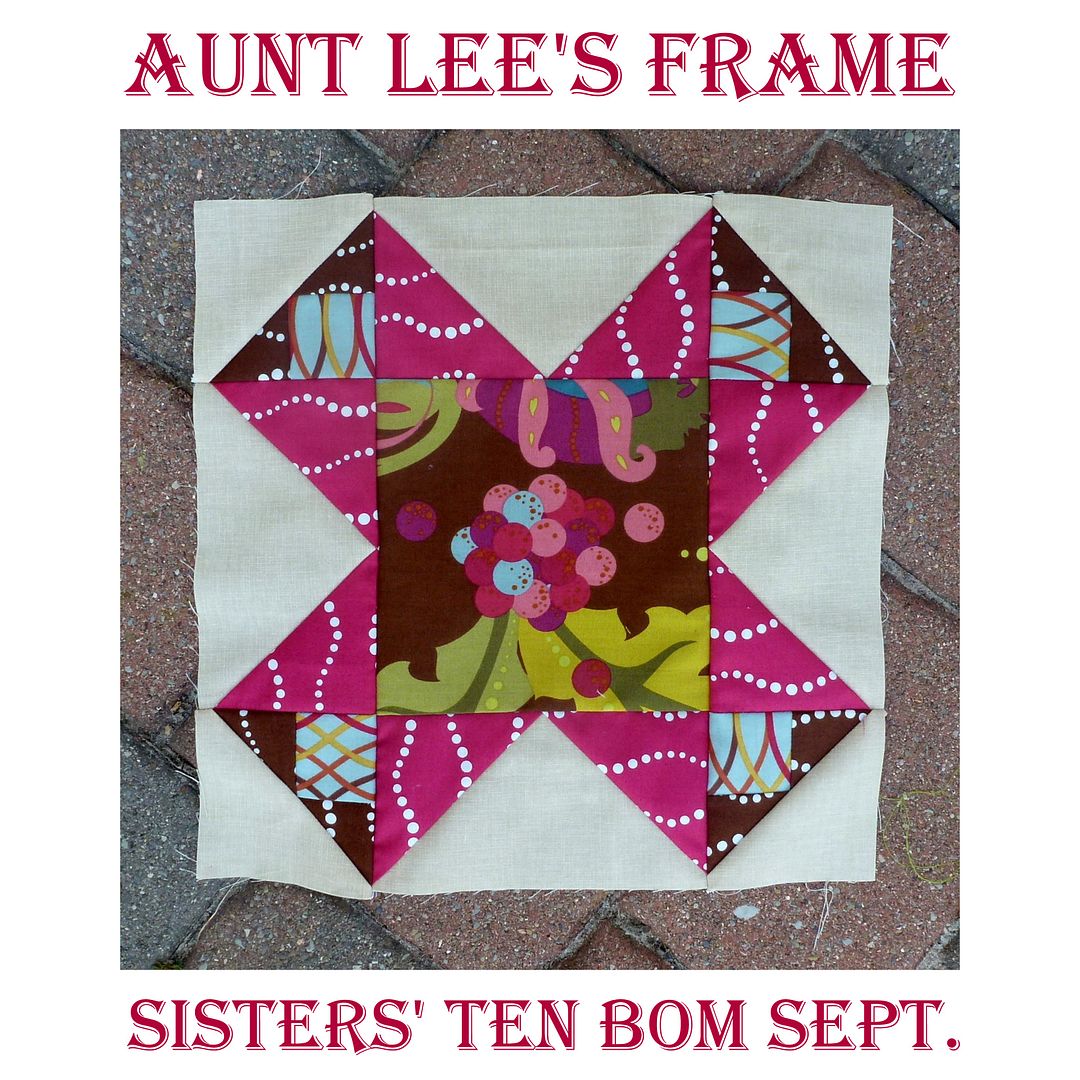
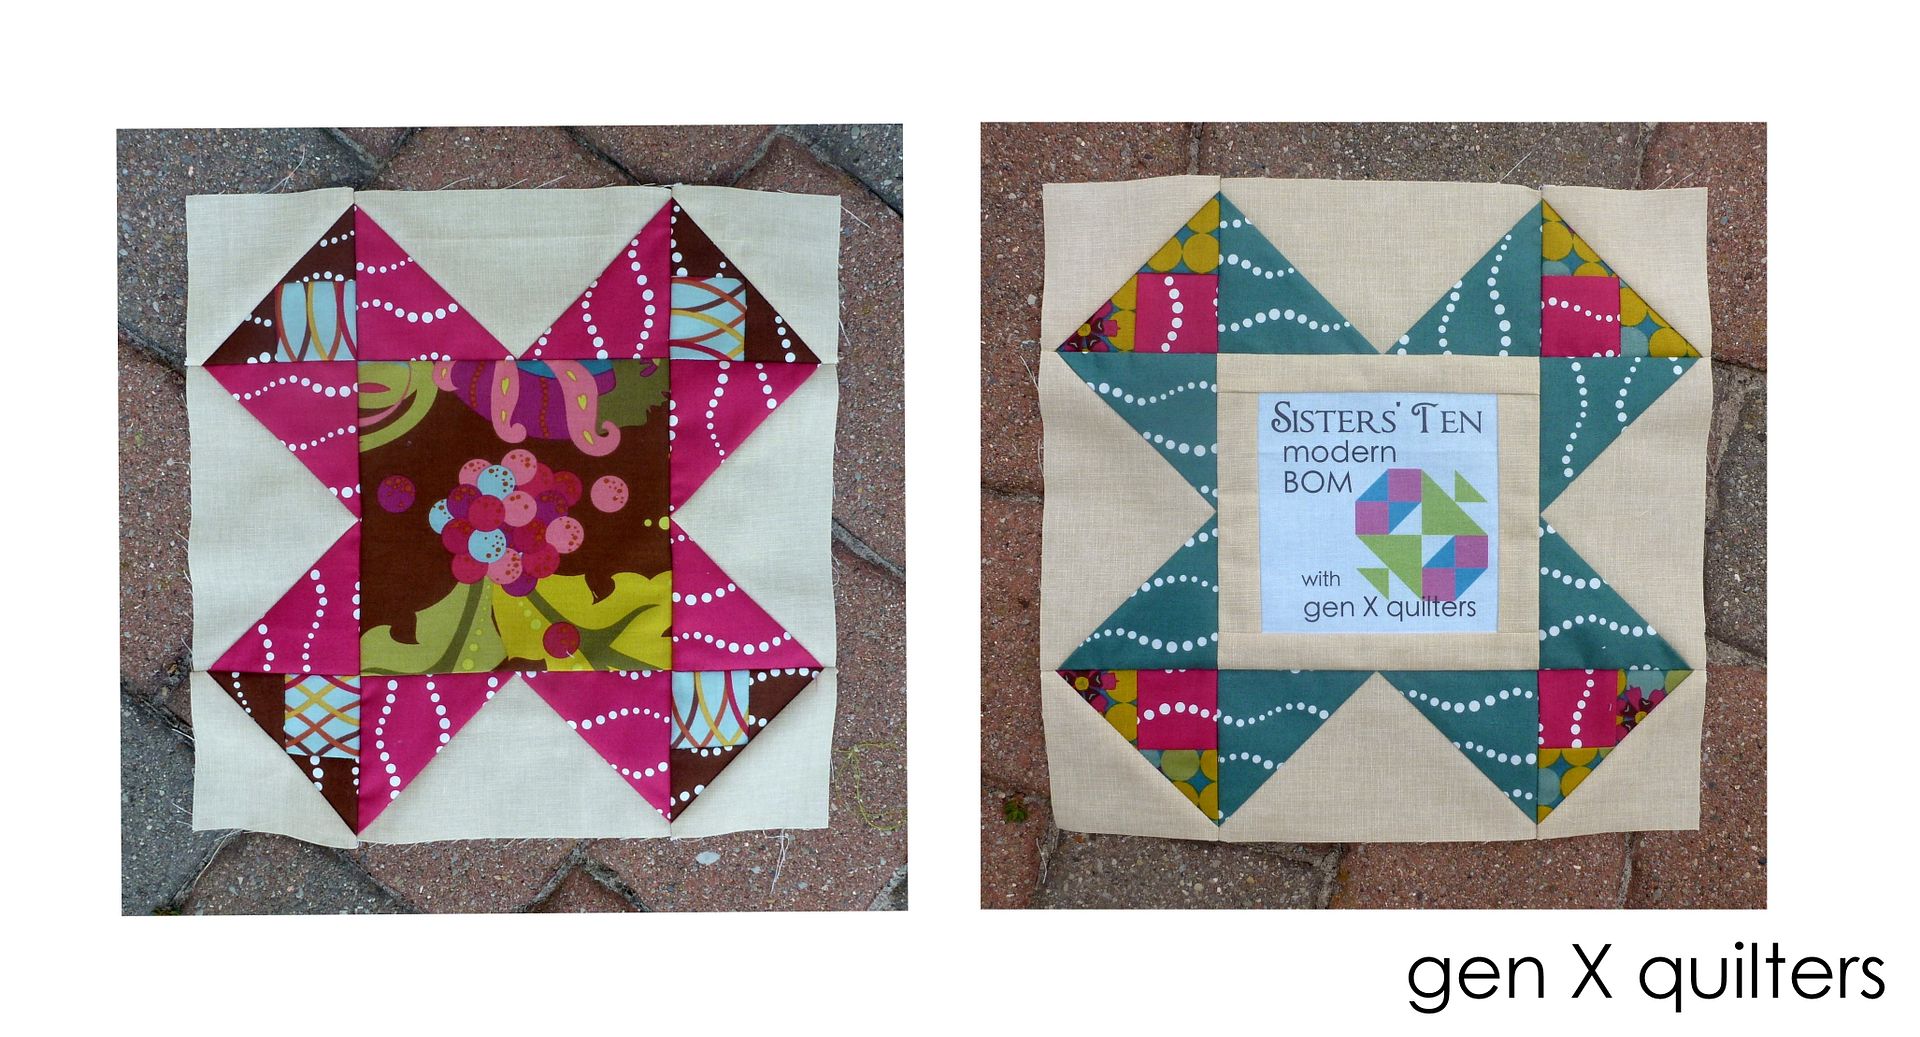
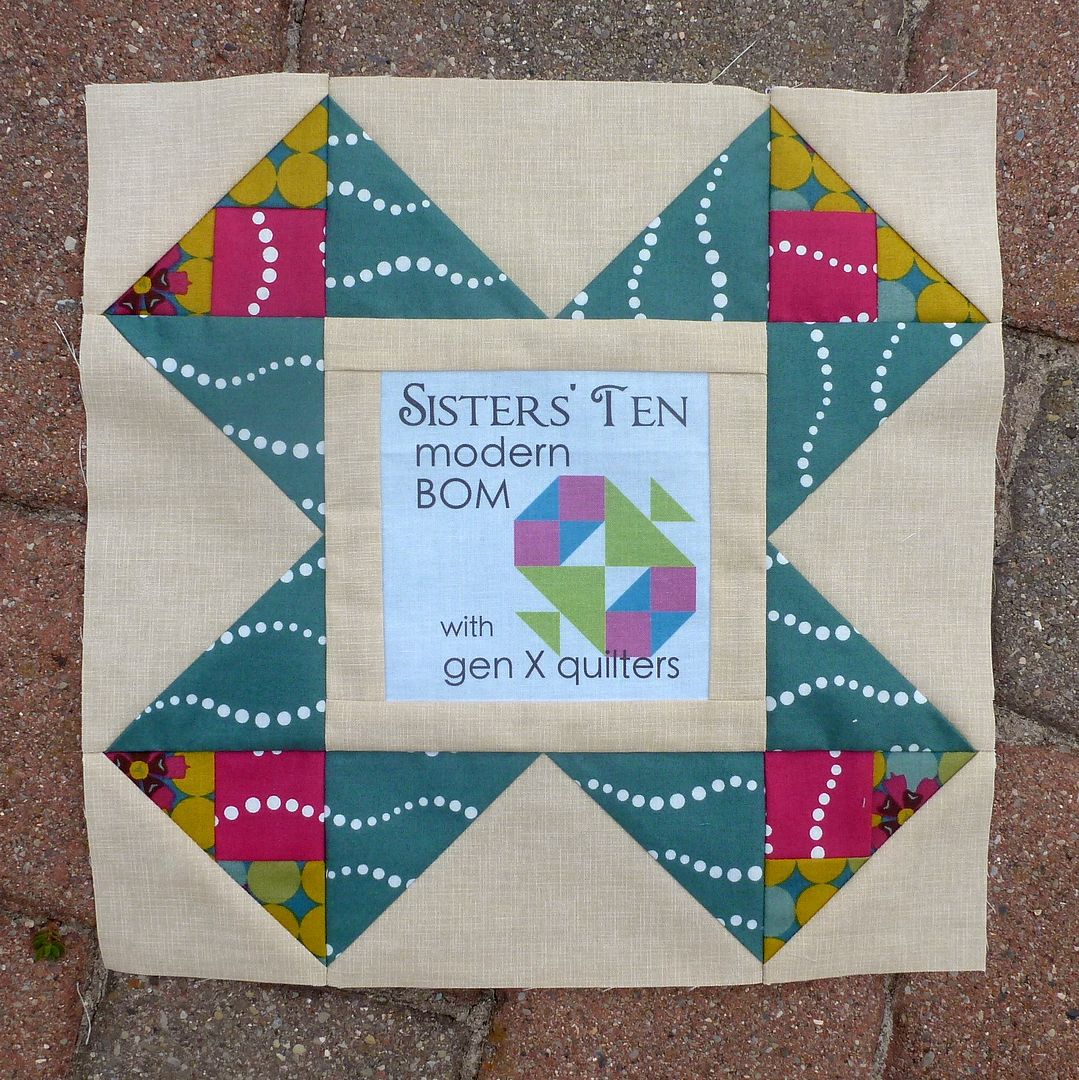
The final block! October's block for the
Sisters' Ten Modern Block of the Month Club is a beautiful frame block. Frame blocks are often used to feature a fussy cut motif and/or to dedicate a quilt. Aunt Lee's Frame uses Flying Geese and some triangle piecework like we did in
August to frame the center square.
Cutting Instructions.
For 12" blocks.
- Cut (1) 7 1/4" x 7 1/4" square of Fabric A (background.
- Cut (2) 3 7/8" x 3 7/8" squares of Fabric A (background).
- Cut (4) 3 7/8" x 3 7/8" squares of Fabric B.
- Cut (4) 2 3/8" x 2 3/8" square of Fabric C.
- Cut (4) 2" x 2" square of Fabric D.
- Cut (1) 6 1/2" x 6 1/2" of Fabric E. (See addendum below if using Sisters' Ten Label in the center of a block.)
For 9" blocks.
- Cut (1) 5 3/4" x 5 3/4" square of Fabric A (background.
- Cut (2) 3 1/8" x 3 1/8" squares of Fabric A (background).
- Cut (4) 3 1/8" x 3 1/8" squares of Fabric B.
- Cut (4) 2" x 2" square of Fabric C.
- Cut (4) 1 5/8" x 1 5/8" square of Fabric D.
- Cut (1) 5" x 5" of Fabric E. (See addendum below if using Sisters' Ten Label in the center of a block.)
Piecing Instructions.
*Use a scant 1/4" on all seam allowances. See the Scant Rant series for details.
1.
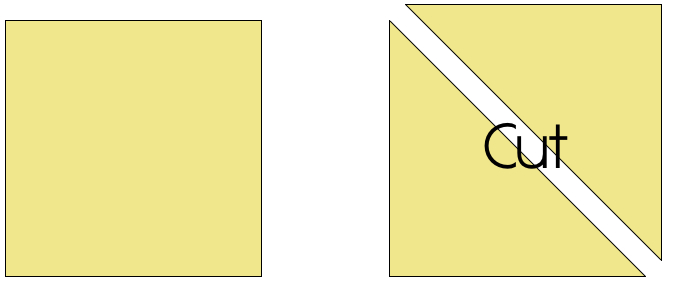
Make No-Waste Flying Geese units using Fabric A and Fabric B. Use the (1) large Fabric A square and (4) Fabric B squares to make (4) Flying Geese units. Draw a
diagonal line on the wrong side of the Fabric B squares. Layer two Fabric B squares atop the Fabric A
square with right sides together. The
Fabric B squares will overlap slightly. Sew pairs together, stitching
1/4" on each side of the drawn line.
Cut the pair apart along the drawn line. Press the units open.
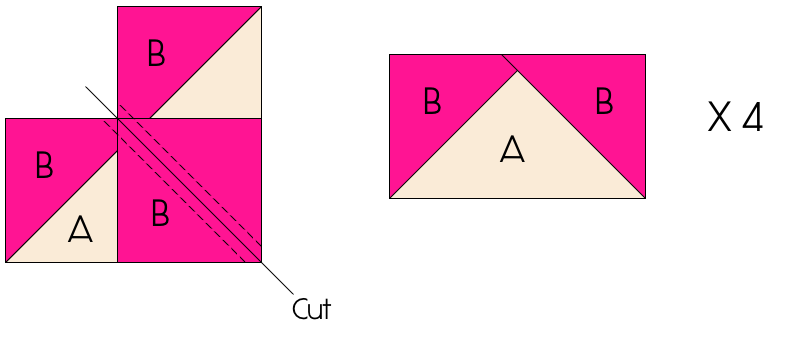
2. Place another Fabric B square atop the unit
from the previous step as shown on the left side of the diagram below. Sew pairs together, stitching 1/4" on
each side of the drawn line. Cut the
pair apart along the drawn line. Repeat with the other unit from step 1. Press units open to make (4) Flying Geese units.
Flying Geese are: 3 1/2" x 6 1/2" unfinished (12" blocks).
2 3/4" x 5" unfinished (9" blocks).
3. Cut (2) Fabric A squares and (4) Fabric C squares into triangles. Cut the remaining (2) Fabric A squares into triangles by cutting diagonally across the square. Repeat for the (4) Fabric C squares.
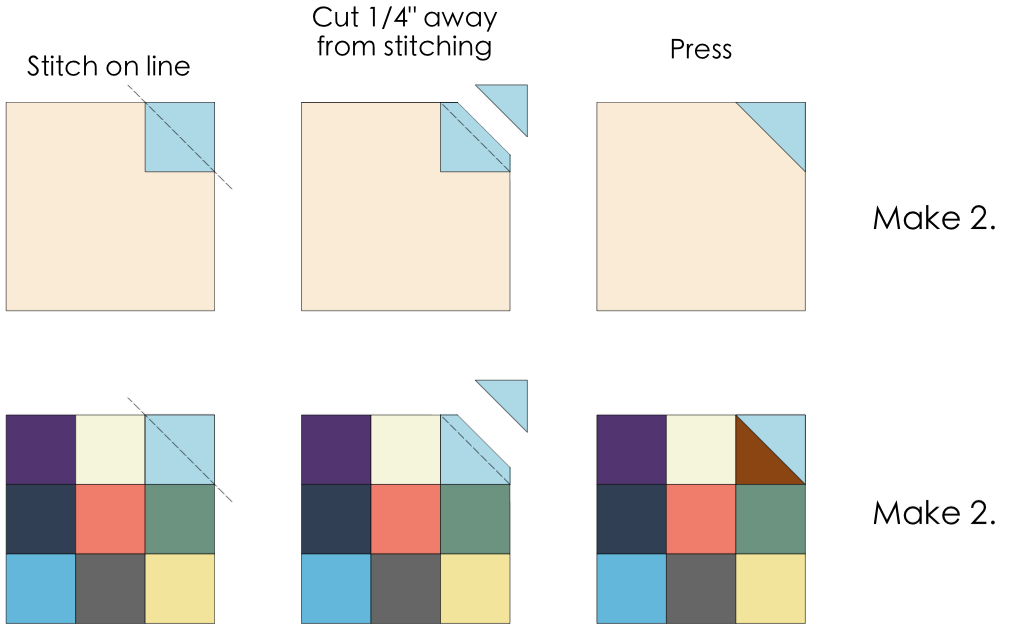
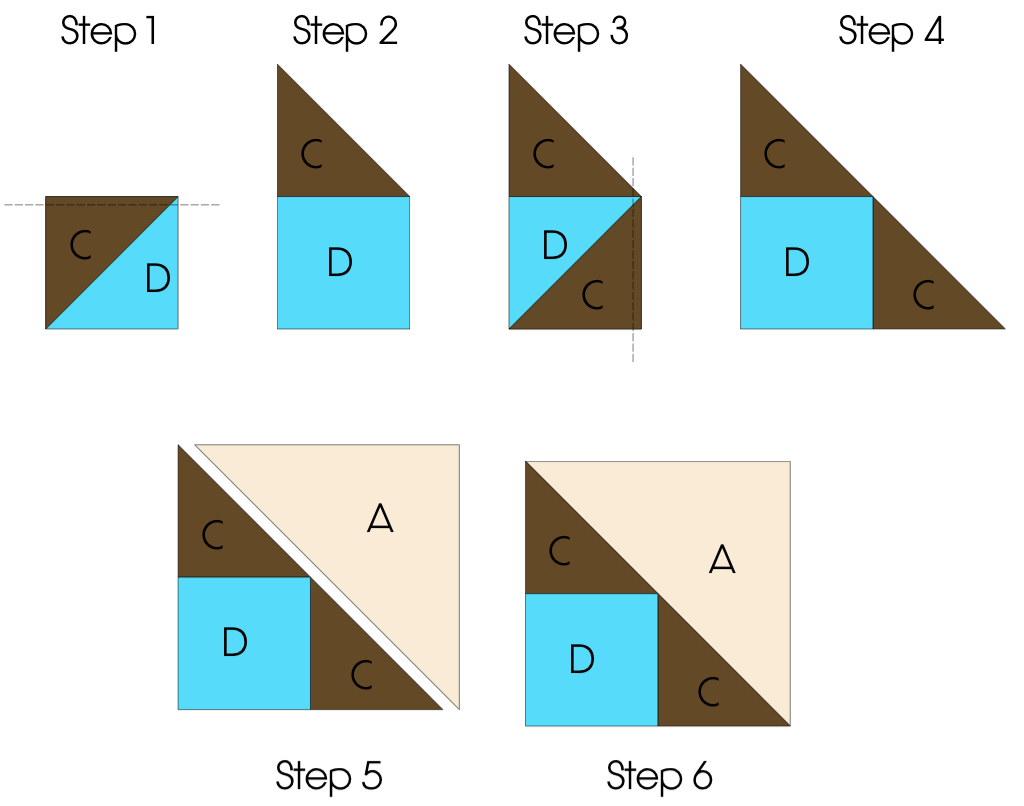
4. Assemble Corner Units. Like the diagram in Step 1 below, place one Fabric C triangle on top of one Fabric D square. Stitch across the top of the block as shown. Press the Fabric C triangle up as in Step 2. Place another Fabric C triangle along the right side of the unit from Step 2, as shown in Step 3. Stitch across the right side of the unit as shown. Press the Fabric C triangle to the right as shown in Step 4.
As shown in Step 5, to complete the quadrant, a Fabric A triangle will be sewn to the unit from Step 4. Place the Fabric A triangle directly on top of the Step 4 unit (not shown) and sew along the hypotenuse of the pair. Press the Fabric A triangle open as shown in Step 6. Repeat for the remaining 3 Corner Units.
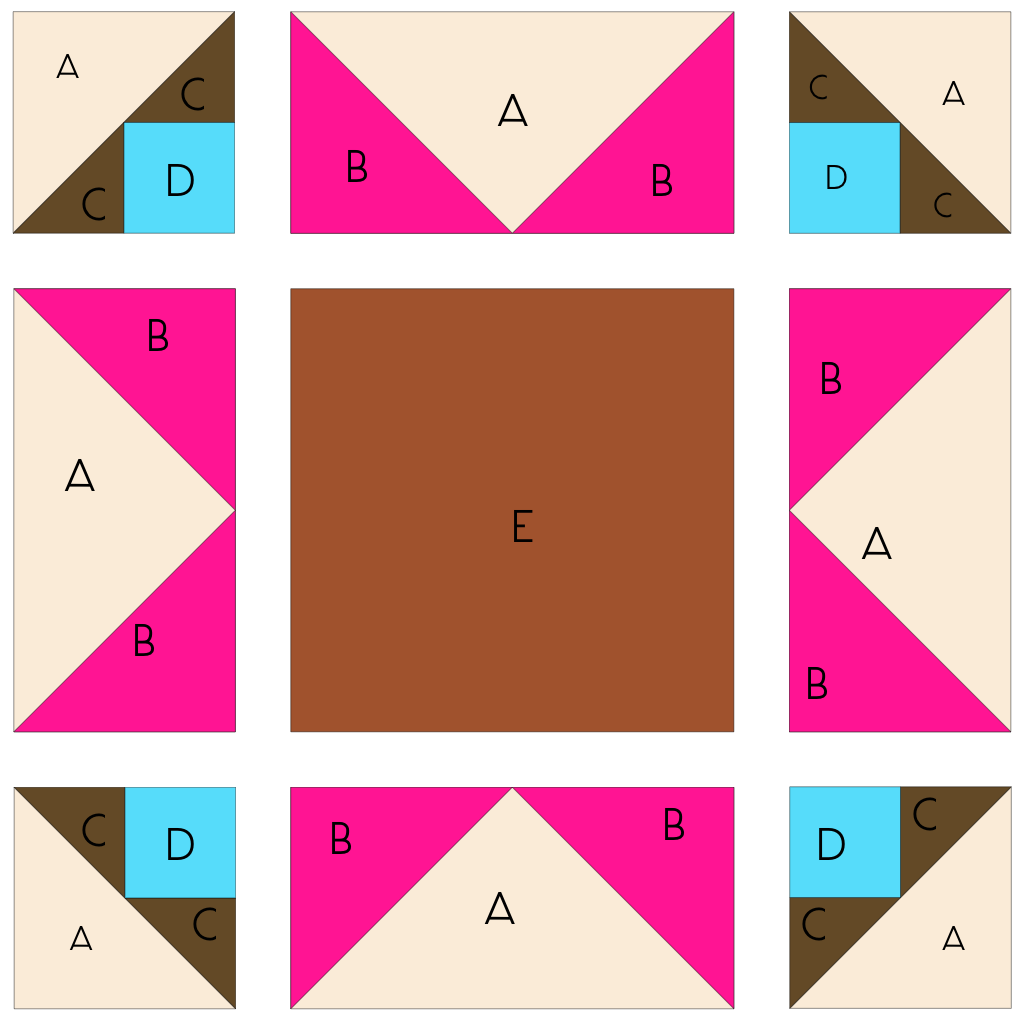
5. Layout the Flying Geese Units, the Corner Units and the Fabric E square as shown below.
6.
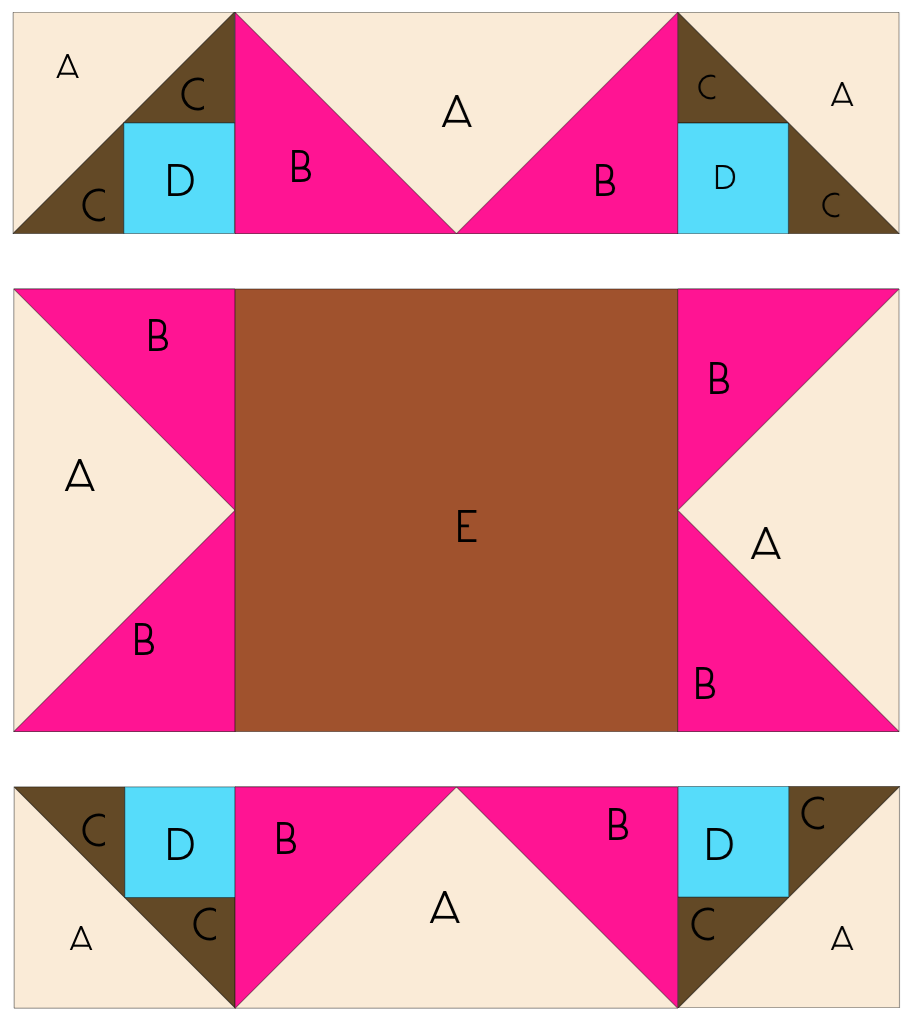
Sew each of the three rows together, alternating the direction the seams are pressed.
7. Sew the three rows together to complete the block.
8. Make (2) blocks. They may be identical blocks or made from differing fabrics for a scrappier look.
Fabric is Alison Glass for Andover, Lucky Penny with background Quilter's Linen in Straw by Robert Kaufman.
---------------------------------------------------------------------------------------------------------
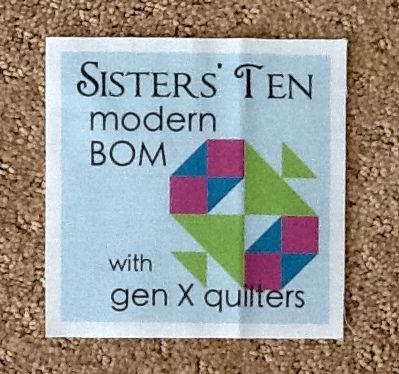
Custom Sisters' Ten Label Instructions
1. Trim the label down to a 5" x 5" block. The label itself is 4 1/2" x 4 1/2" finished. So if you add 1/4" to each side of the label, it will be 5" x 5" unfinished.
For 9" blocks: You lucky dog! This is the size you need for your center square.
For 12" blocks: We will add a border around the label to make the needed 6 1/2" x 6 1/2" unfinished size.
2. Cut (2) 1 1/4" x 5" rectangles of Fabric A (background).
3. Cut (2) 1 1/4" x 6 1/2" rectangles of Fabric A (background).
4. Sew the 1 1/4" x 5" rectangles to the left and right sides of the label.
5. Sew the 1 1/4" x 6 1/2" rectangles to the top and bottom of the unit from the previous step.
6. Now go use this framed label as your Fabric E square!
----------------------------------------------------------------------------------------------------------


