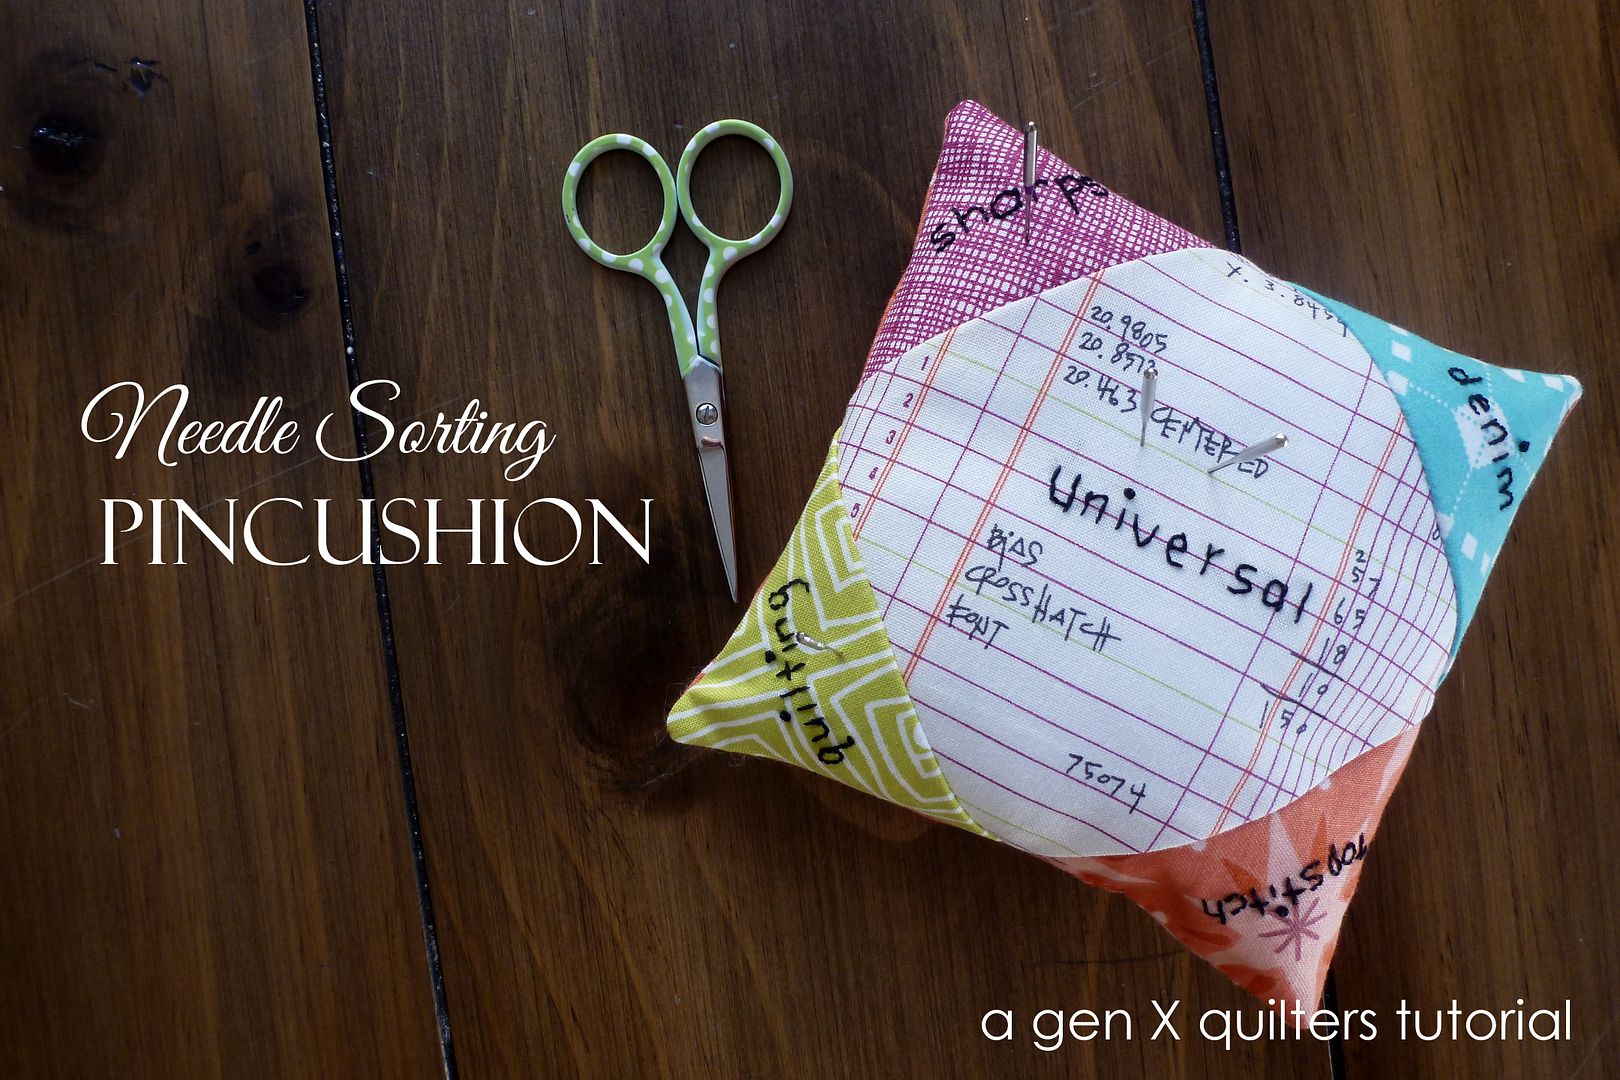
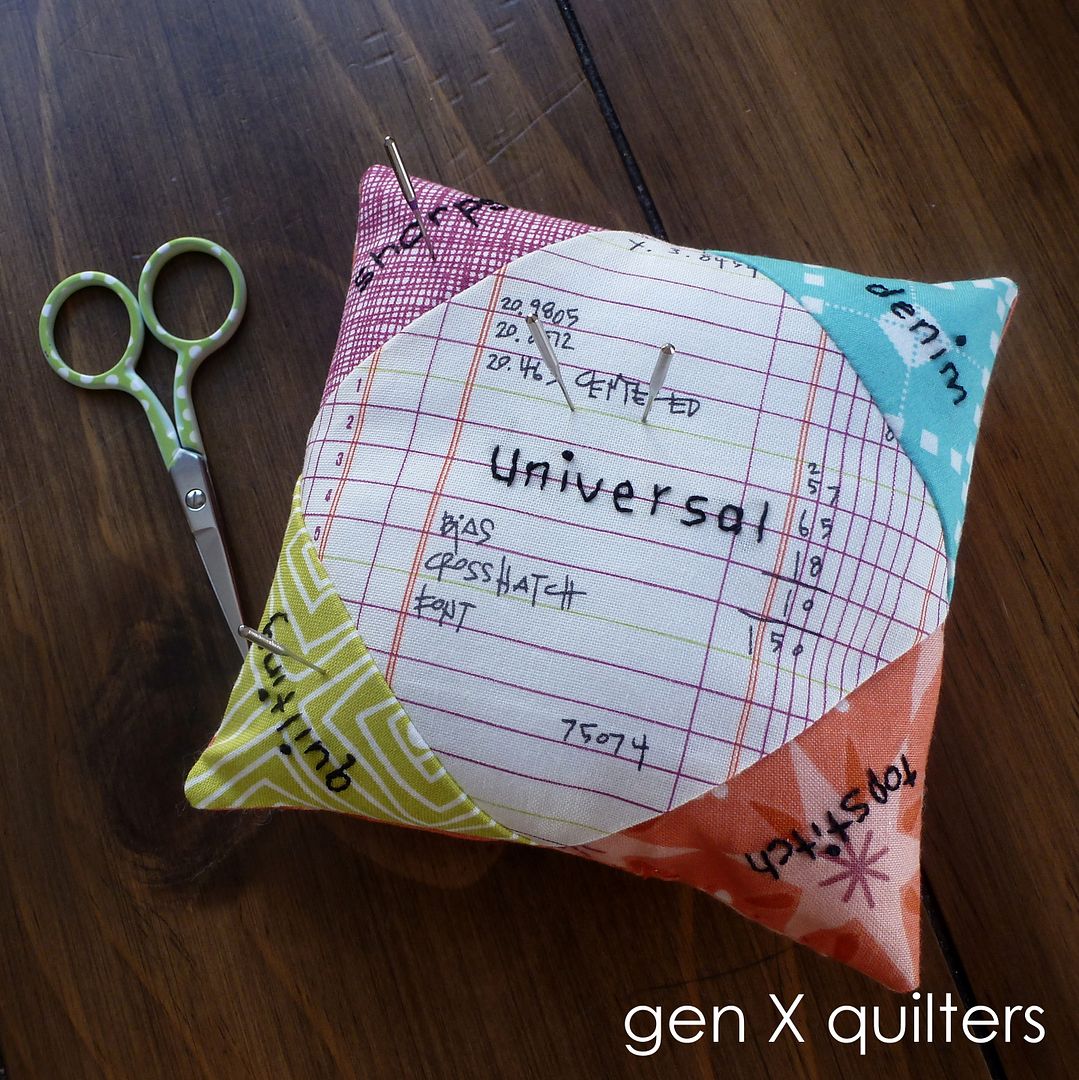
During my research on sewing machine needles, I realized that when I did change my needle, I had been putting my slightly used needles back into the little case it came from along with the new needles. I had no way of discerning which needles were truly new and which I had used before. I decided a pretty new pincushion was in order to help me keep the used needles separate from the brand spanking new ones.
The colors I've chosen for the corners on this pincushion correspond with the color markings on my Schmetz needles (i.e. quilting needles are marked with a green dot, sharps marked by a purple dot). I suggest looking to see what colors denote the needle types for the ones you buy to make sorting them easy!
Materials.
- 4 assorted scraps in blue, green, orange and purple. Scraps should be large enough to fit in a small embroidery hoop
- (1) 4" x 4" square white print for the center
- (1) 5 1/2" x 5 1/2" for scrap for back
- black embroidery floss (DMC 310)
- polyester fiberfill
- print out of templates
Instructions.
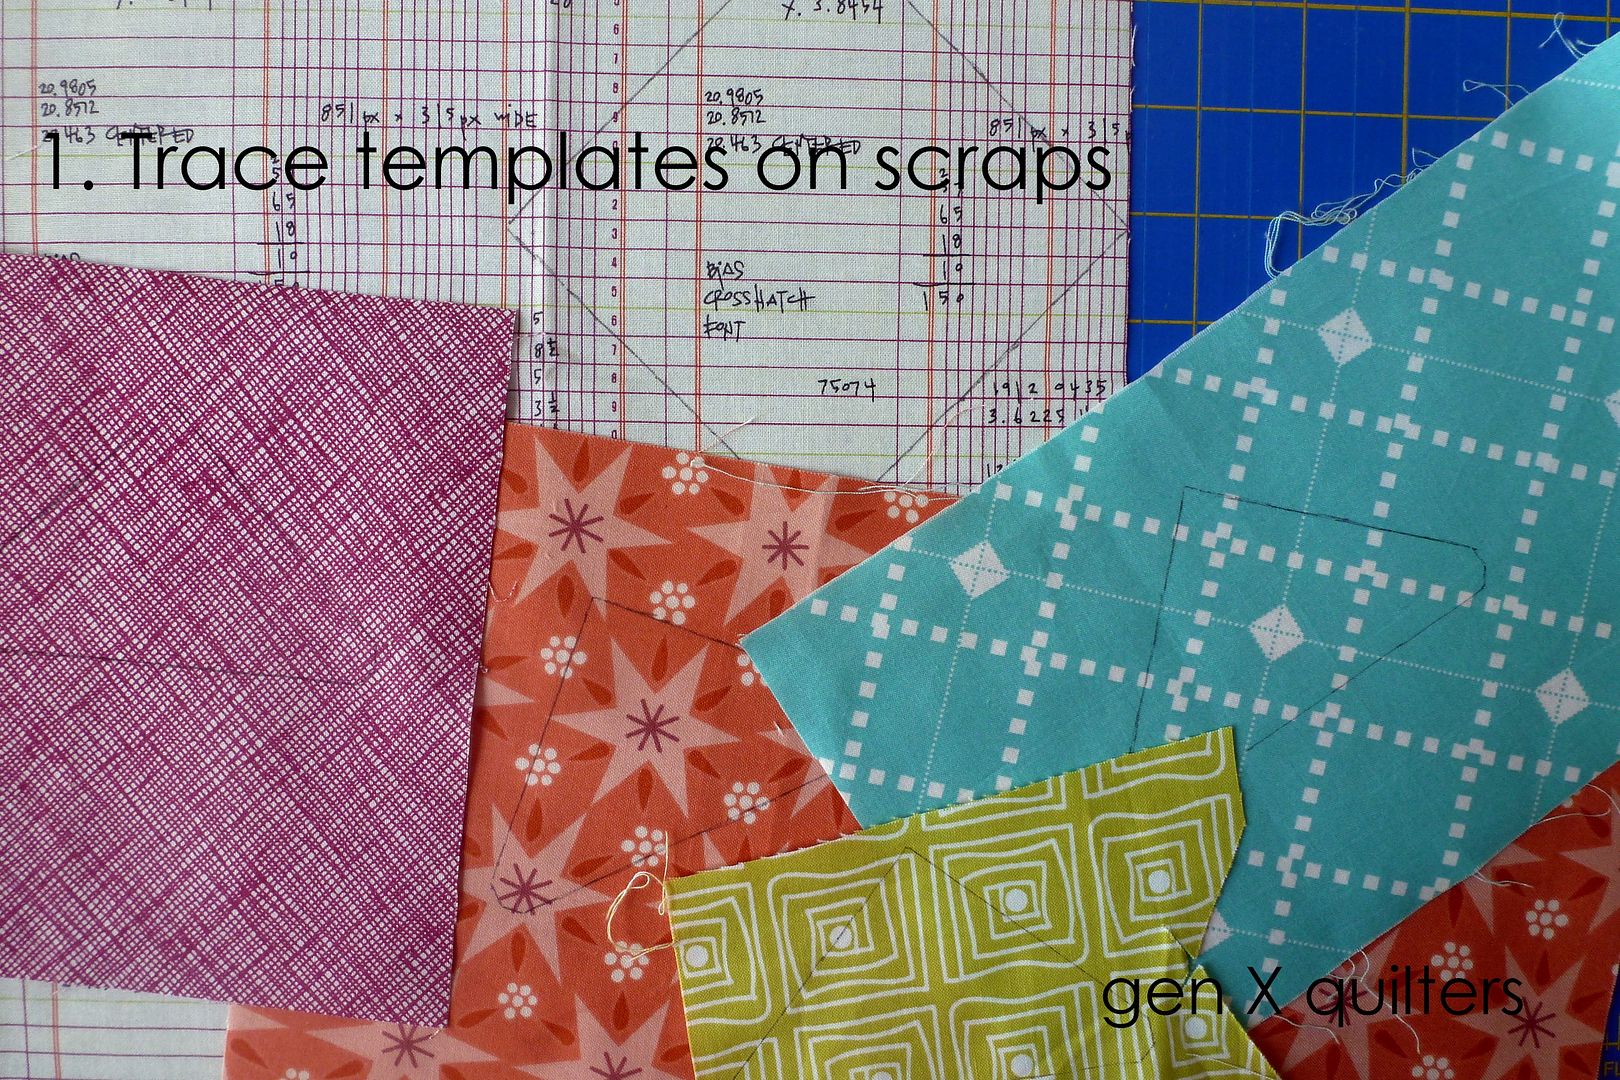
1. Begin by giving all your scraps a good press. Mine always need extra pressing duty from being crumpled in the scrap bin. Then print out the templates provided. Cut out the triangle template and trace it's shape on each the (4) assorted color scraps. Place the template in the middle of your scrap to be sure that you can place an embroidery hoop around the triangle to embroider the wording before cutting.
I have provided a template for the white 4" x 4" square also just in case you'd like to fussy cut your center square. :) I did! I used a Frixion pen to trace the shapes.
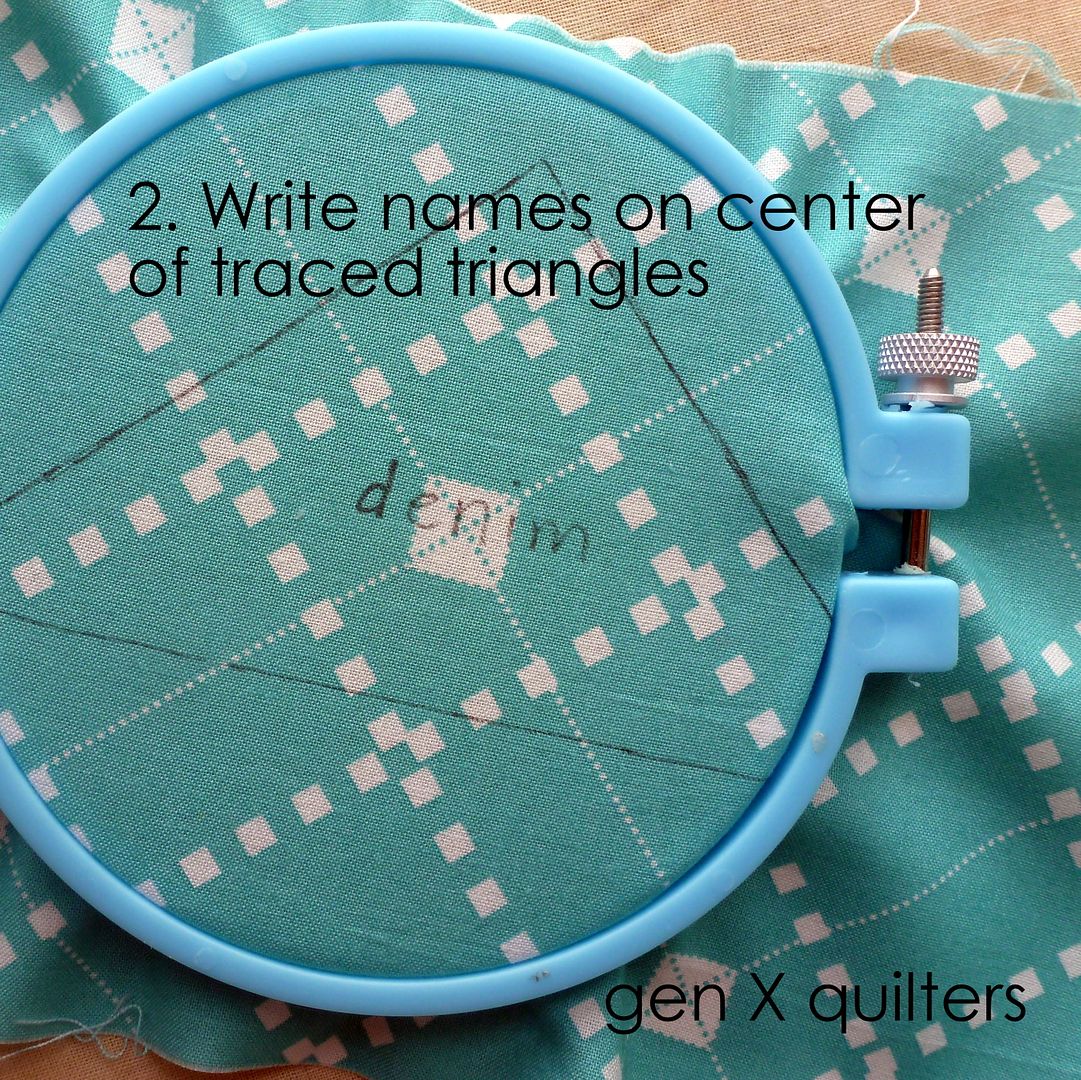
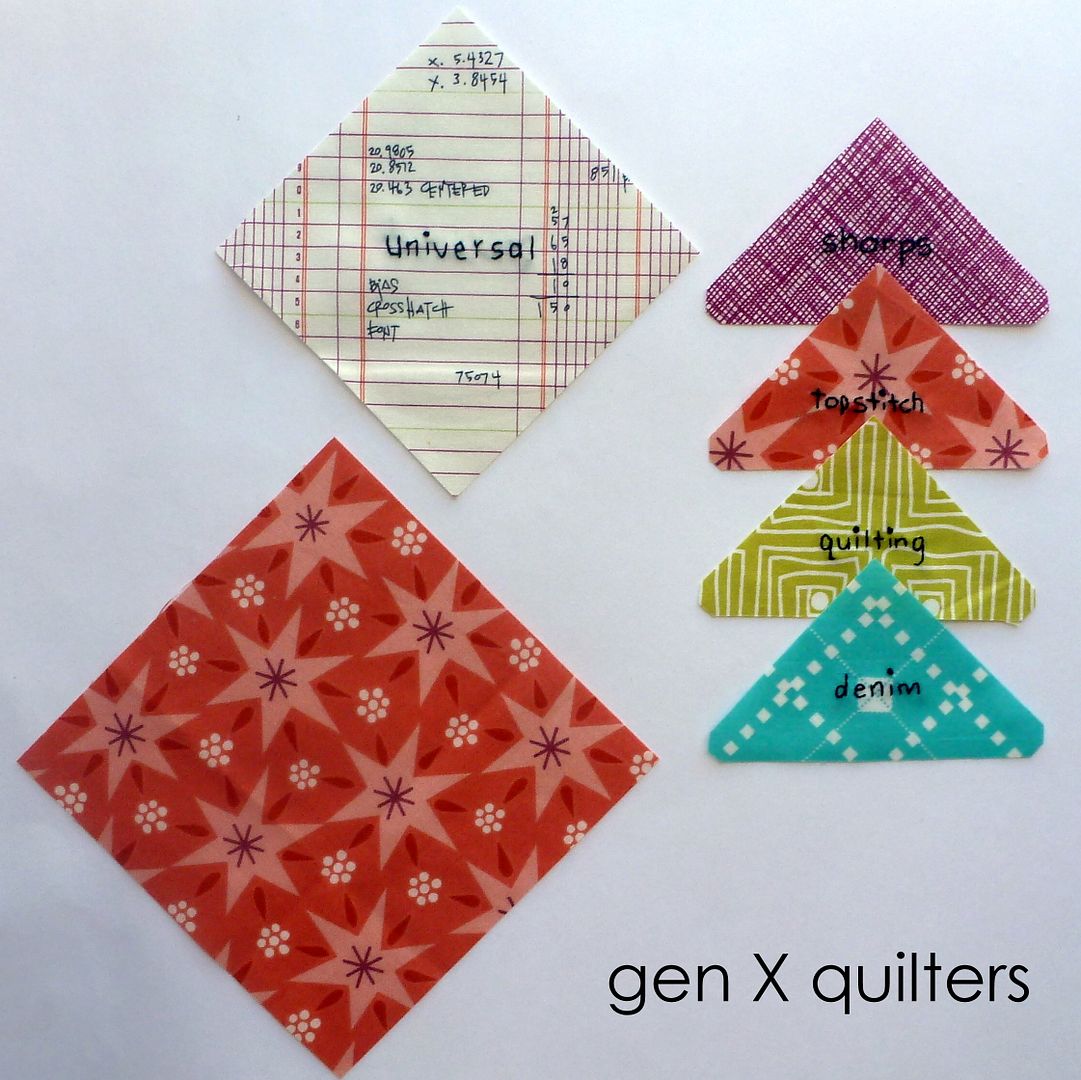
2. Write the names of the needles you want to sort in the middle of the triangle. If you are not too fond of your own handwriting, you could always print out the words in a pretty font and trace those on the fabric. I am using "denim", "sharps", "topstitch", "quilting", and "universal". It is up to you to choose which needles you use most. I am color coordinating the colored dot on the needle to the scrap triangle color. Denim needles have a blue dot marking them, so I am embroidering "denim" on the blue scrap.
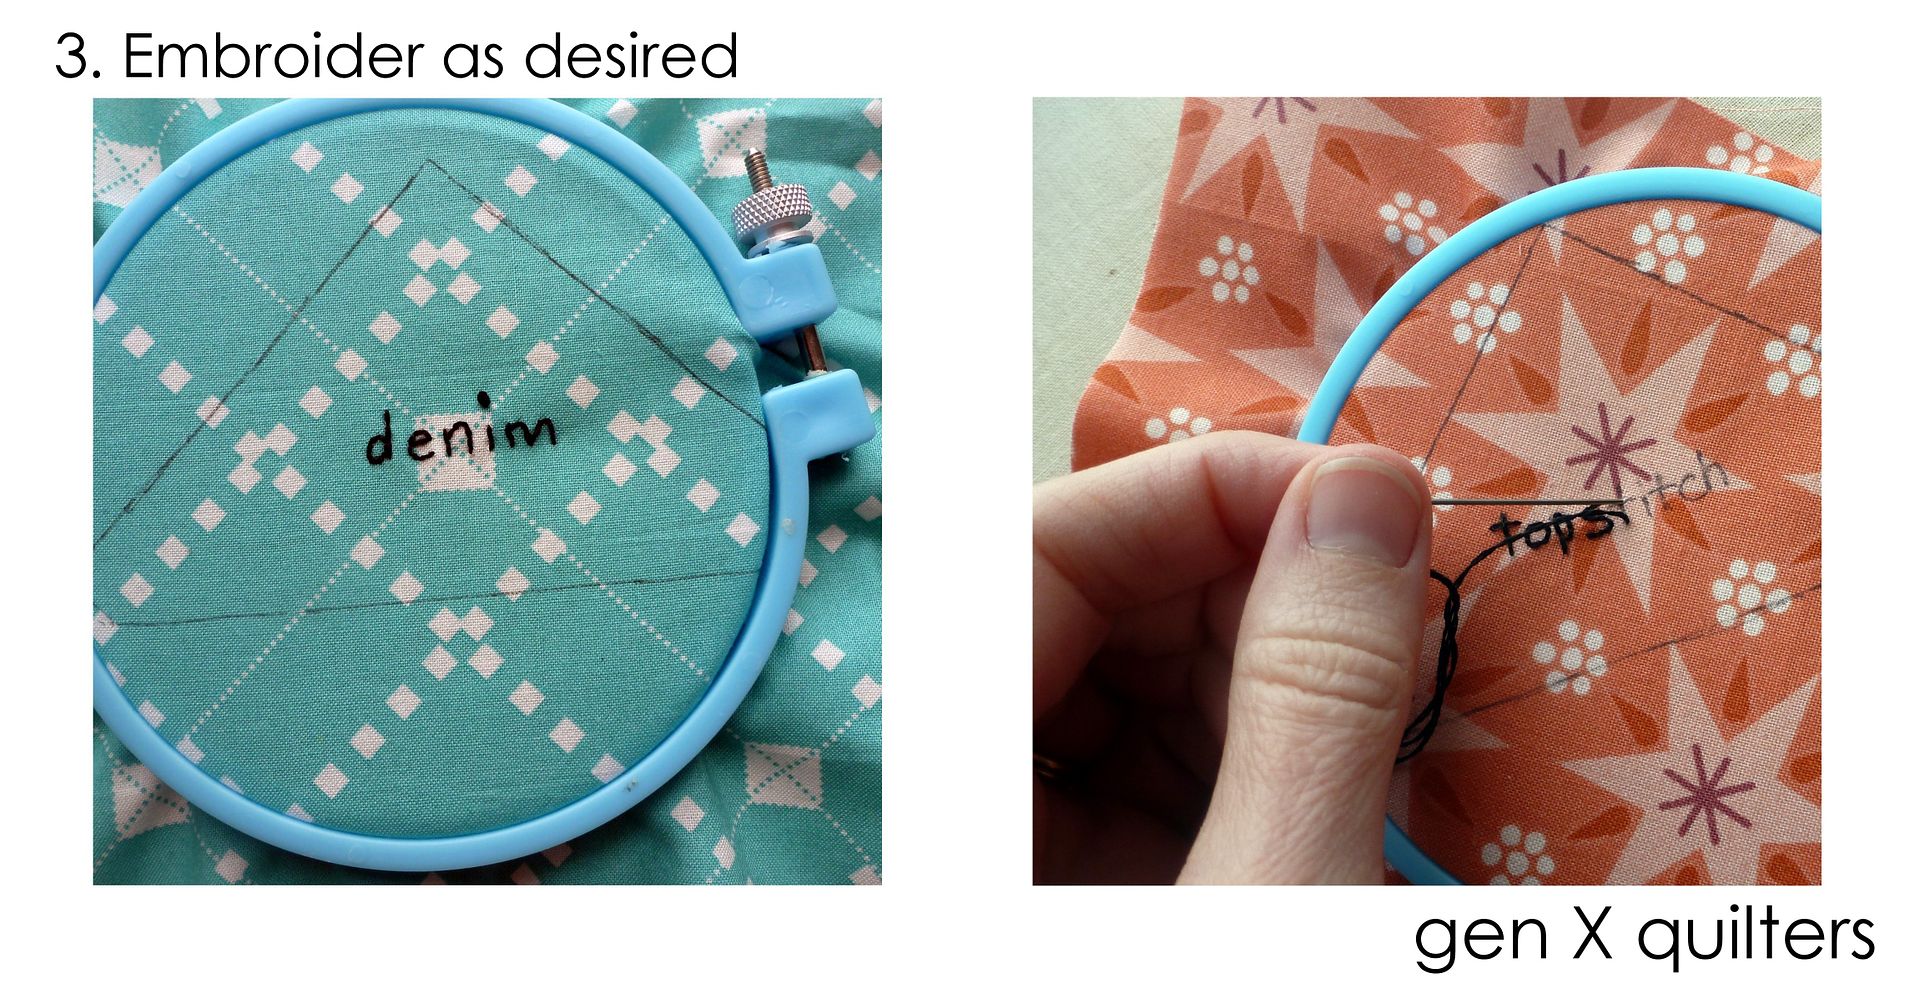
3. Embroider the needle type name on each of the five fabrics (4 corner scraps and 1 white center square). I used a simple back stitch to embroider.
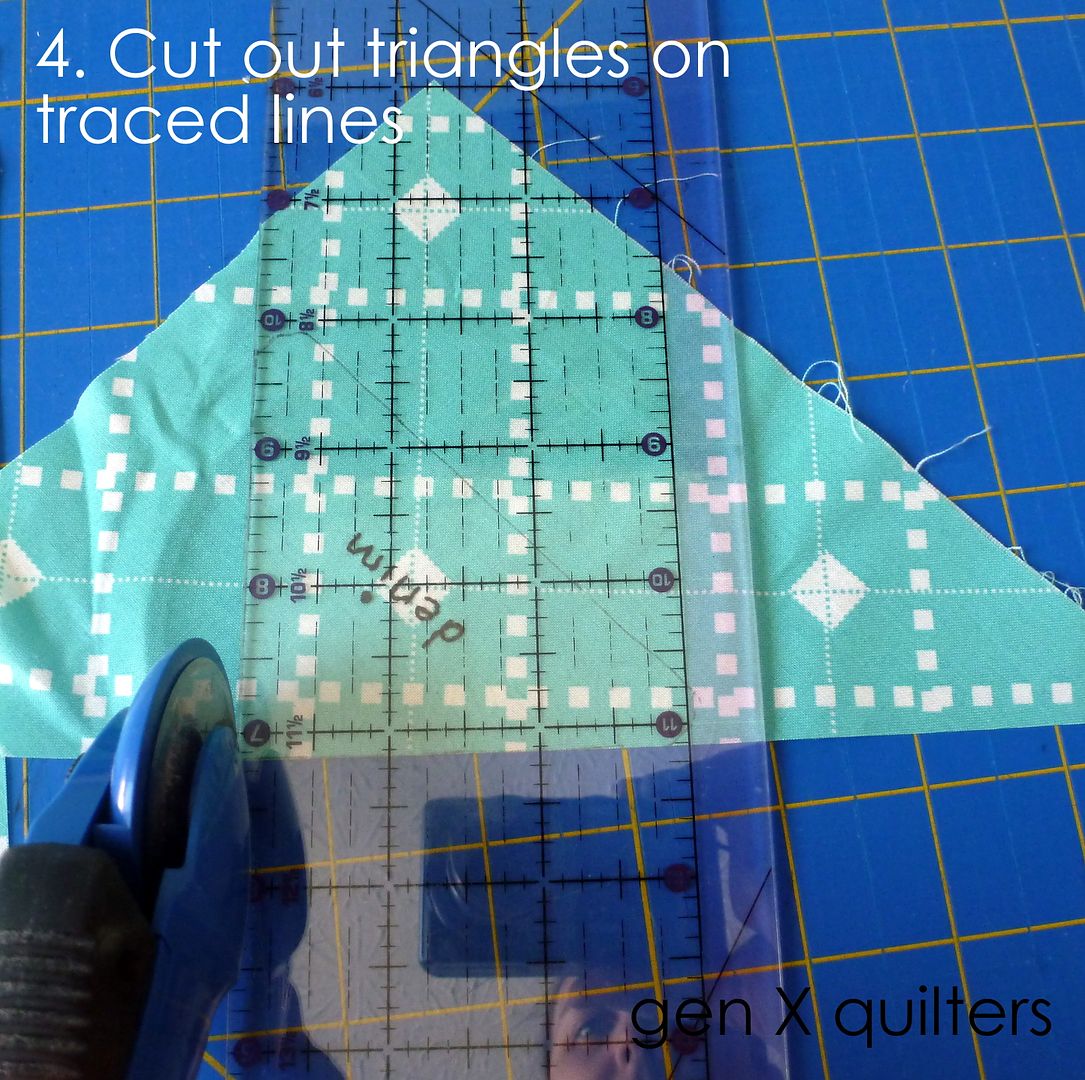
4. Cut out the triangle shapes with your rotary cutter. Do this before you press if you've used a Frixion pen or other ink that will disappear with heat!
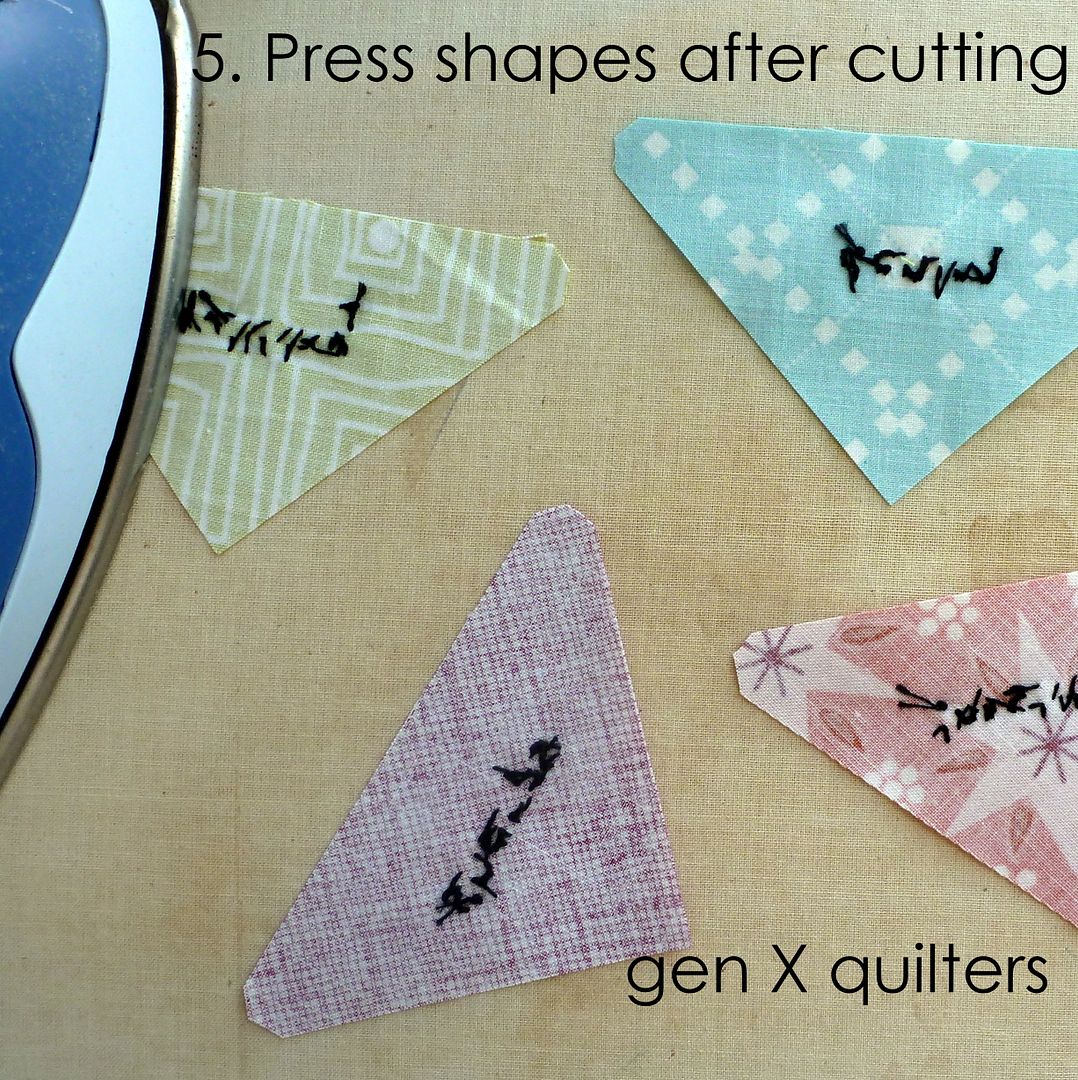
5. Press triangles on the back side after cutting each shape.
6. Now we can layout the on-point square quilt block for the pincushion top.
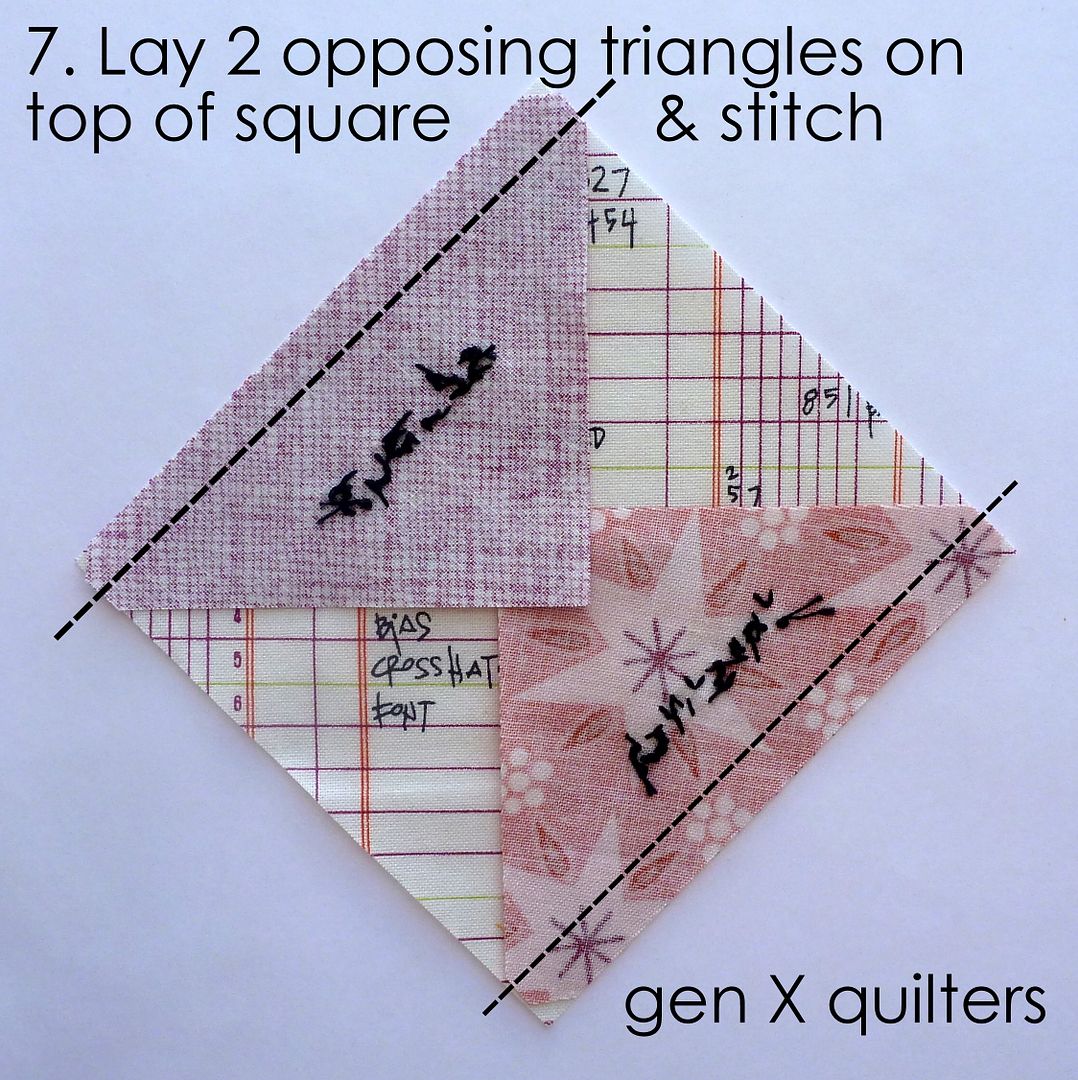
7. Take two of the opposing triangles and lay them on top of the center square, right sides together. Using the templates (i.e. the dogears are removed) allows you to center the triangle on the square easily. Stitch using a ¼” seam. Press toward the triangles.
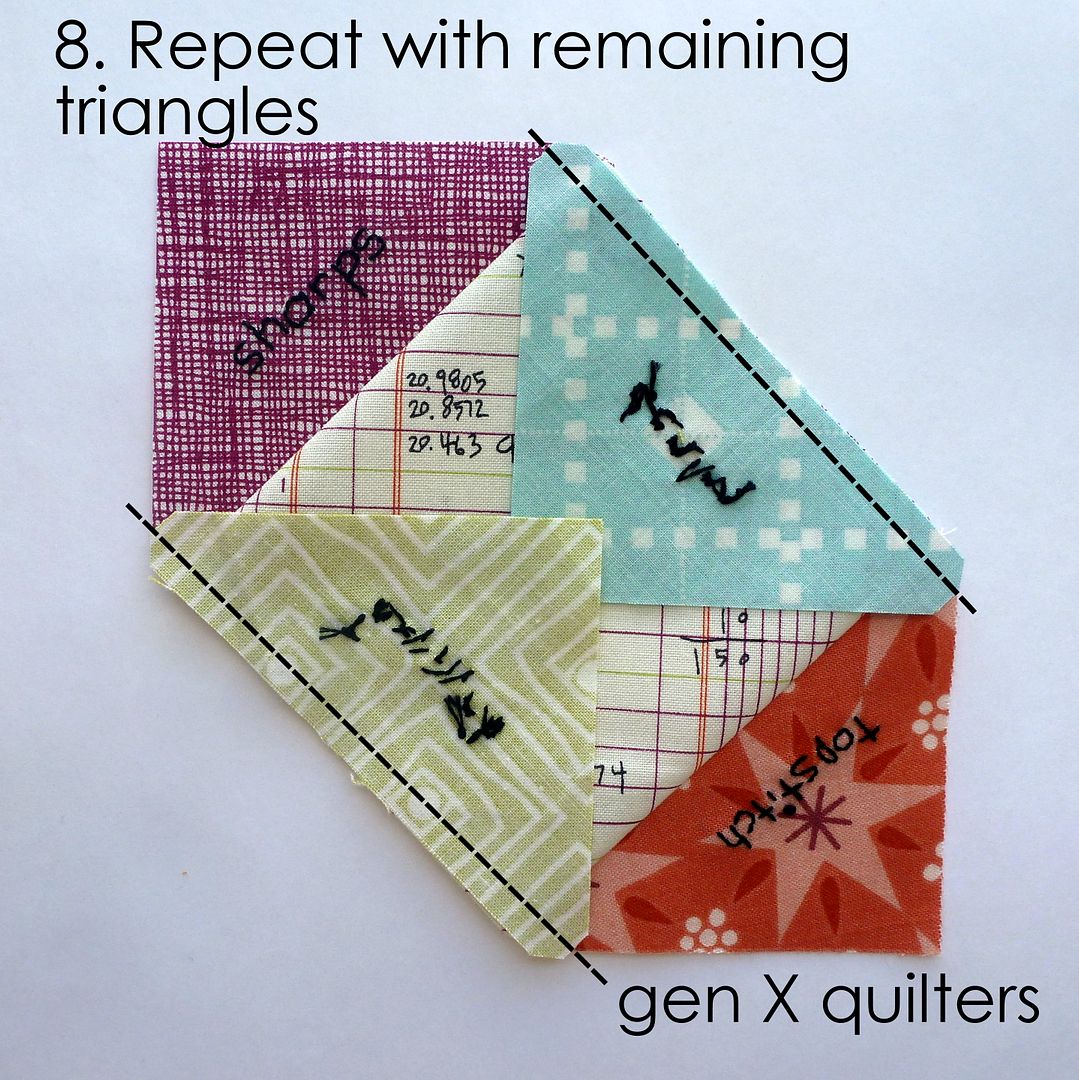
8. Repeat step 7 using the remaining two triangles.
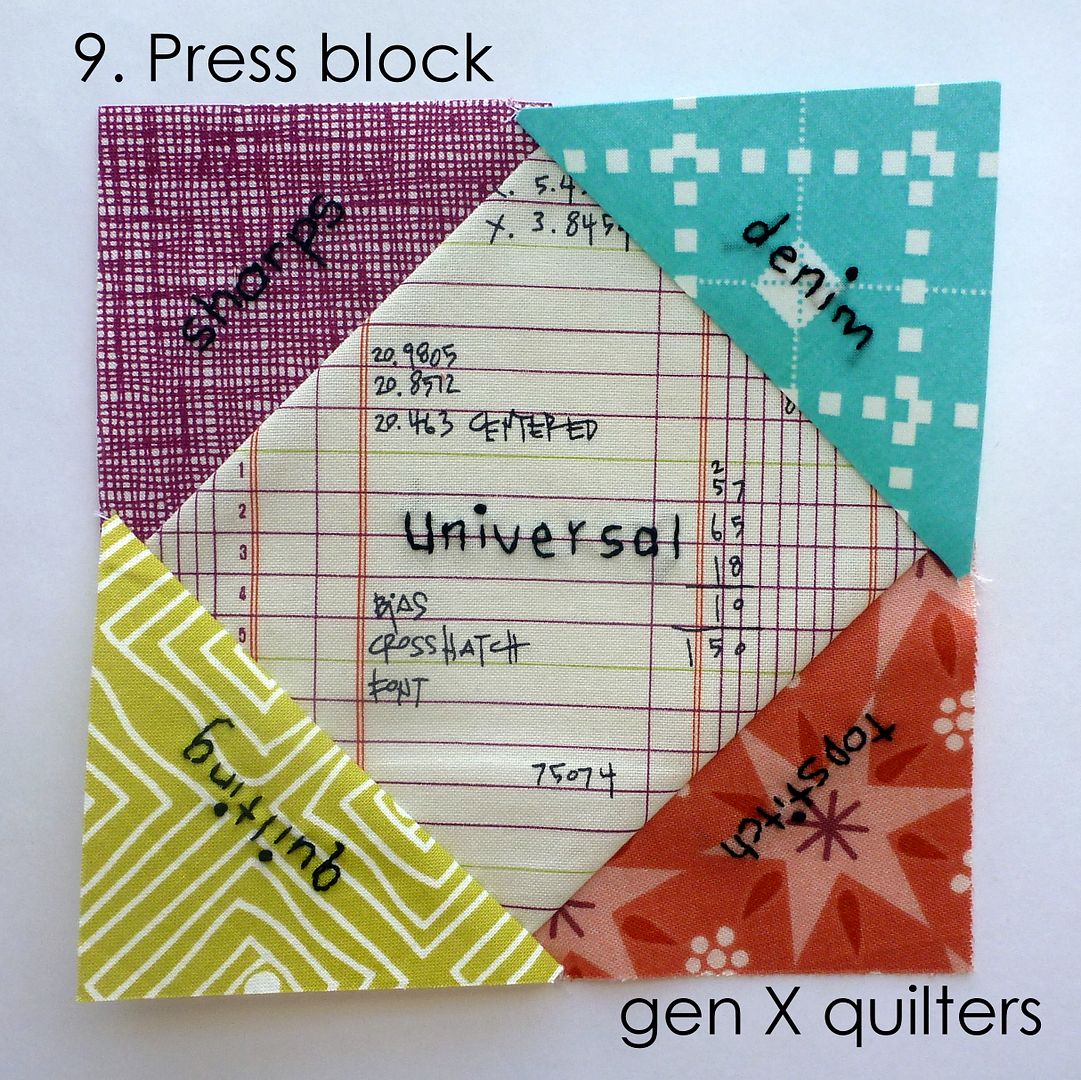
9. Press your block and take this opportunity to square up your block if need be. Nevermind that I took this shot before squaring up my block! Sorry!
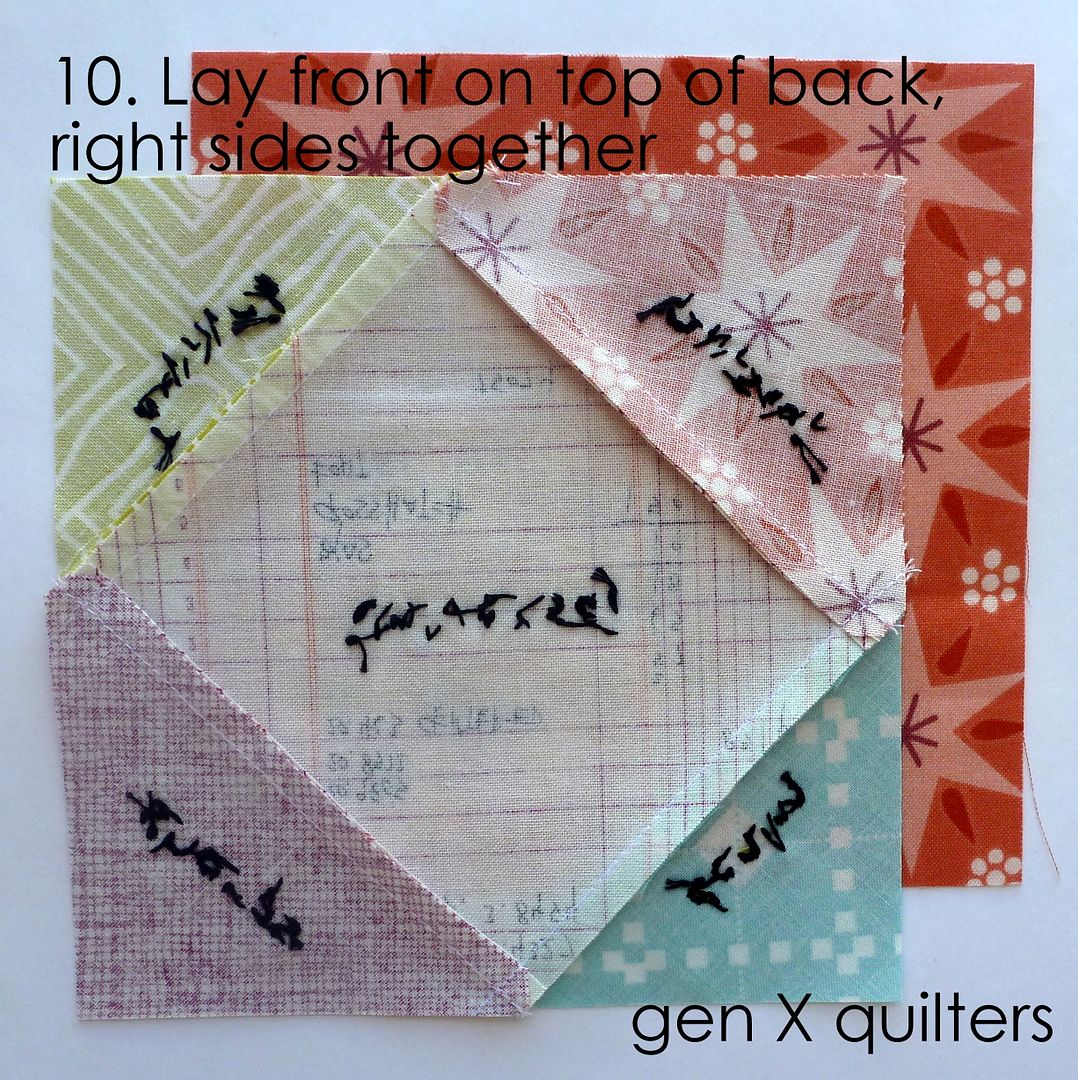
10. Lay the pincushion front on top of the back fabric, right sides together, aligning all four edges. Pin in place if necessary.
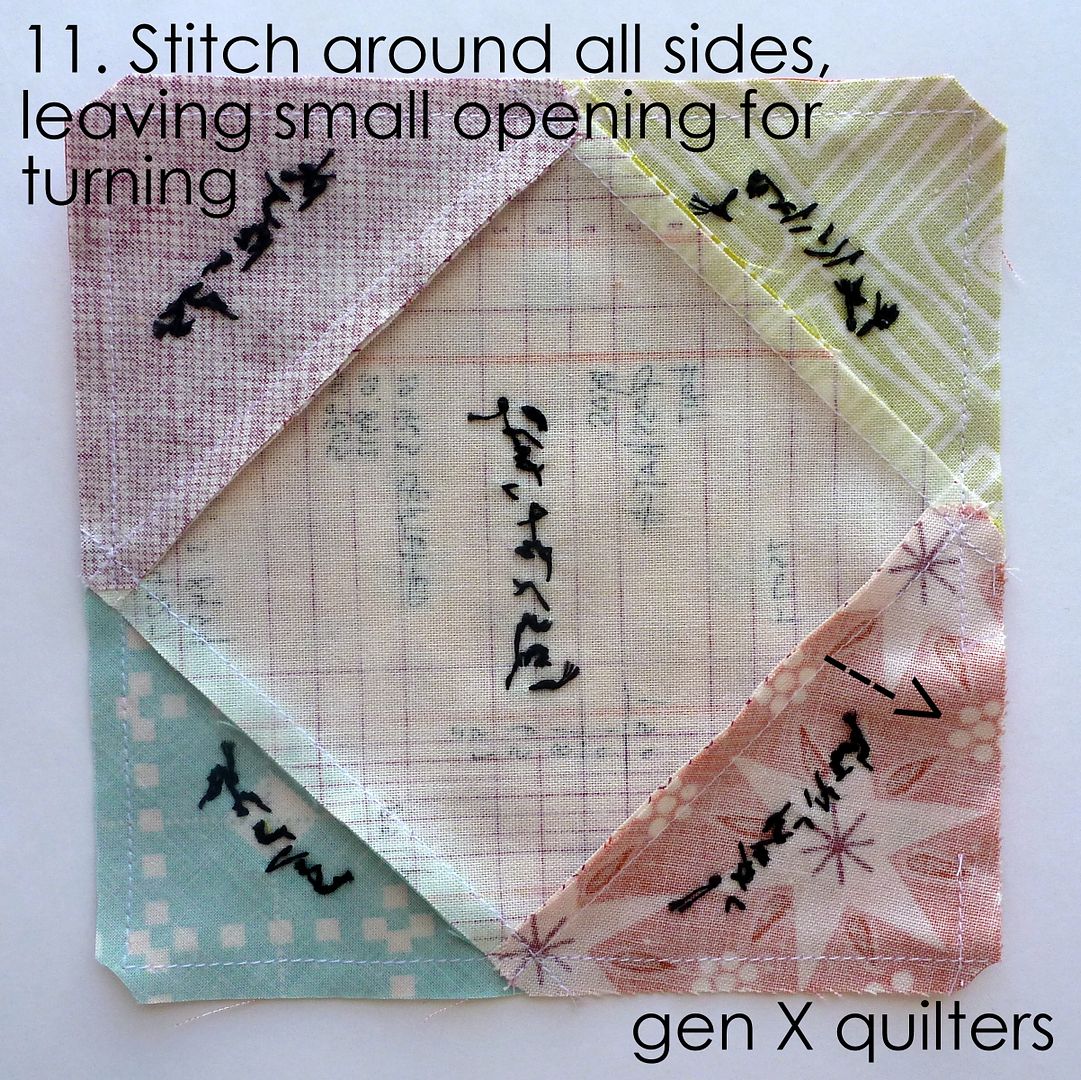
11. Stitch around all 4 sides, leaving a small opening for turning right side out and stuffing. Clip all 4 corners to reduce bulk in that area.
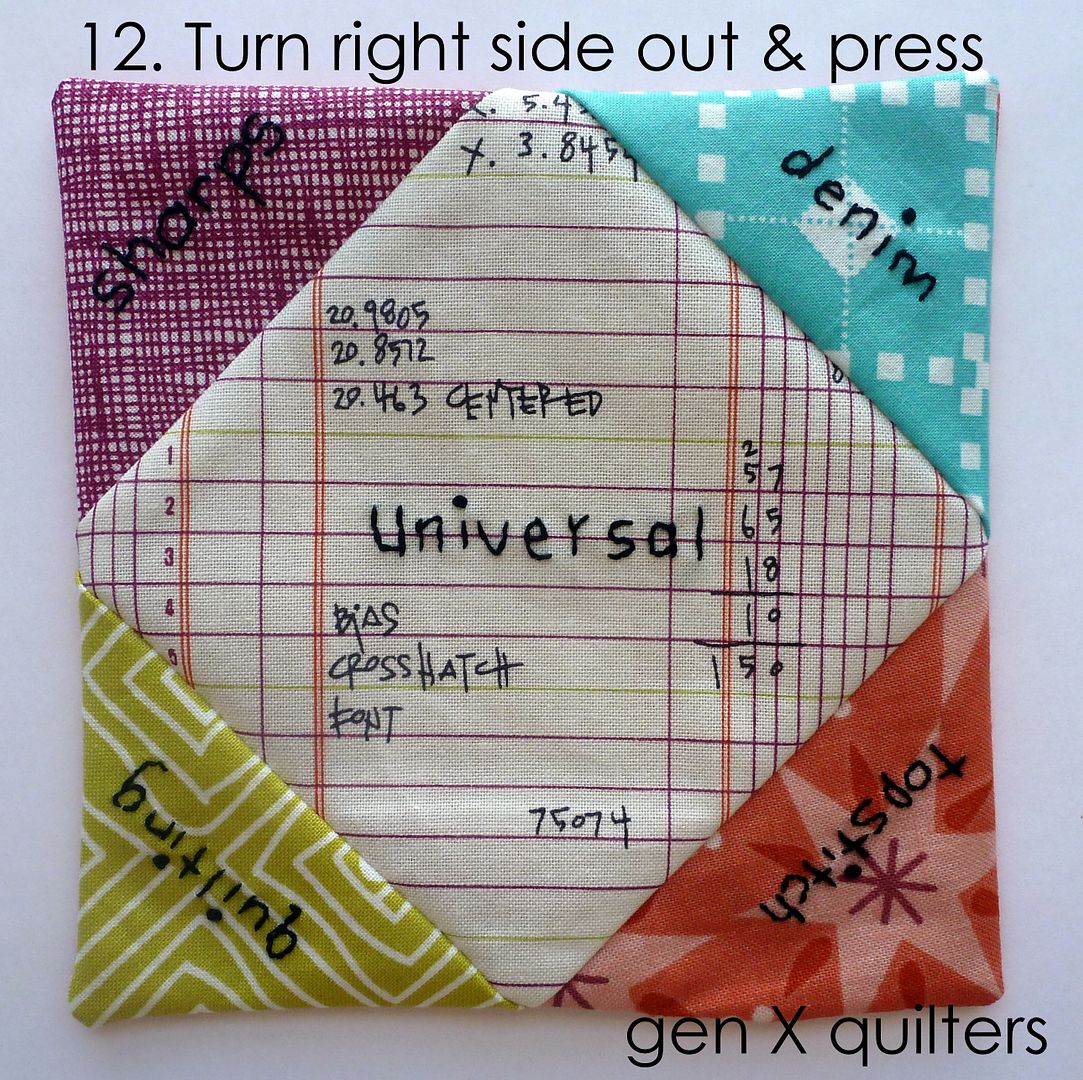
12. Turn the pincushion right sides out through the small opening. Give it a good press.
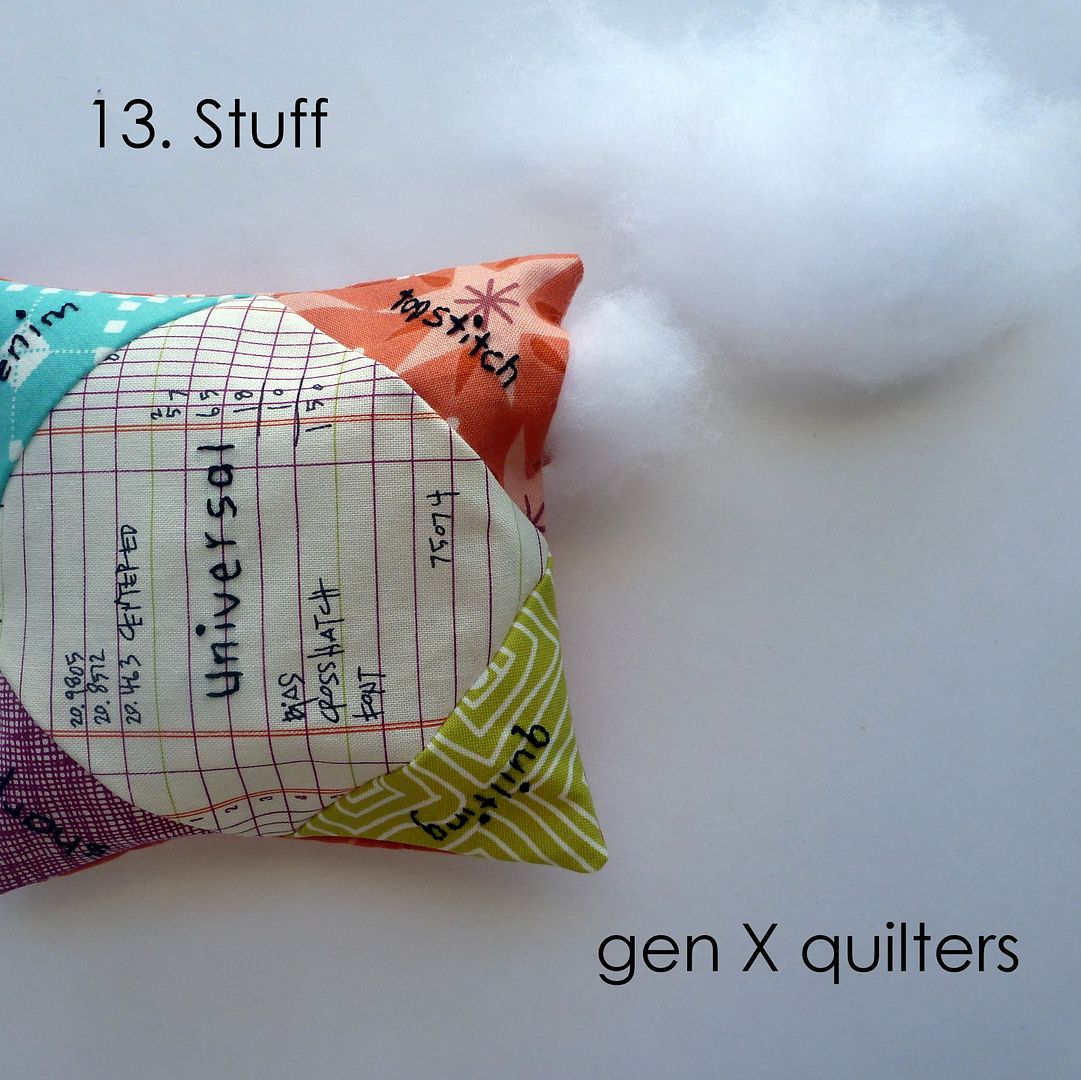
13. Stuff and puff the cushion! (to your desired fullness of course) Then hand sew the opening closed.
And there you have it! I hope this helps you sort out and store your slightly used needles. You can use a special pin as a marker to indicate which needle is currently in your machine.

