Sisters' Ten Modern BOM May Block: Aunt Eliza's Star

Sisters Ten BOM 1
Today the next block for the Sisters' Ten Modern Block of the Month Club is here!  Let's welcome May with Aunt Eliza's Star.  This block will bring on a new base block, the Hourglass. 
May - Aunt Eliza's Star blog post cover

Cutting Instructions.

For 12" blocks.
  • Cut (4) 4 1/2" x 4 1/2" squares of Fabric A (background).
  • Cut (1) 4 1/2" x 4 1/2" square of Fabric C.
  • Cut (2) 5 1/2" x 5 1/2" squares of Fabric A (background).  (For Hourglass)
  • Cut (2) 5 1/2" x 5 1/2" squares of Fabric B.  (For Hourglass)
  • Or if you prefer, cut only (1) 5 1/2" x 5 1/2" square of Fabric B and cut (1) 5 1/2" x 5 1/2" square of Fabric D.
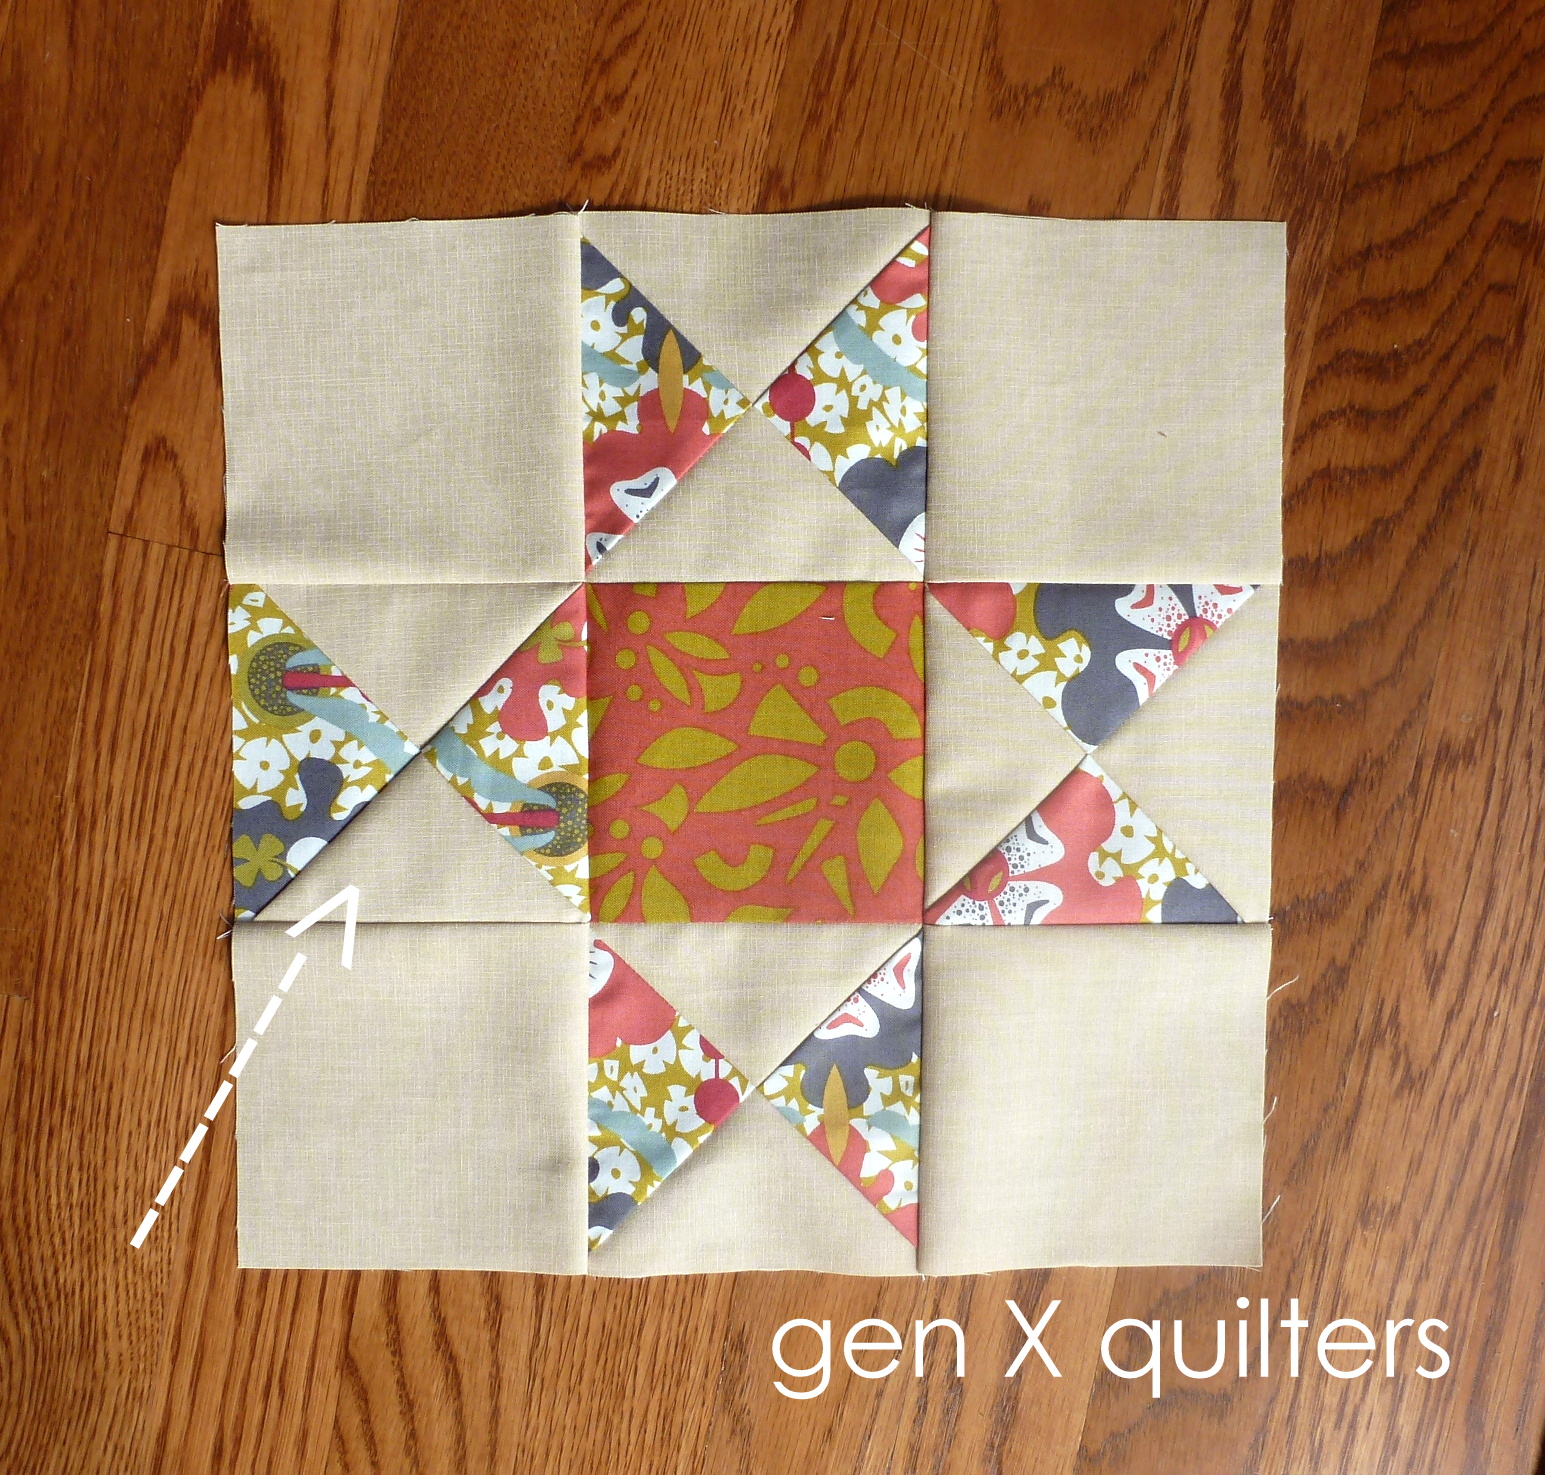
May - Aunt Eliza's Star 1 and 2 together with corrected letters

For 9" blocks.
  • Cut (4) 3 1/2" x 3 1/2" squares of Fabric A (background).
  • Cut (1) 3 1/2" x 3 1/2" square of Fabric C.
  • Cut (2) 4 1/2" x 4 1/2" squares of Fabric A (background).  (For Hourglass)
  • Cut (2) 4 1/2" x 4 1/2" squares of Fabric B.   (For Hourglass)
  • Or if you prefer, cut only (1) 4 1/2" x 4 1/2" square of Fabric B and cut (1) 4 1/2" x 4 1/2" square of Fabric D.
Piecing Instructions.
*Use a scant 1/4" on all seam allowances. See the Scant Rant series for details.

1. Make Hourglass units with Fabric A and Fabric B/Fabric D. Use (1) Fabric A square and the (1) Fabric B square to make (2) Hourglass units using the method in this tutorial.  Repeat this step with either Fabric A and B - or- Fabric A and D.  In total, you will need 4 Hourglass units. The Hourglass blocks should be trimmed down to:
                      
12" blocks:  4 1/2" (unfinished size).
9" blocks:  3 1/2" (unfinished size).

2. Layout the Hourglass Units and other squares as shown below.
Hourglass layout (1)
4. Sew blocks together to make three rows, pressing seams in each row in alternating directions.
Hourglass layout 3
5. Sew the three rows together to complete the block.
Hourglass layout 3 1
7. Make (2) blocks. They may be identical blocks or made from differing fabrics for a scrappier look.  Be careful of your Hourglass block orientations!  I was not paying attention well enough and ended up with a goof....  Time to get the seam ripper!
aunt eliza's star blooper

And the finished blocks...May - Aunt Eliza's Star 1 and 2 together Fabric is Alison Glass for Andover, Lucky Penny with background Quilter's Linen in Straw by Robert Kaufman.

Quiltmaker's 100 Blocks Vol. 7 Blog Hop Stop

I am just ecstatic to have my block included in Quiltmaker's 100 Blocks Volume 7!  

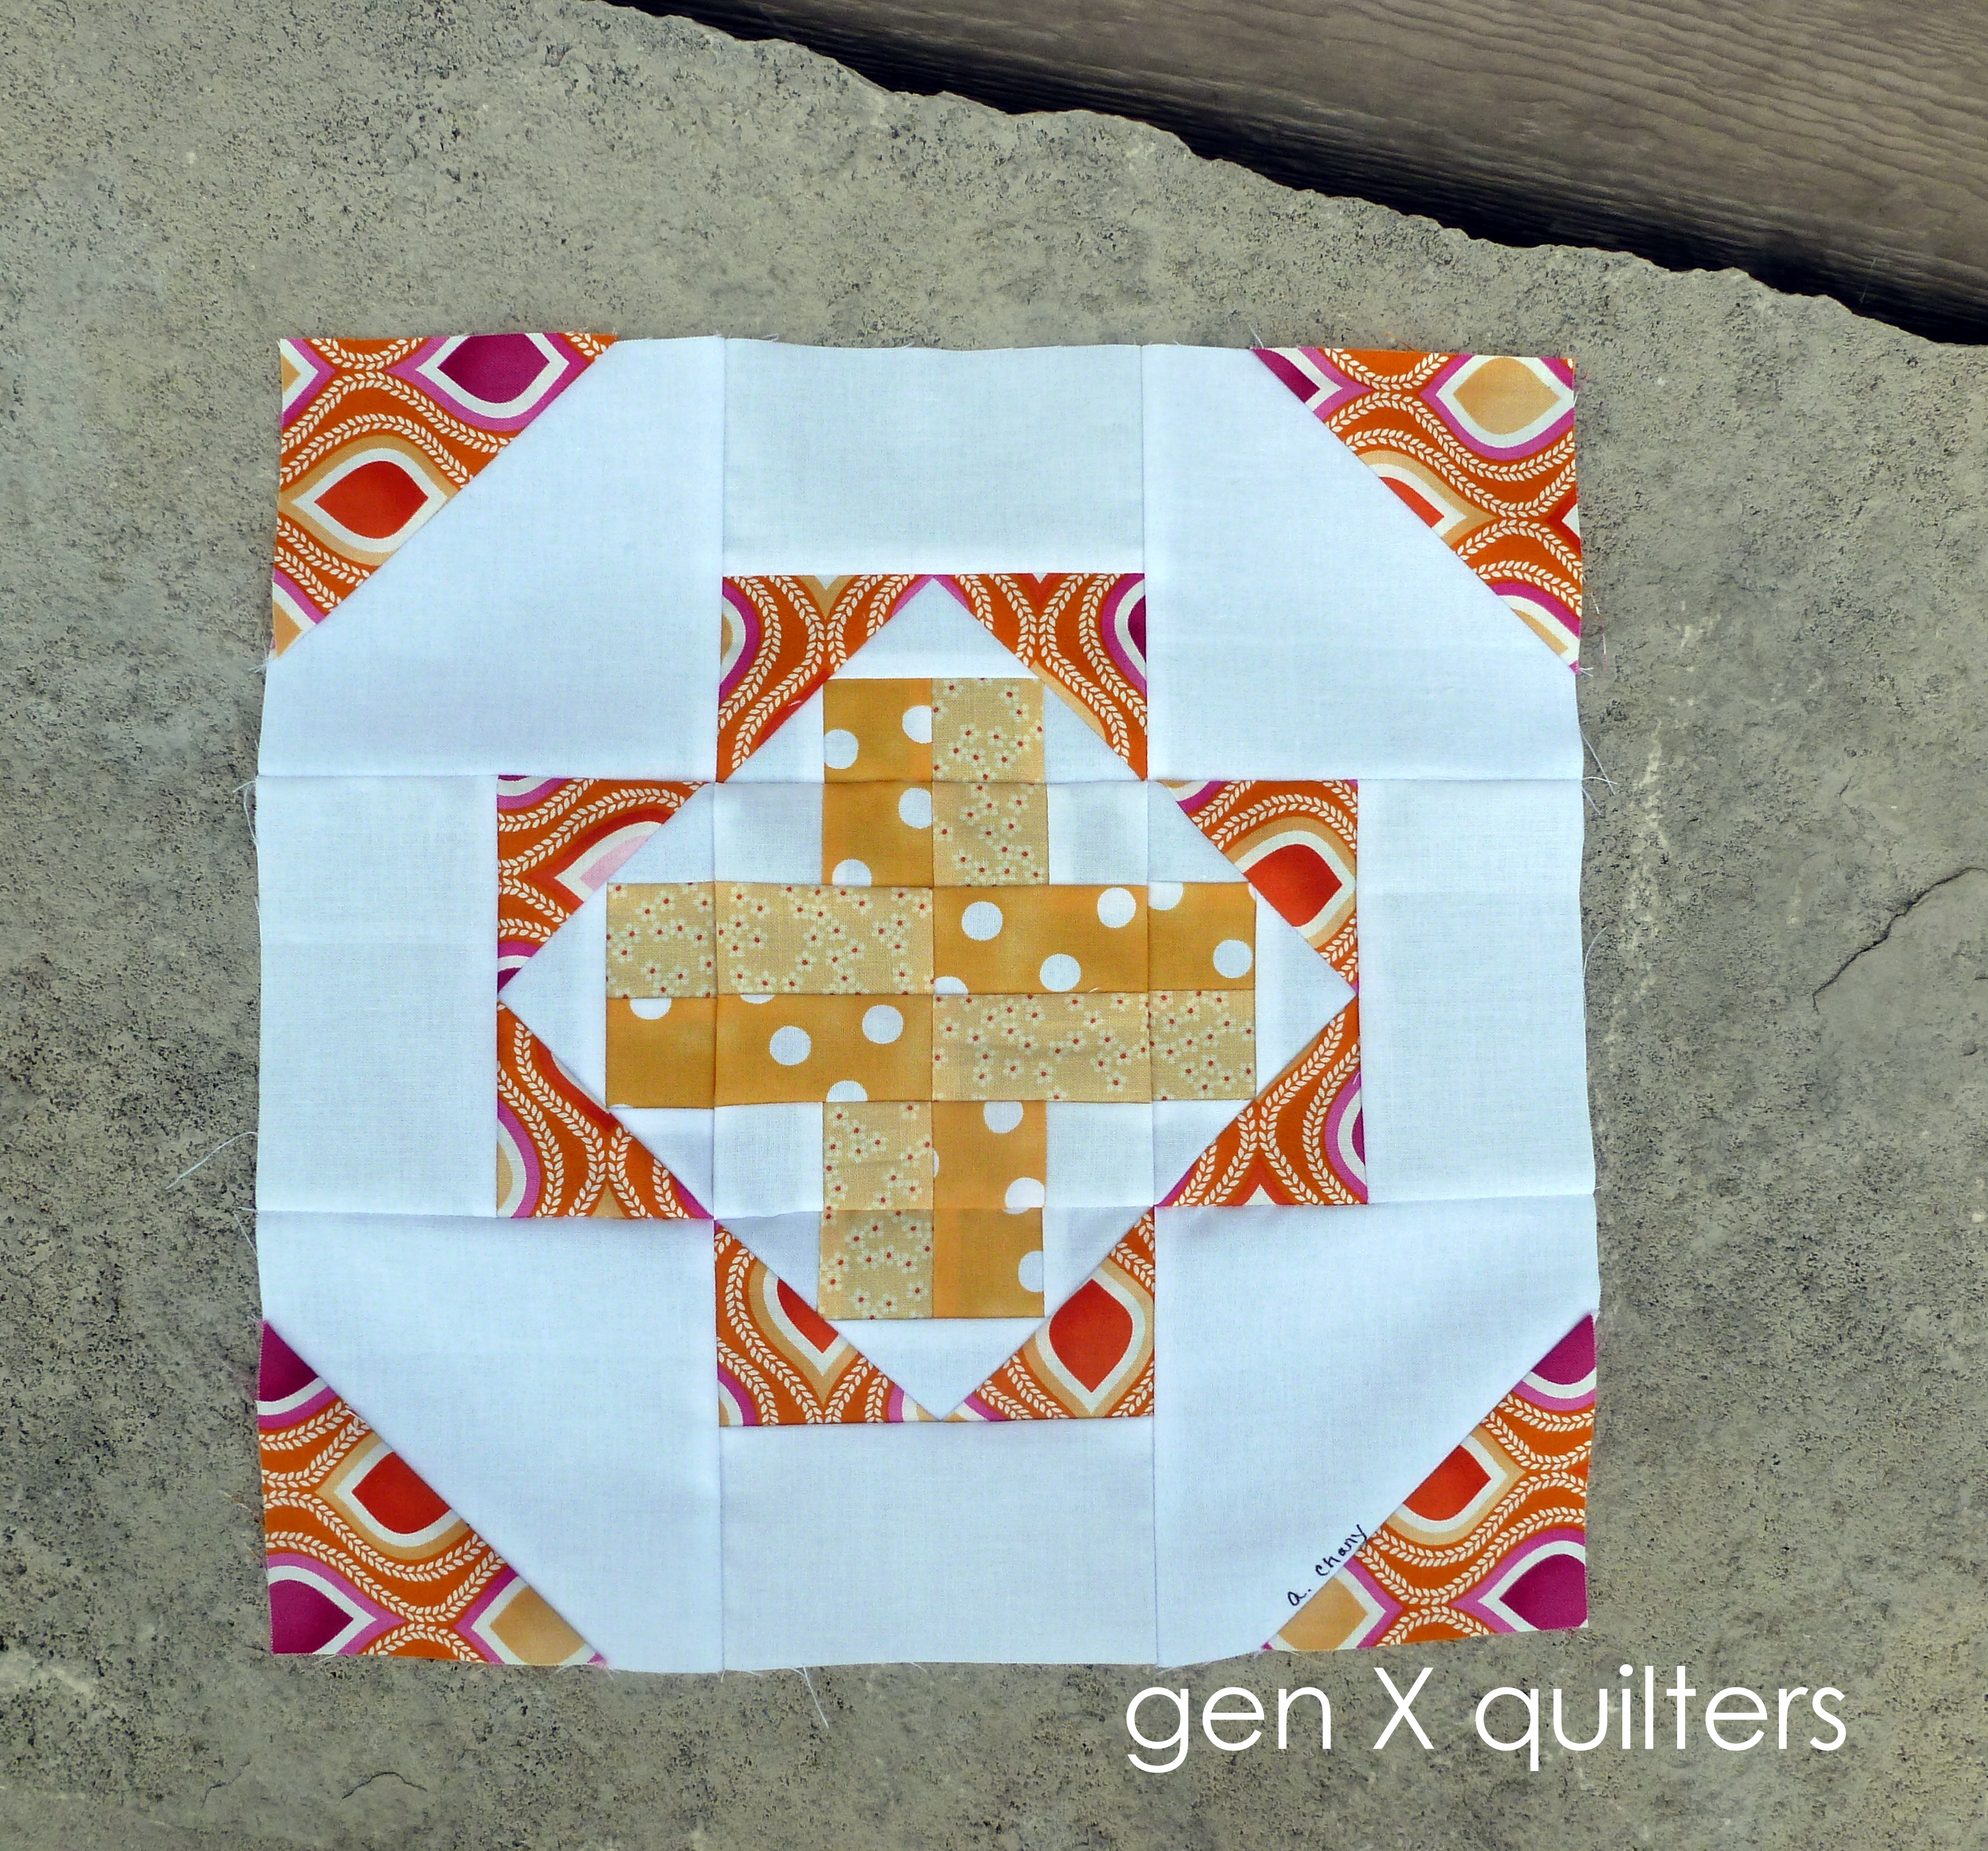
Inside you will find my block, Double Crossed.  Here she is!  She came out so fresh and springy, even though her name suggests something sinister and sneaky.
double crossed block

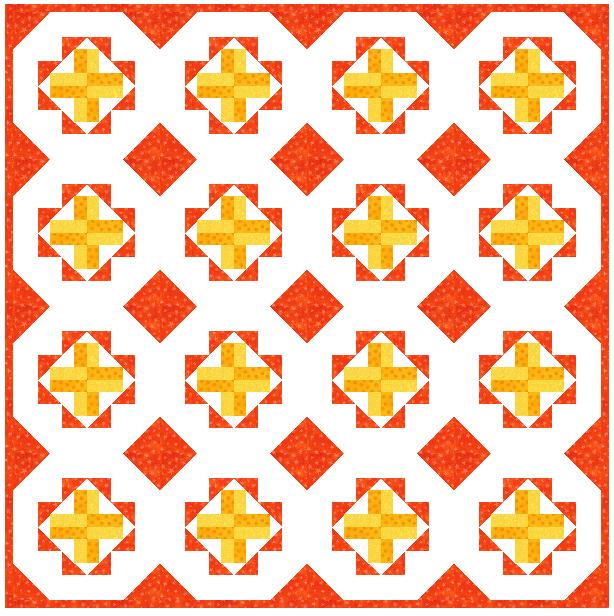
Here are a few fun layout ideas using the Double Crossed block.  In the example below, the block is repeated in a traditional horizontal setting.  When the quilt comes together, on point squares are formed by joining the blocks.
double crossed quilt layout

In a different variation, take the same setting, but add a little sashing and a few cornerstones.... aren't they great?  Look at those shoo-fly blocks that appear.  How fun!
double crossed quilt layout 2
If you would like a chance to win your own copy of Quiltmaker's 100 Blocks Volume 7 or one of my Patterns, enter the giveaway below. (Giveaway ends Sunday, May 5, 2013 at 11:59pm)  This giveaway is now closed.


a Rafflecopter giveaway

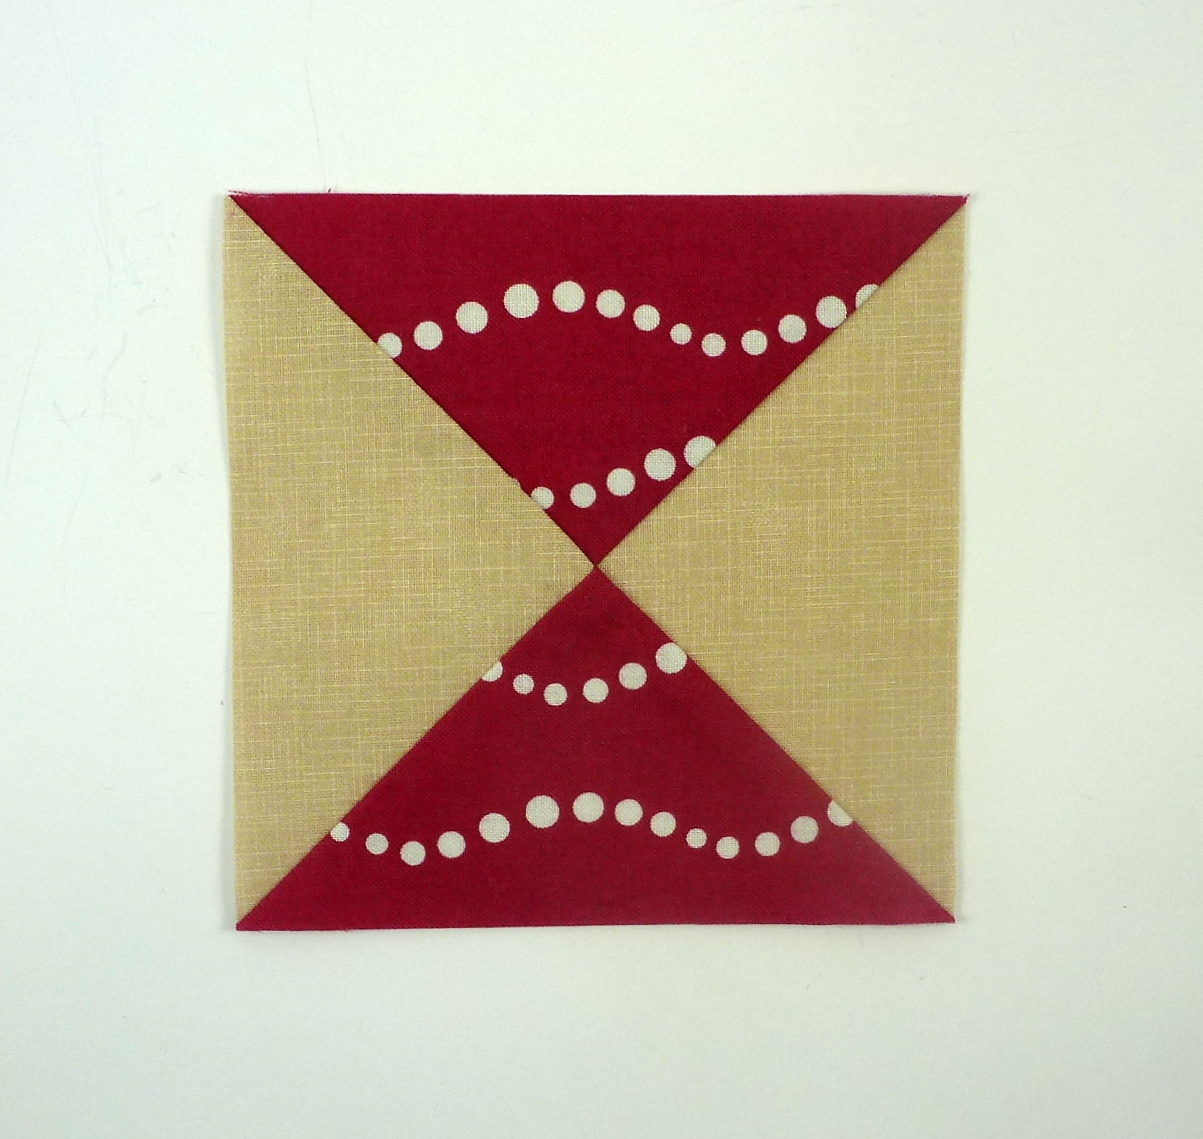
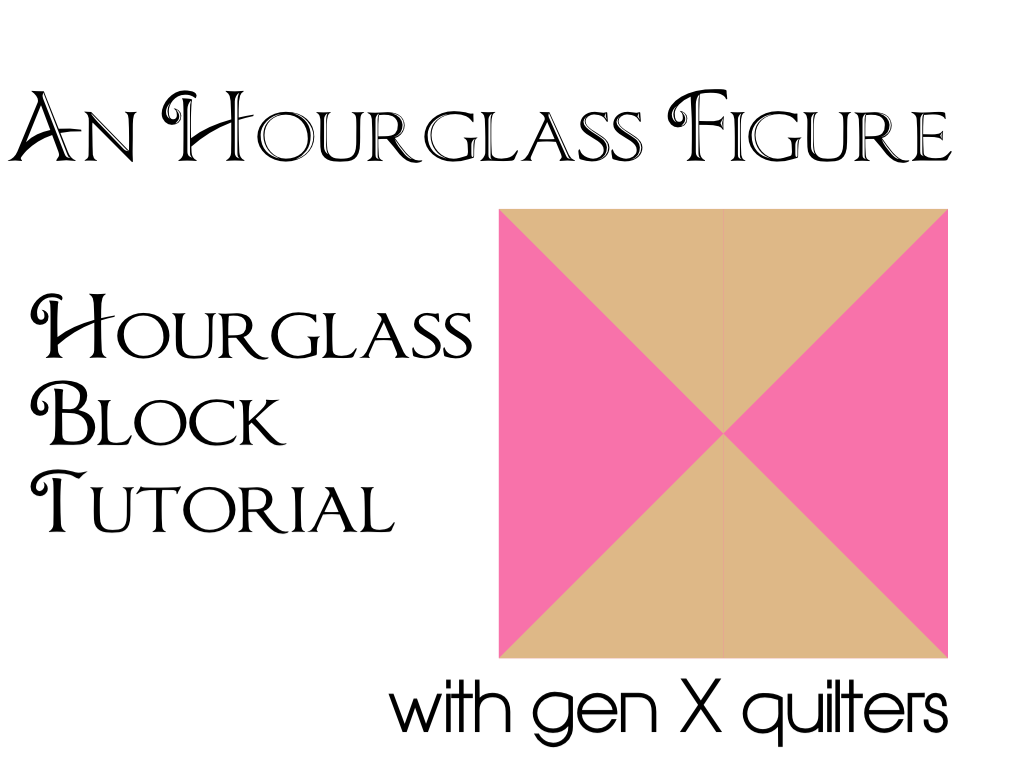
An Hourglass Figure: Hourglass Block Tutorial

Hourglass

Here is a tutorial for a fundamental quilt block, the Hourglass block.  Such a classic!  Bet you can't guess what block will be May's Sisters' Ten block??  Hee hee.  The block for the BOM will build upon this hourglass block... but I love having the basics separated out into it's own tutorial.  Here we go...

1letters
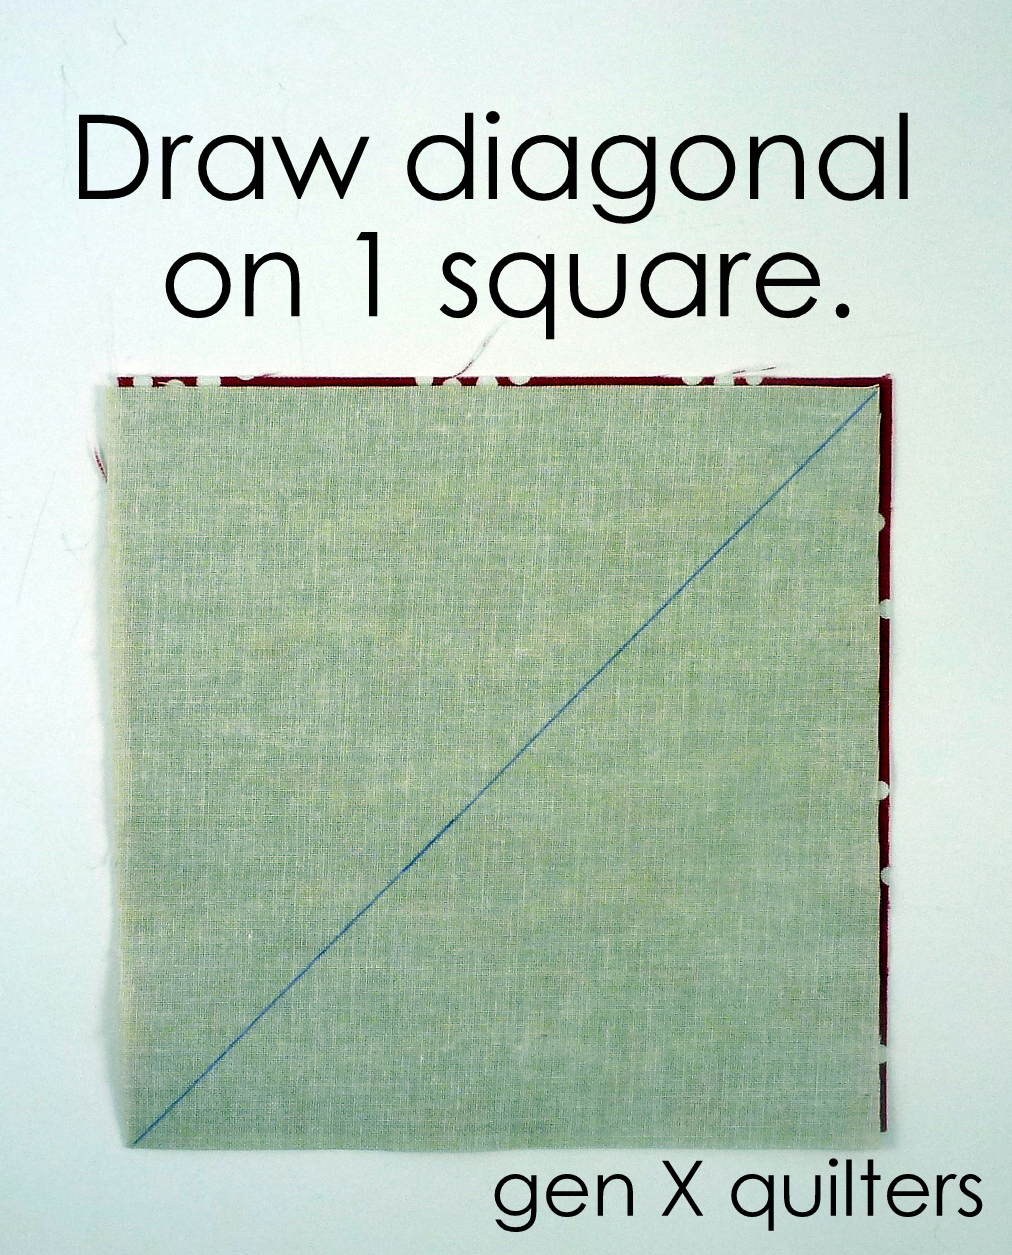
1.  Cut 2 squares the same size.  One from Fabric A and one from Fabric B.
Draw a diagonal line on the wrong side of the Fabric A square.
2


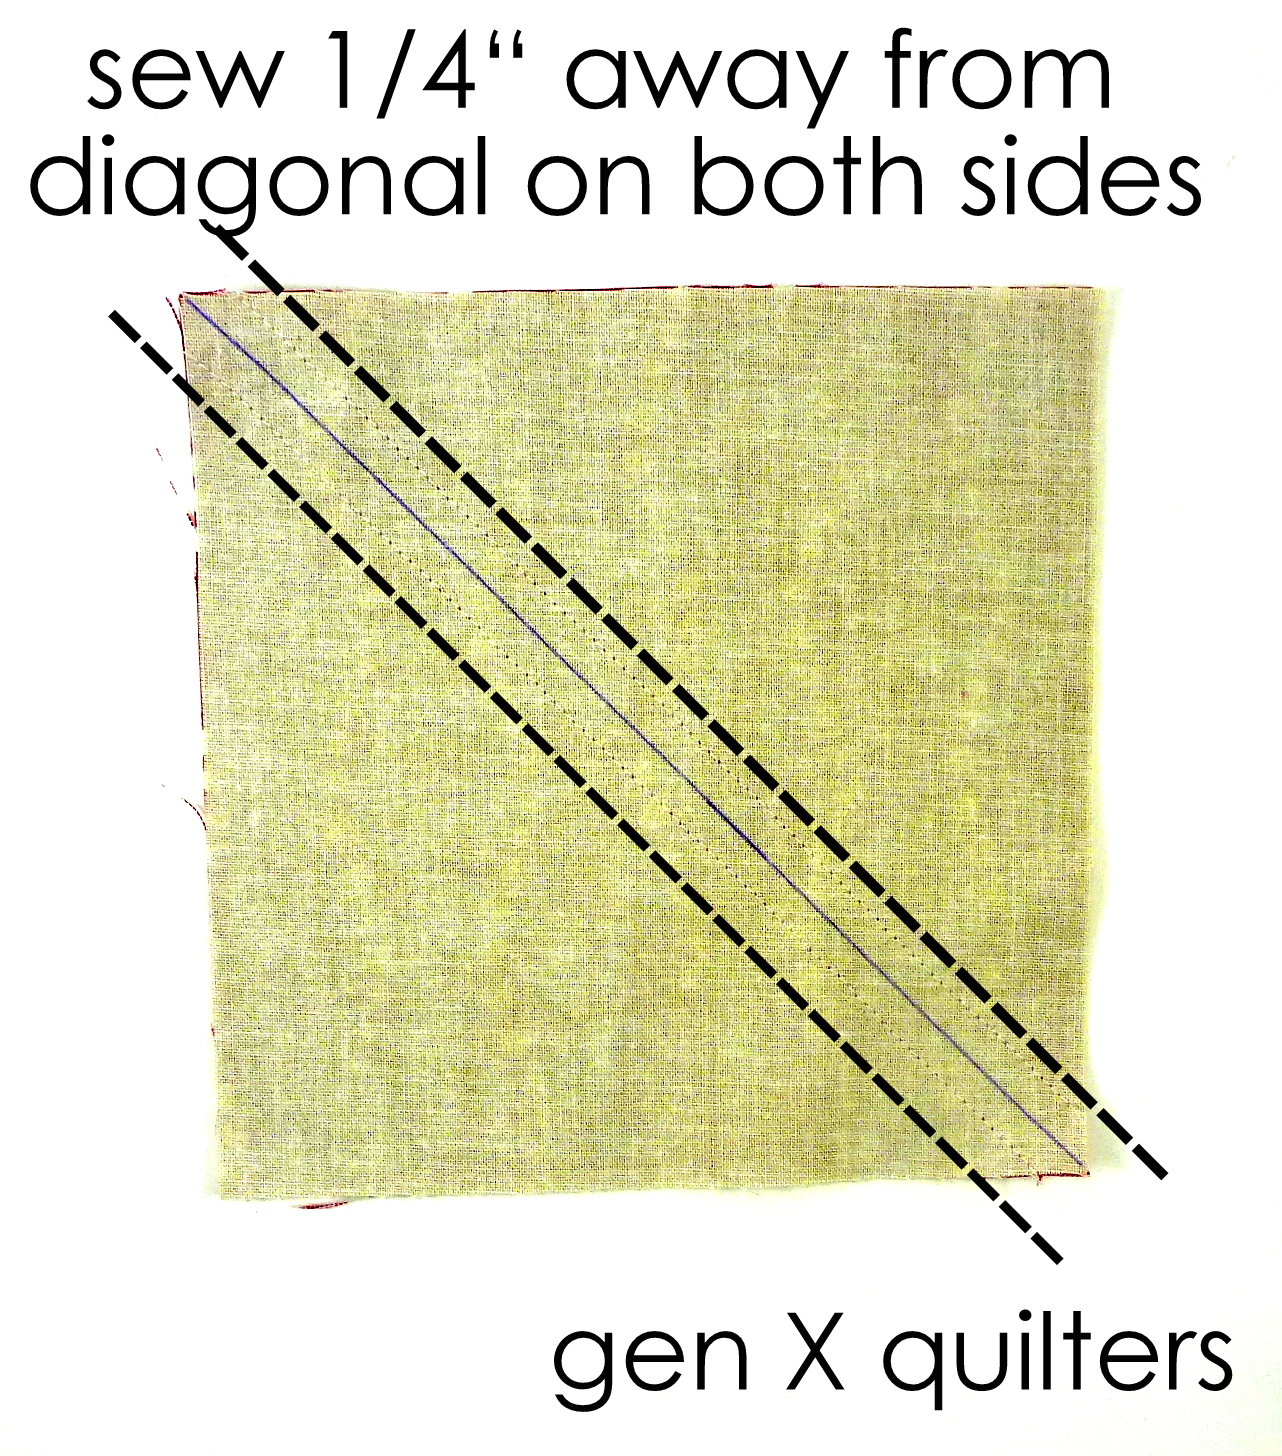
2.  Layer the Fabric A square atop the Fabric B square with right sides together.  Sew pairs together, stitching 1/4" on each side of the drawn line.

3
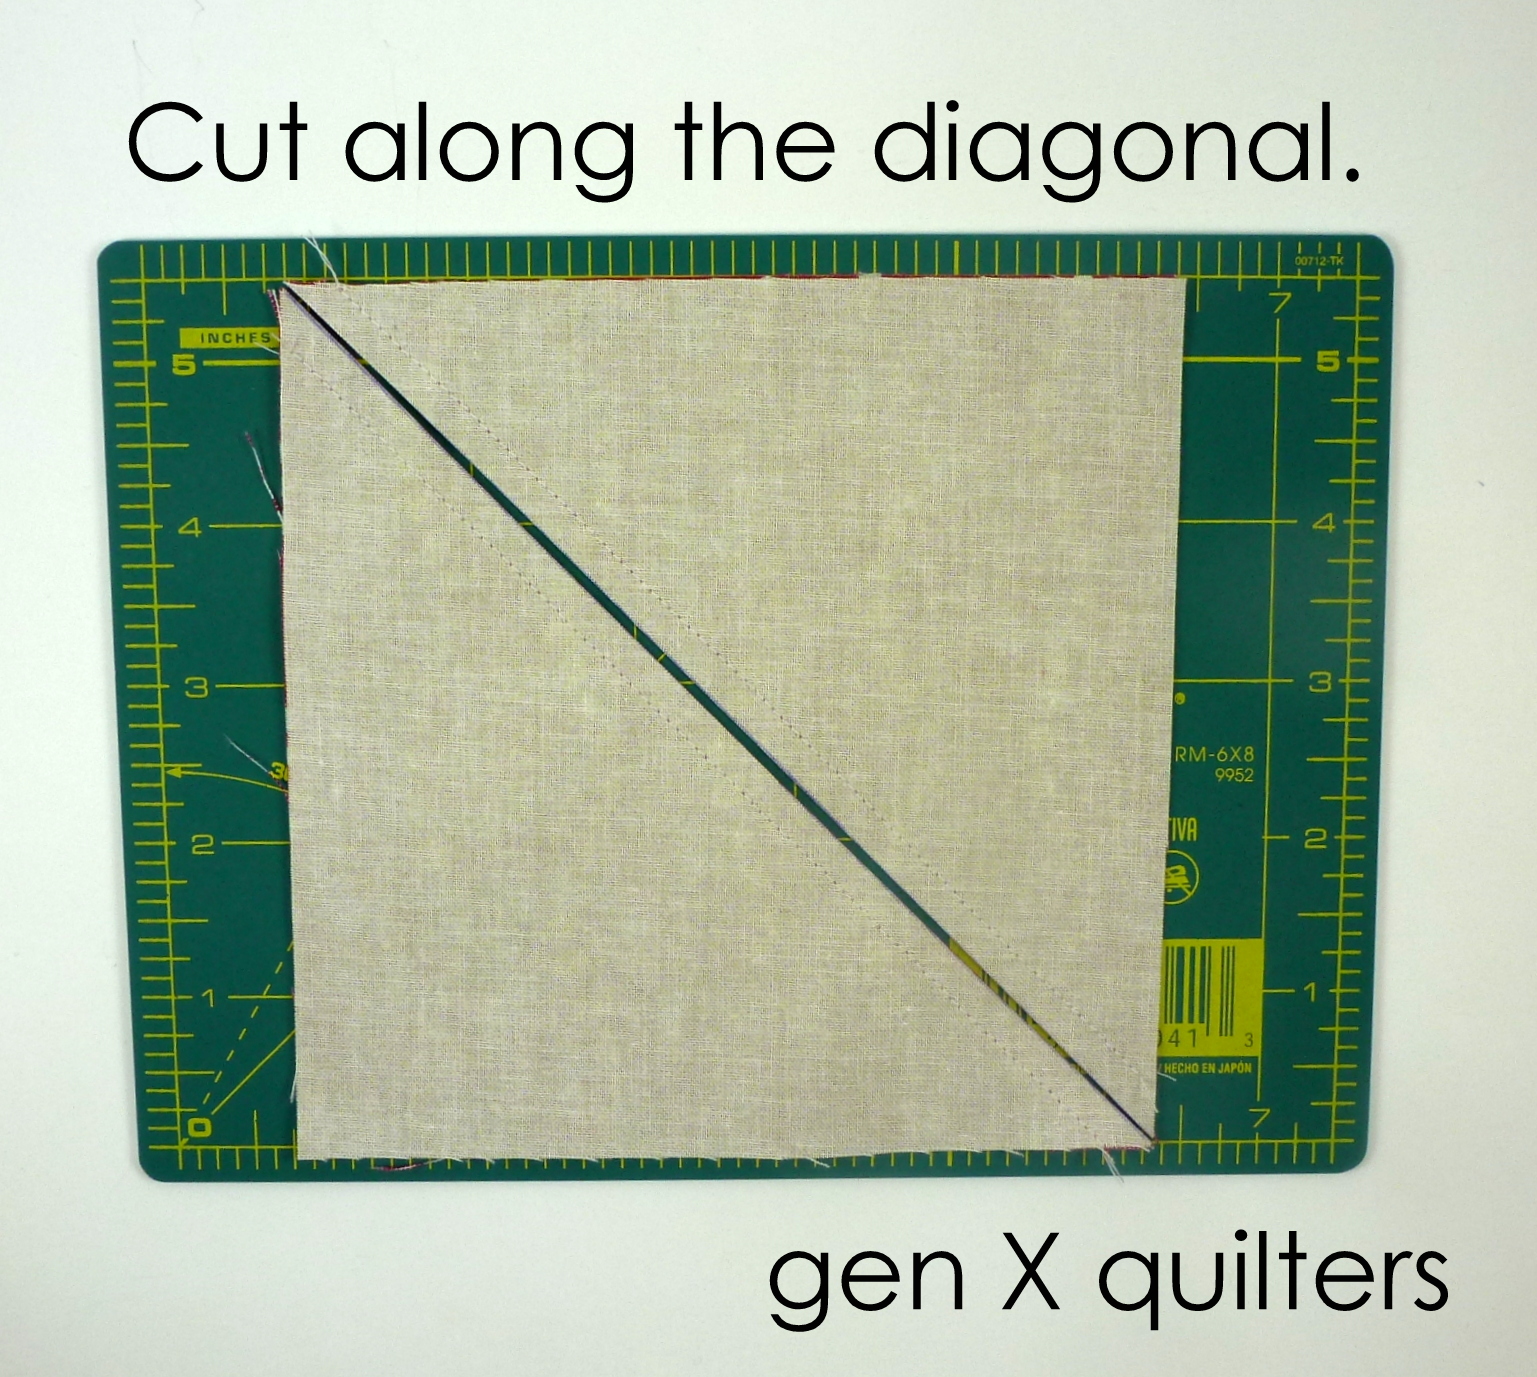
3.  Cut the pair apart using your rotary cutter along the drawn line.

4

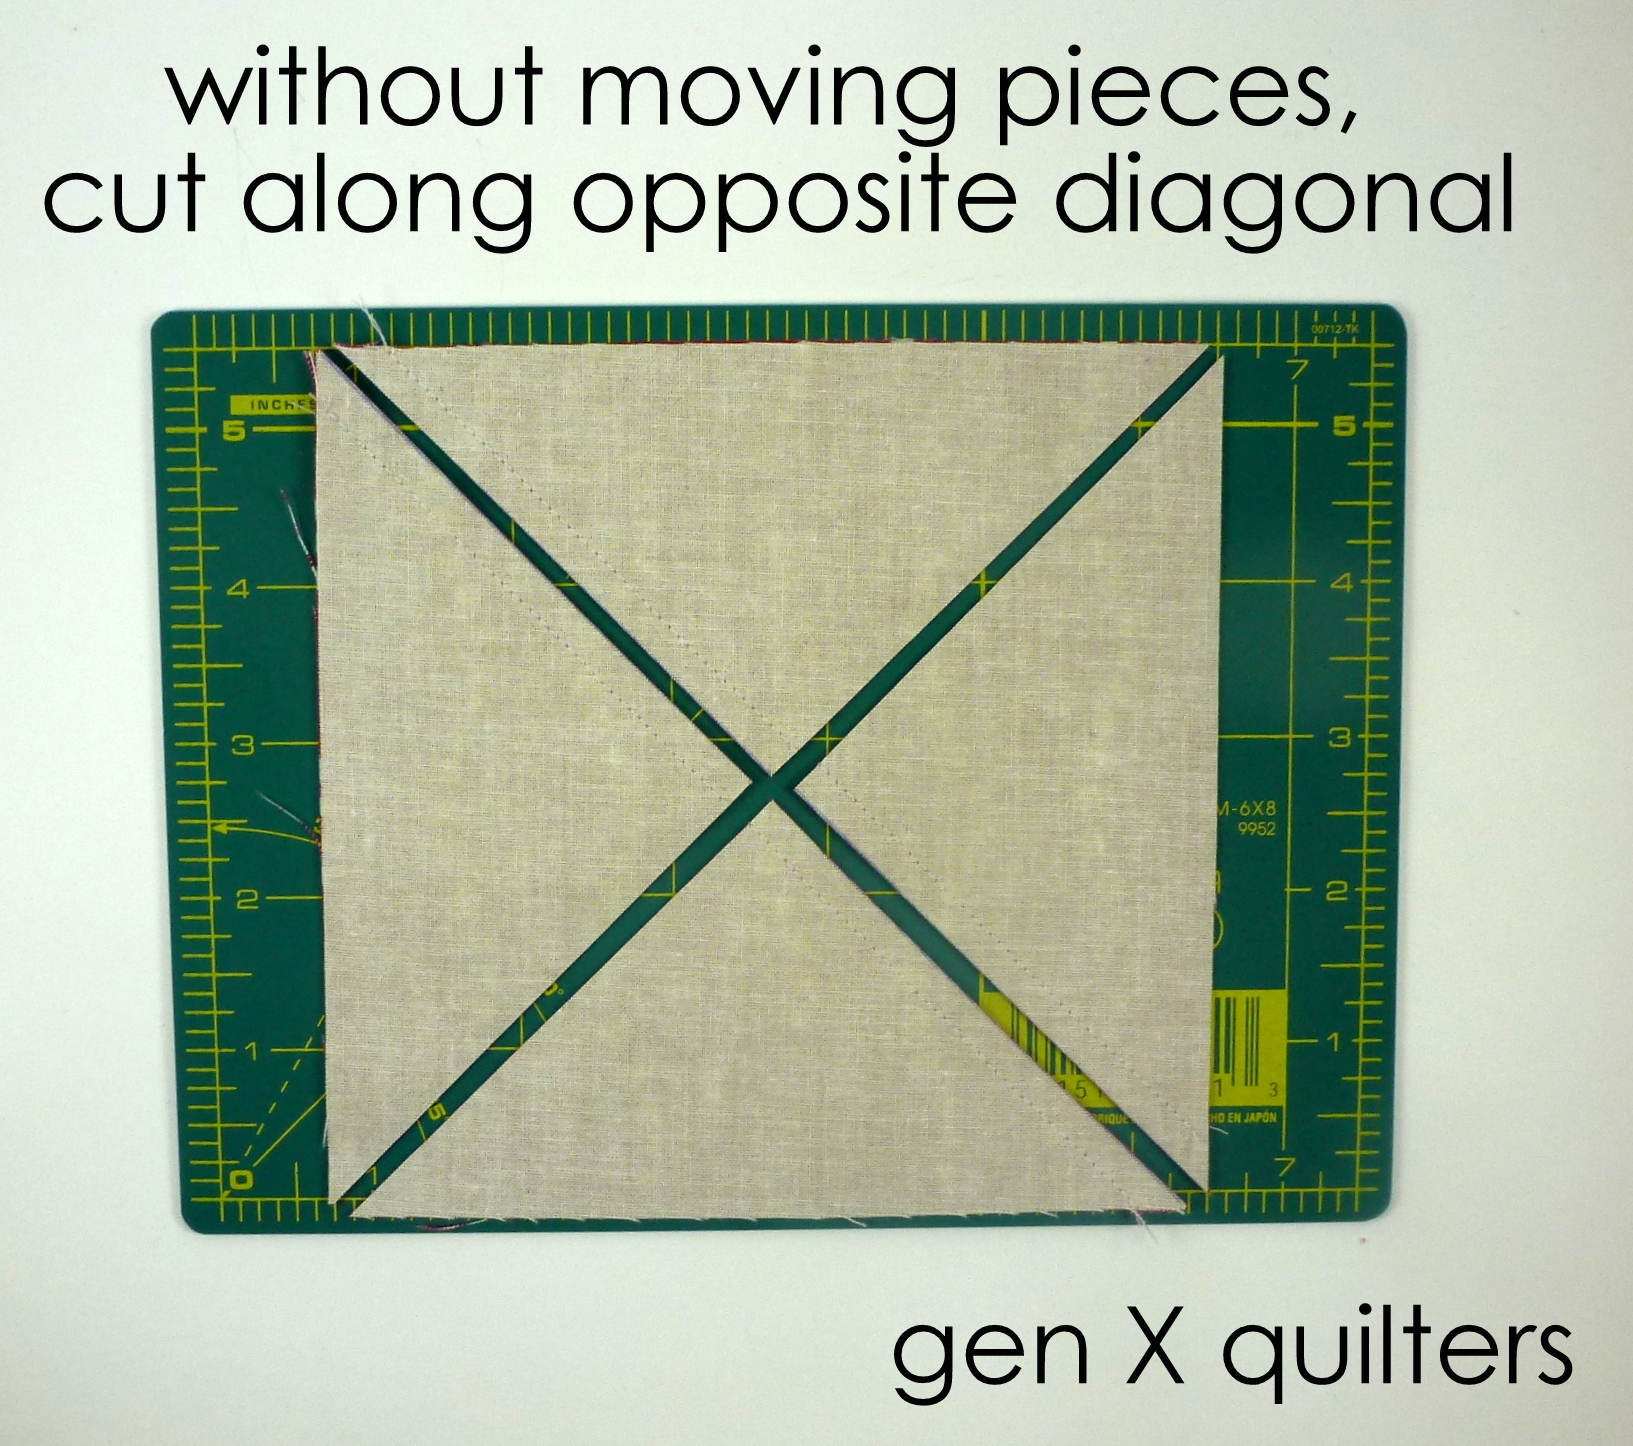
4.  Without moving the blocks you just cut, place your ruler over the opposite diagonal and cut.  There are now four triangle units.  Each unit has one A triangle and one B triangle.
5
5.  Press the seams toward the dark side and match up pairs of triangles that form the hourglass block together.
6
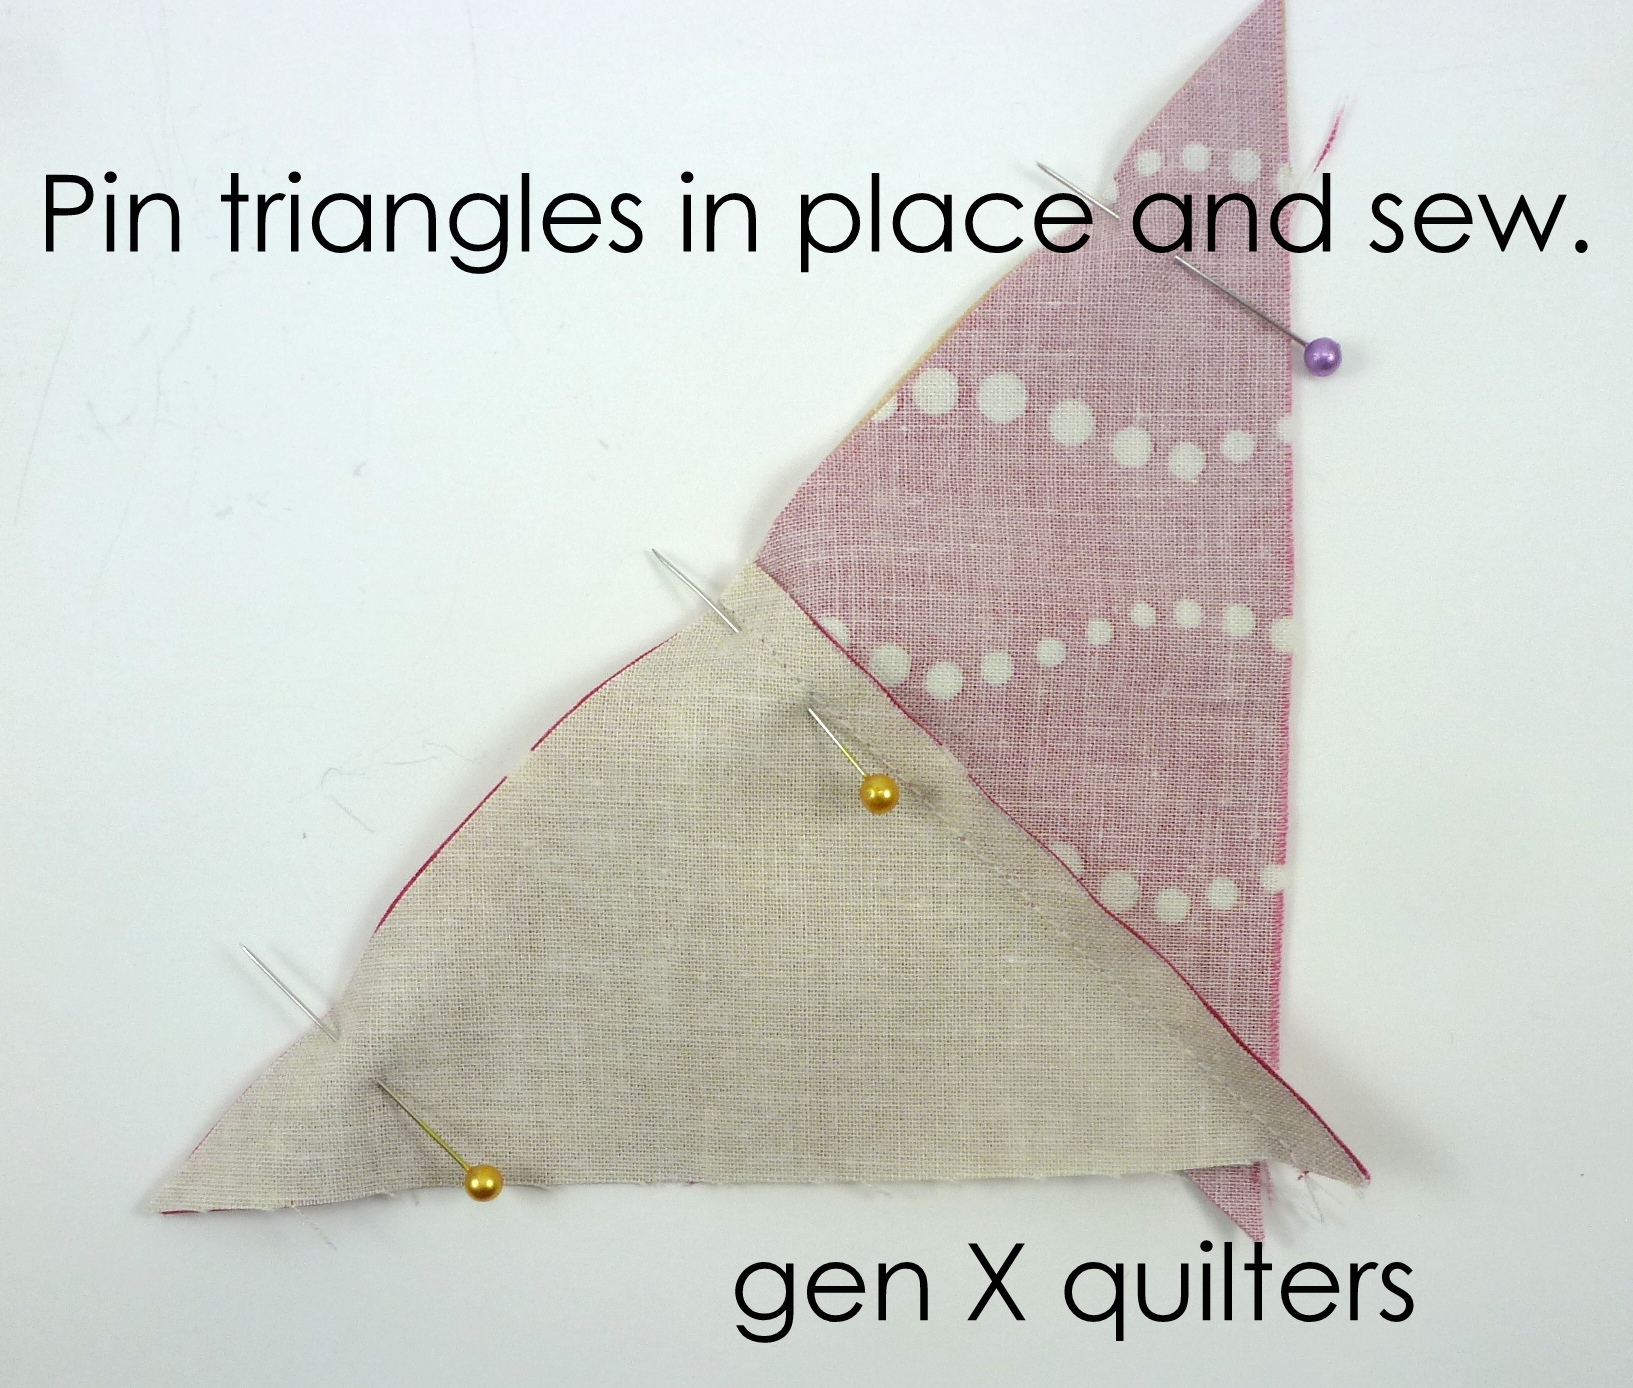
6.  Pin triangles in place and sew.  Now I admit, I am a bit of an anti-pinner, but this is one case where I do like to pin.  When sewing triangles with bias introduced, the simple act of pinning can help from your triangles getting distorted.
7

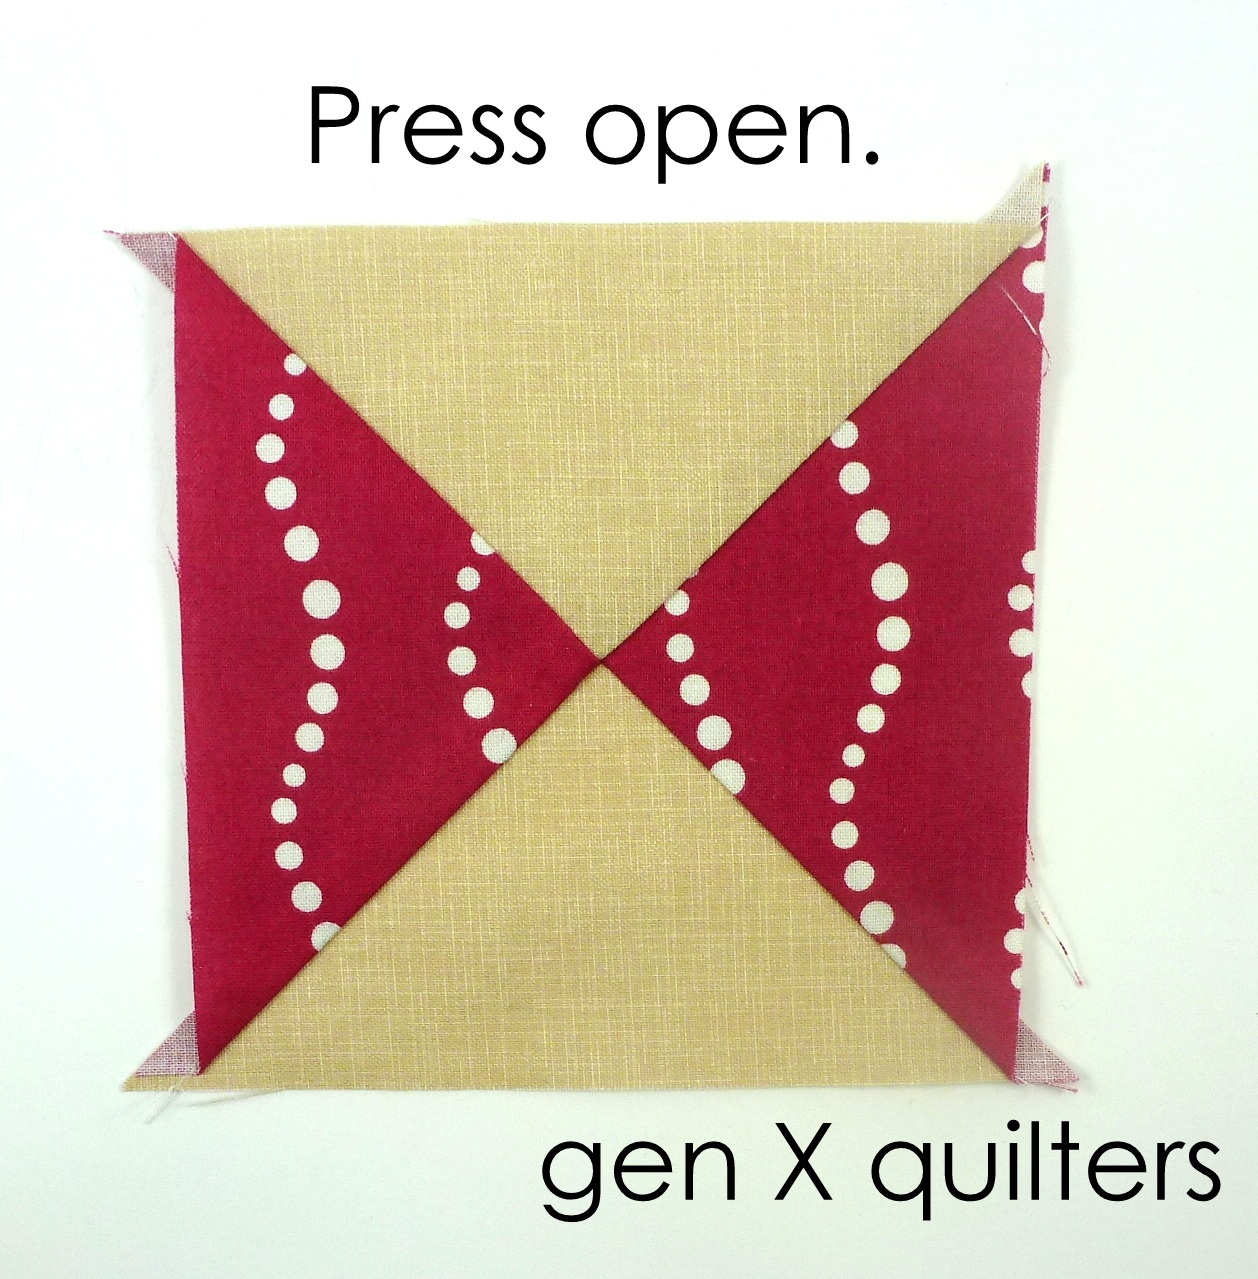
7.  Press the block open.
8
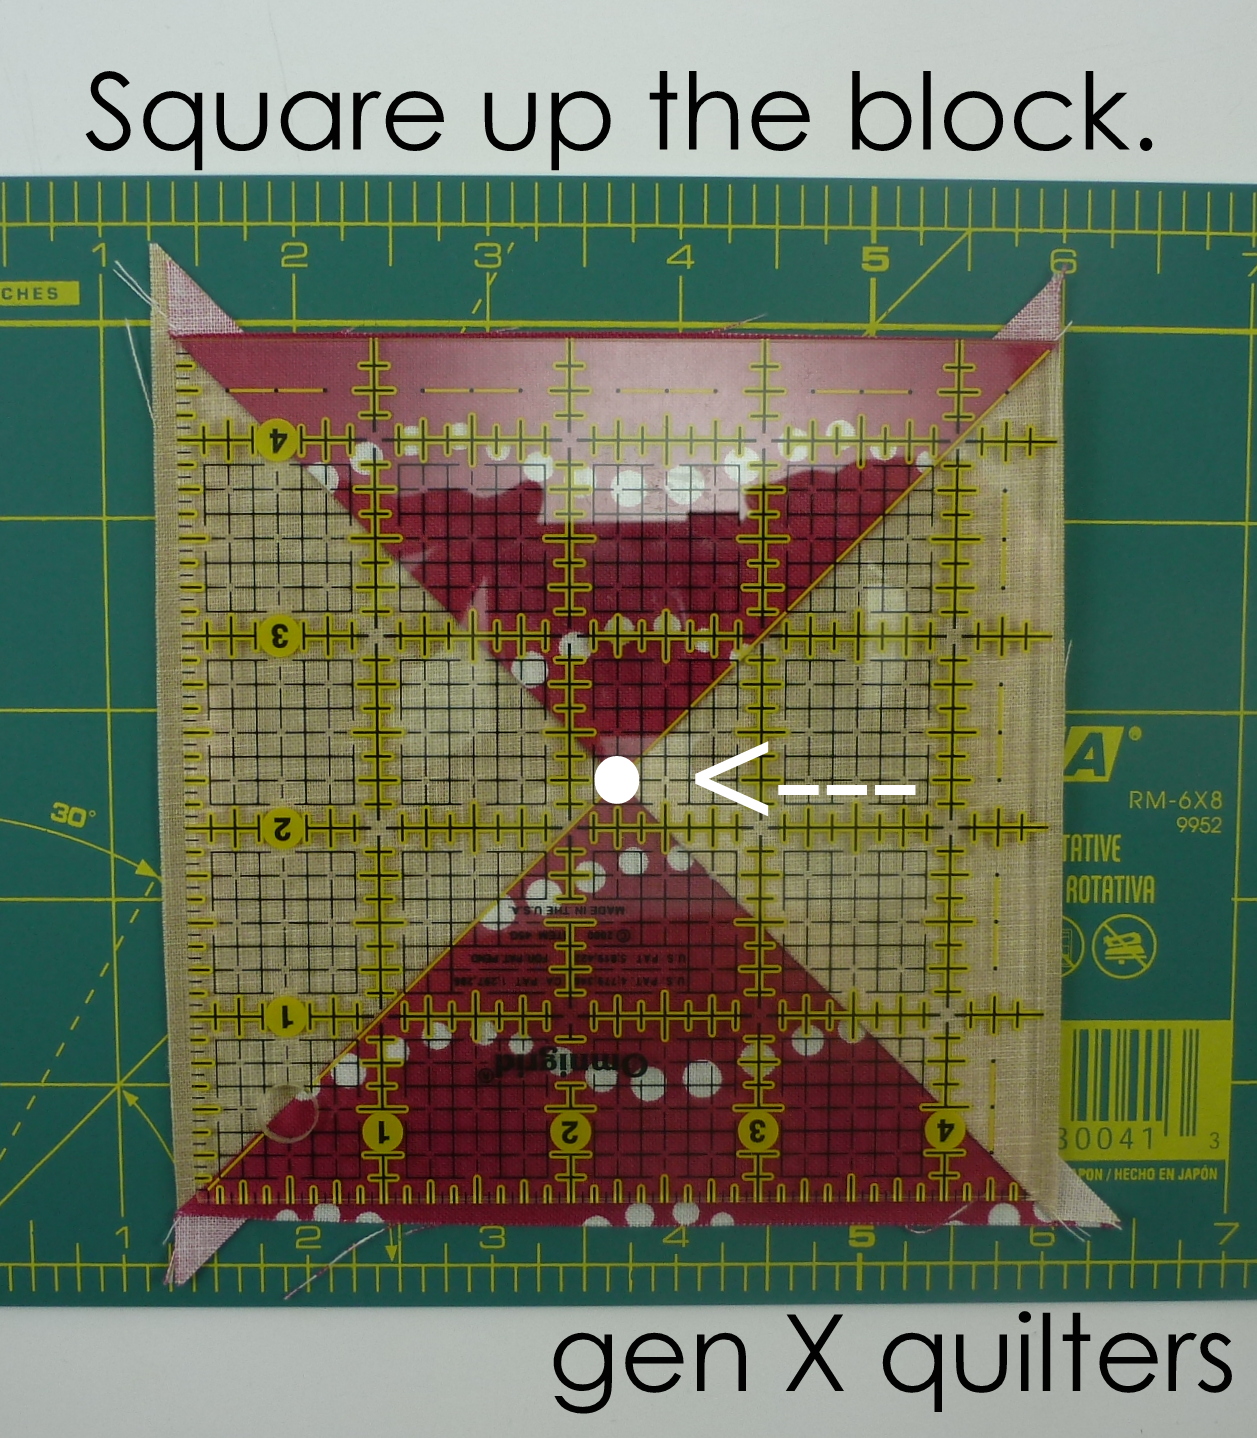
8.  Square up the block.

In this case, I was lucky that this block needed to square up to 4 1/2" and I happened to have a 4 1/2" ruler.

Mark the center of the block on your ruler.  Lay the diagonal of the ruler on top of one of the diagonals of the Hourglass, making sure the center dot is at the intersection of the block.  Trim excess fabric on all sides.

9

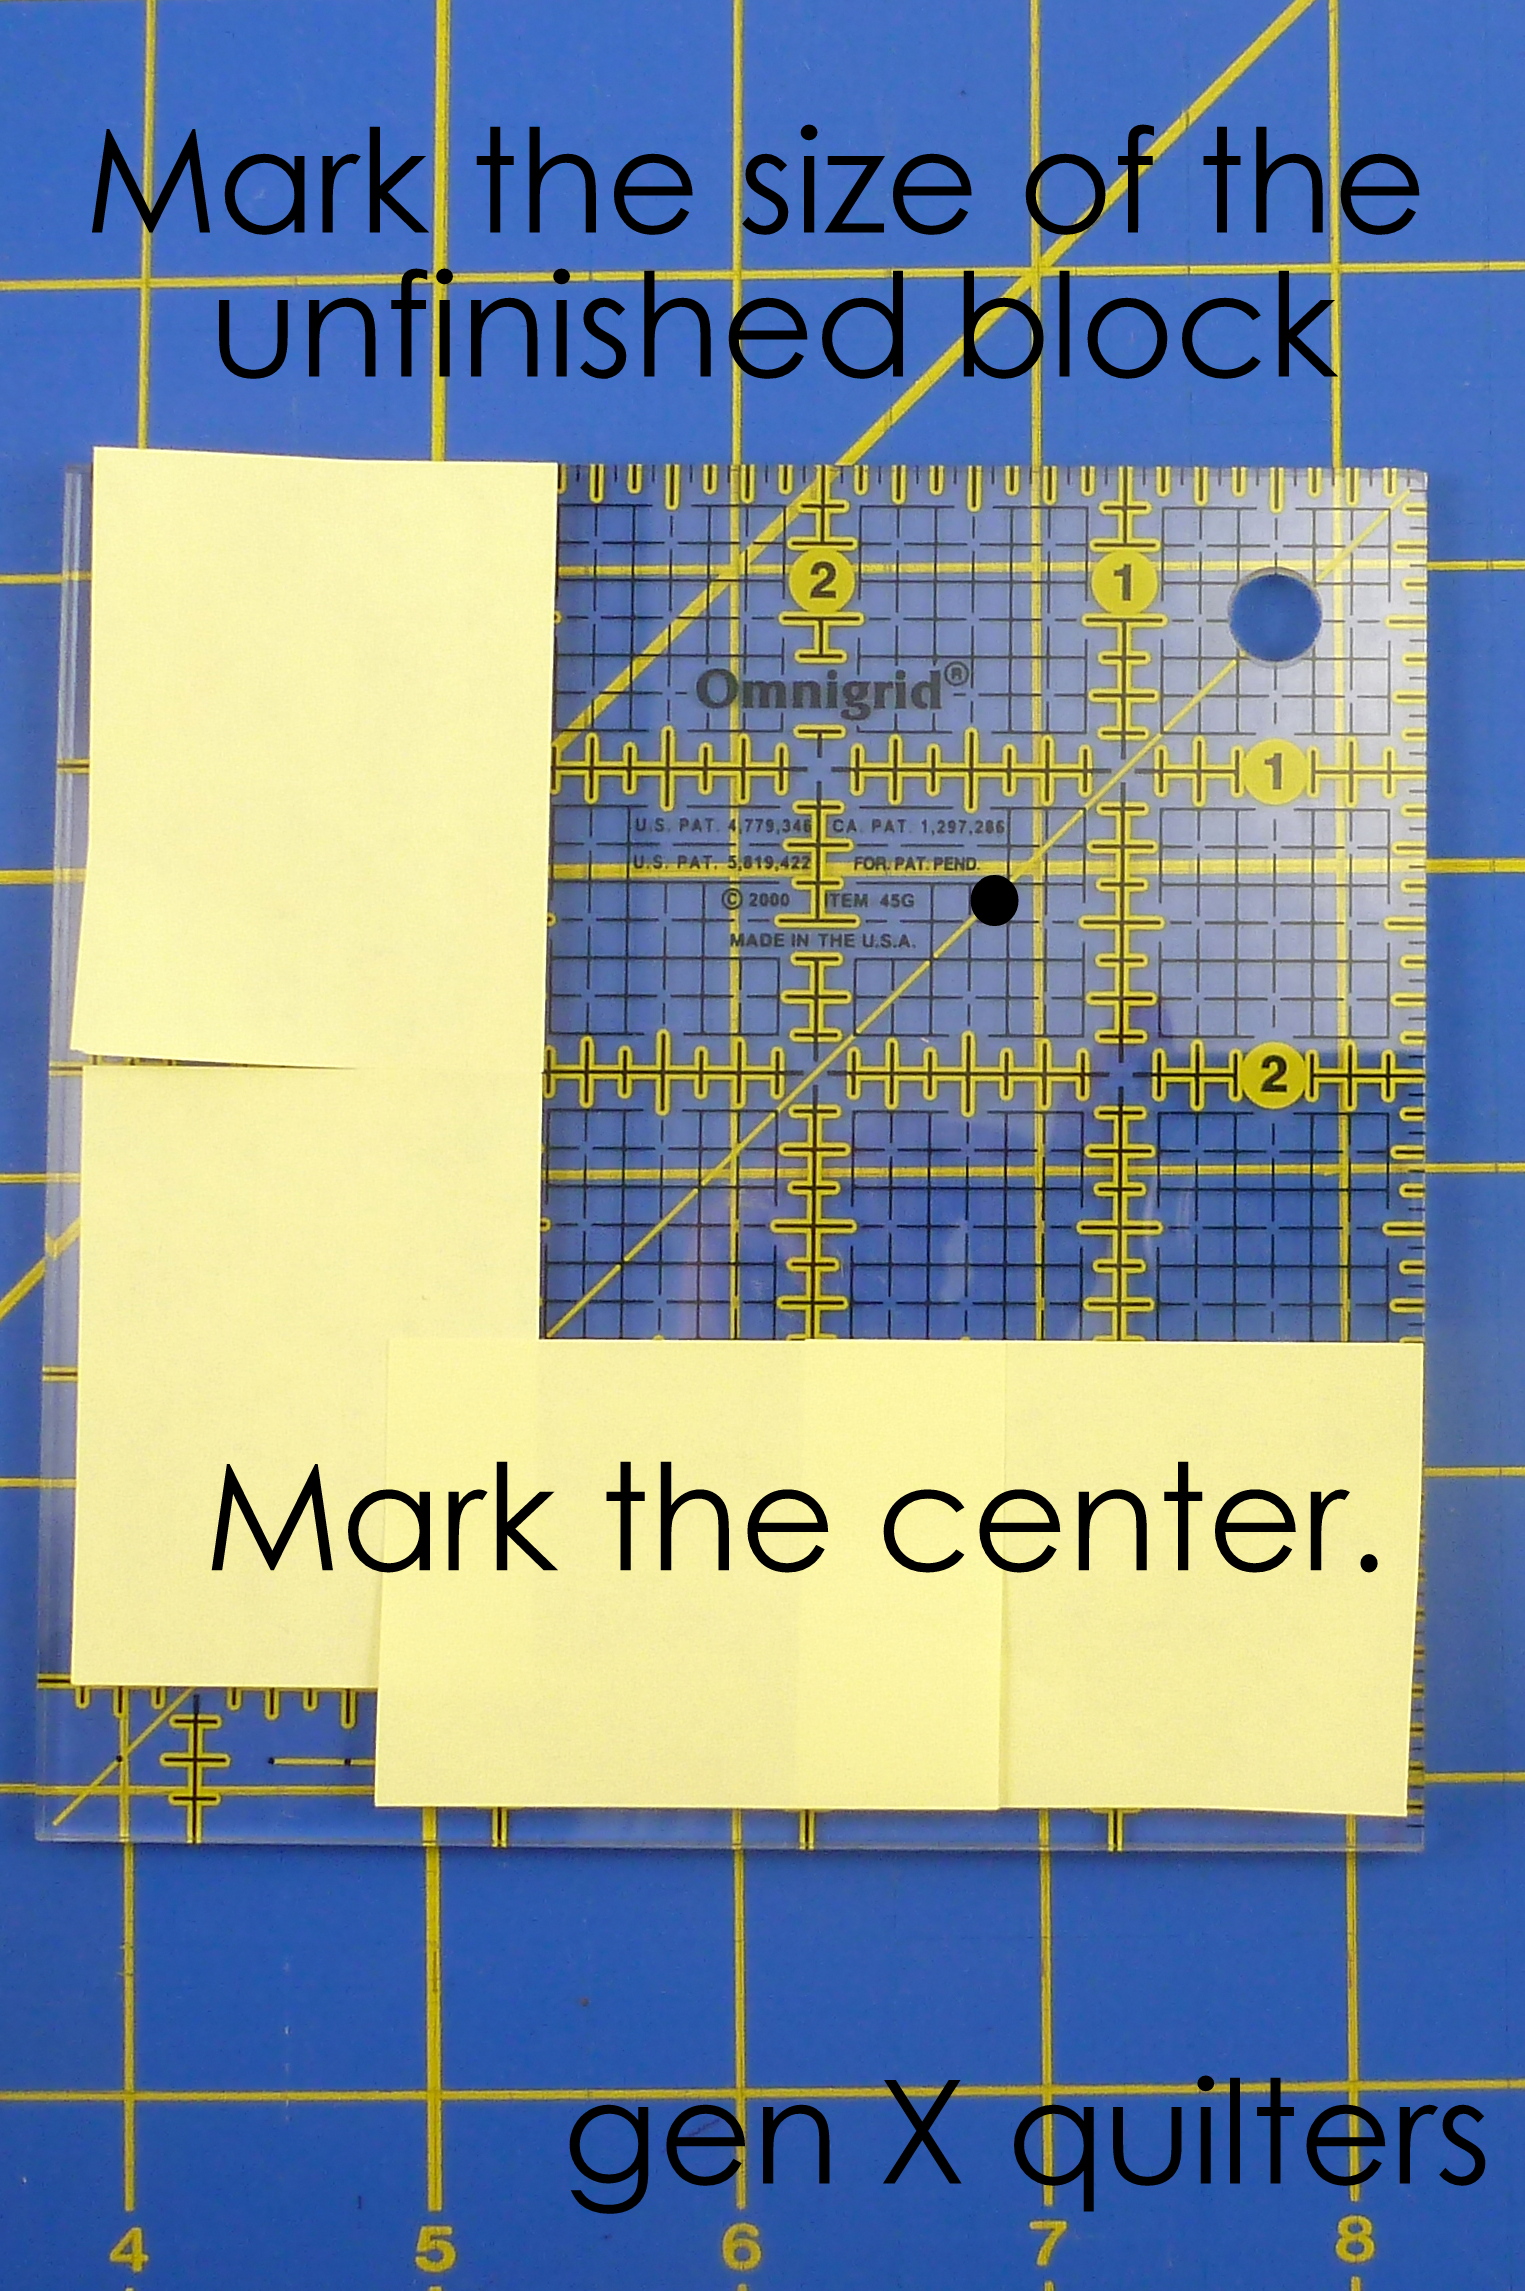
8.5.  If your ruler is not exactly the same size as you need, I like to mark off the unfinished size I am going to trim the block down to.  I lay post-its on the ruler so I can see the unfinished size without getting confused.  (In this example, I have gridded off a 2 7/8" x 2 7/8" square.  Mark the center of the square also.

hourglass 5. mark required unfinished size
8.75.  Now you can continue as above (in step 8) by laying the diagonal of the ruler on top of the diagonal of the hourglass, making sure the center dot is at the intersection of the block.  Trim excess on all sides.  (For further details on squaring up with the marked off ruler, see this tutorial.)
10
Finished!