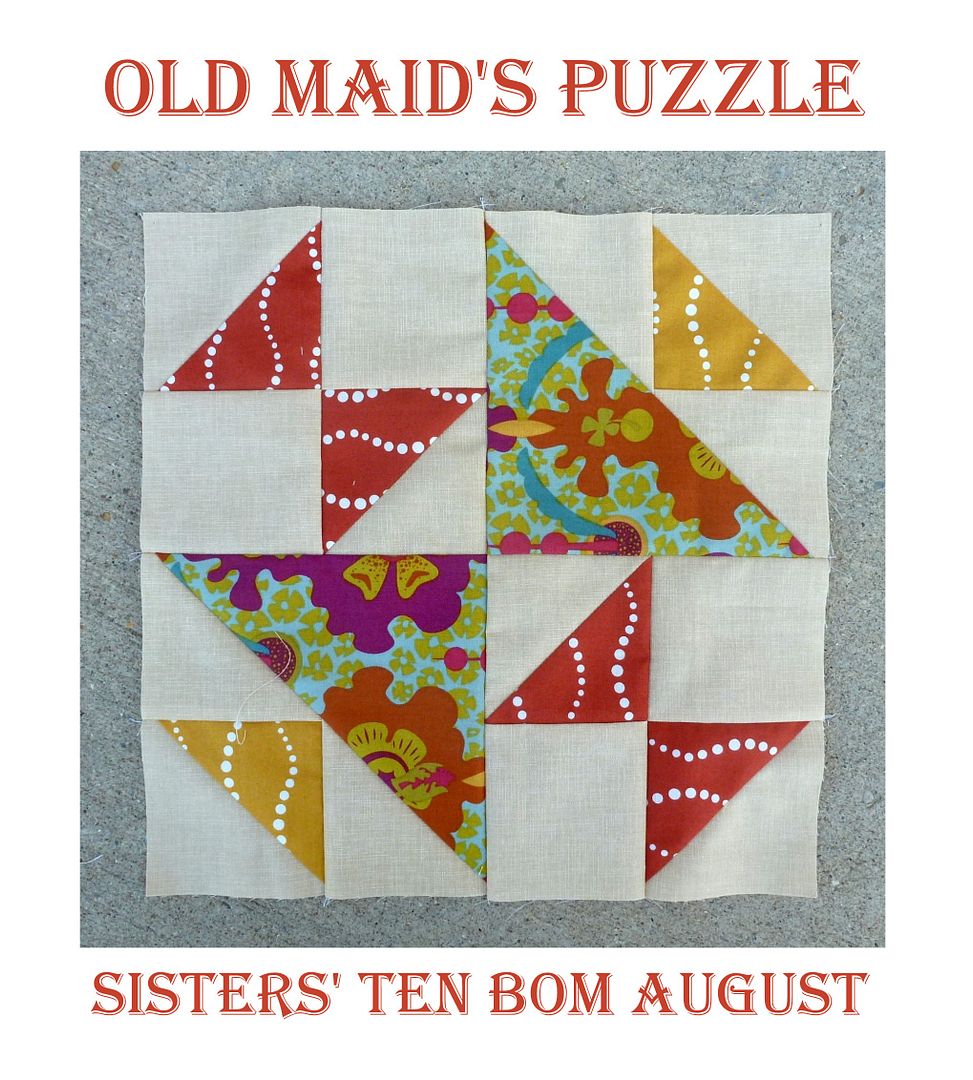
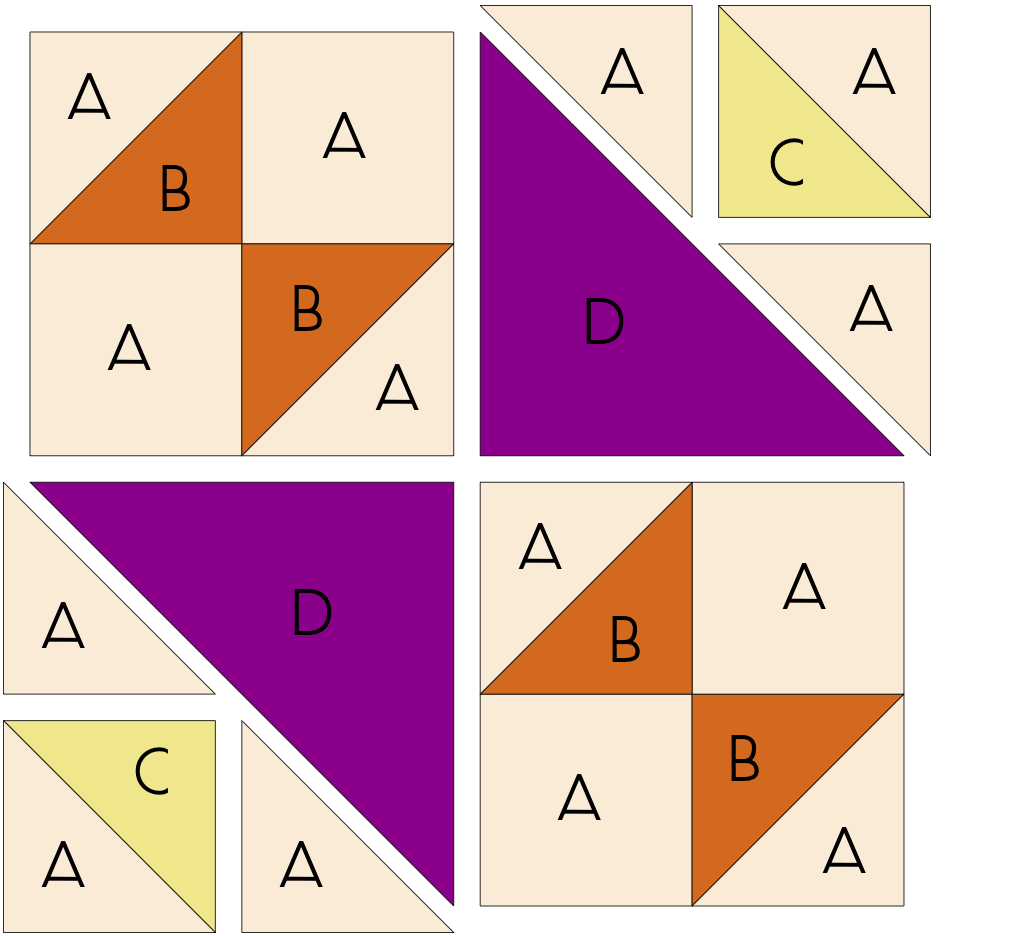
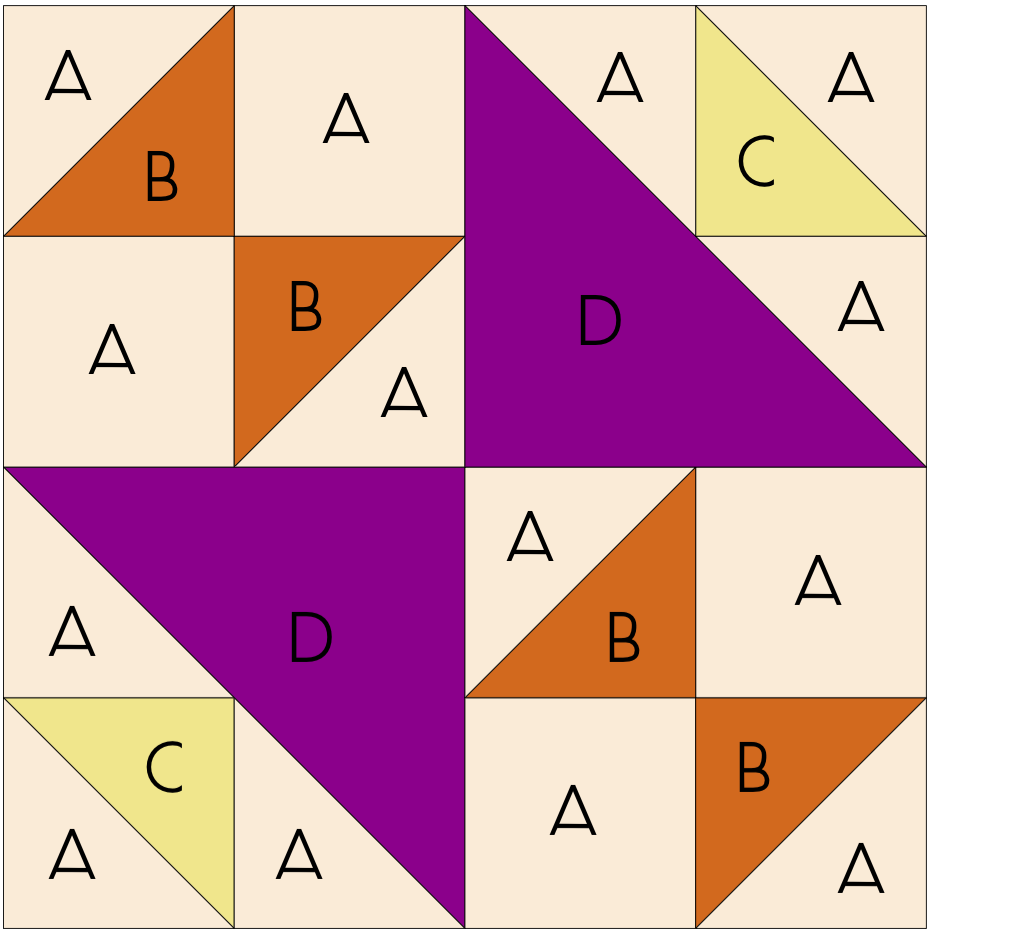
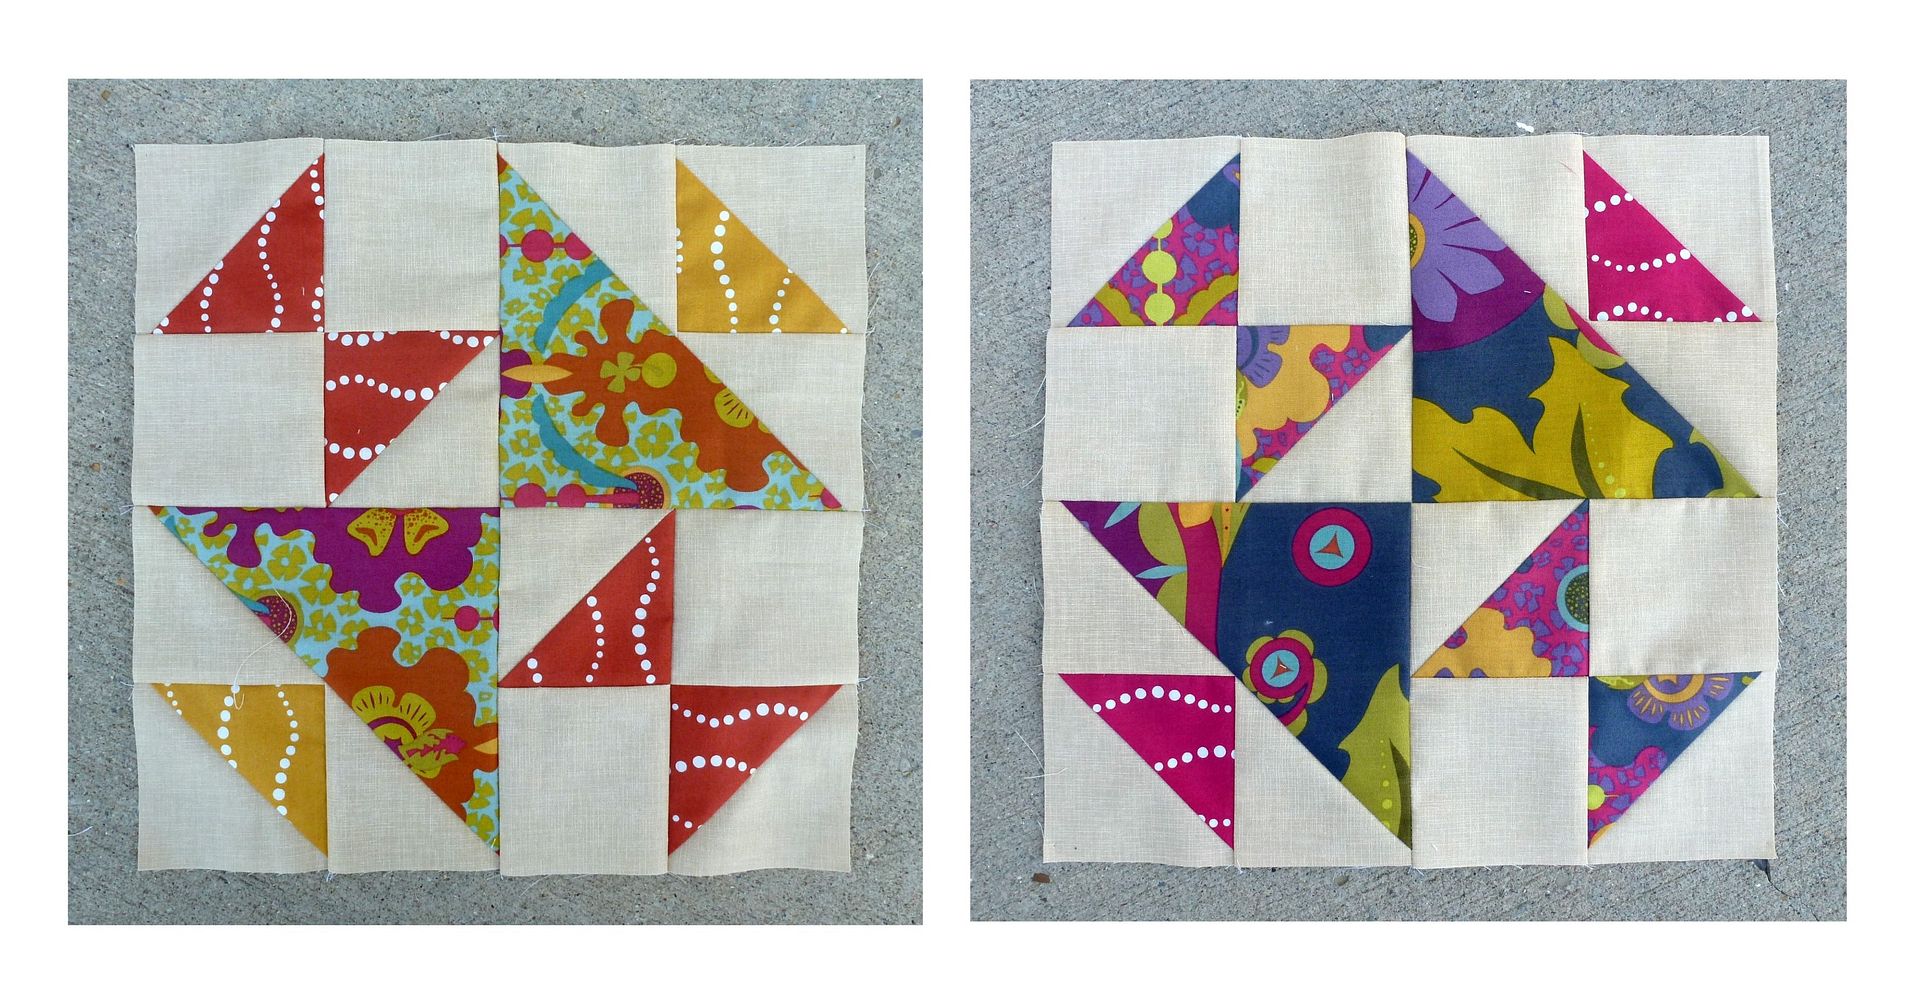
August's block for the Sisters' Ten Modern Block of the Month Club is a simple and attractive design. We are going to venture into triangles this month... don't worry! There are only a few if you have not worked with triangles before. Old Maid's Puzzle uses a great combination of half-square triangles in two different sizes.
For 12" blocks.
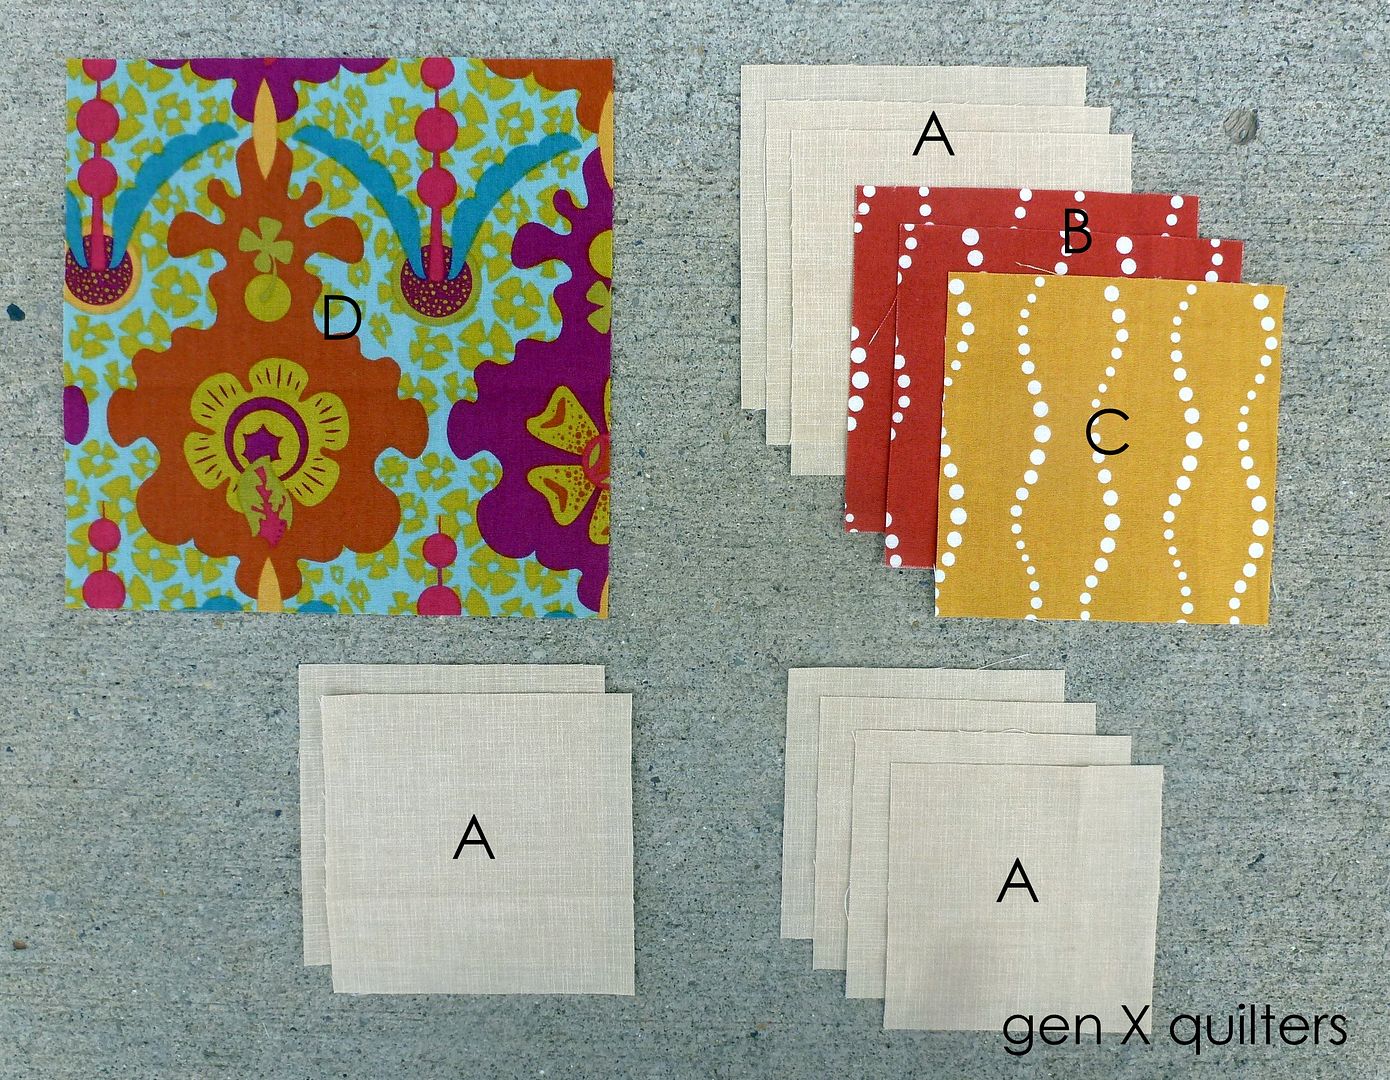
- Cut (3) 4 1/4" x 4 1/4" squares of Fabric A (background.
- Cut (2) 3 7/8" x 3 7/8" squares of Fabric A (background).
- Cut (4) 3 1/2" x 3 1/2" squares of Fabric A (background).
- Cut (2) 4 1/4" x 4 1/4" squares of Fabric B.
- Cut (1) 4 1/4" x 4 1/4" square of Fabric C.
- Cut (1) 6 7/8" x 6 7/8" square of Fabric D.
For 9" blocks.
- Cut (3) 3 1/2" x 3 1/2" squares of Fabric A (background.
- Cut (2) 3 1/8" x 3 1/8" squares of Fabric A (background).
- Cut (4) 2 3/4" x 2 3/4" squares of Fabric A (background).
- Cut (2) 3 1/2" x 3 1/2" squares of Fabric B.
- Cut (1) 3 1/2" x 3 1/2" square of Fabric C.
- Cut (1) 5 3/8" x 5 3/8" square of Fabric D.
Piecing Instructions.
1. Make Half-Square Triangle (HST) units using Fabric A with both Fabric B and Fabric C. Use (2) Fabric A squares and the (2) Fabric B squares to make (4) total Half-Square Triangle units using the method in this tutorial. Then use the remaining (1) Fabric A square and the Fabric C square to make (2) Half-Square Triangle units. The HSTs should be trimmed down to:
12" blocks: 3 1/2" (unfinished size).
9" blocks: 2 3/4" (unfinished size).
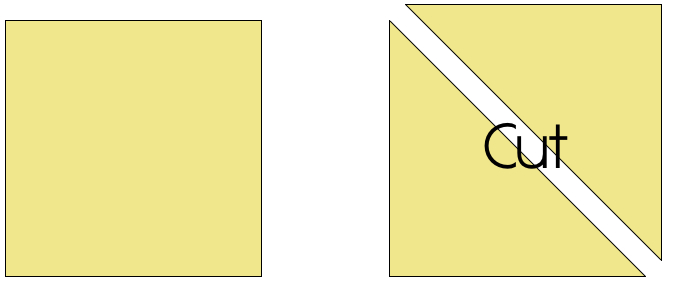
2. Cut (2) Fabric A squares and (1) Fabric D square into triangles. Cut the (2) Fabric A squares (3 7/8" x 3 7/8" squares for 12" blocks; 3 1/8" x 3 1/8" squares for 9" blocks) into triangles by cutting diagonally across the square. Repeat for the Fabric D square.
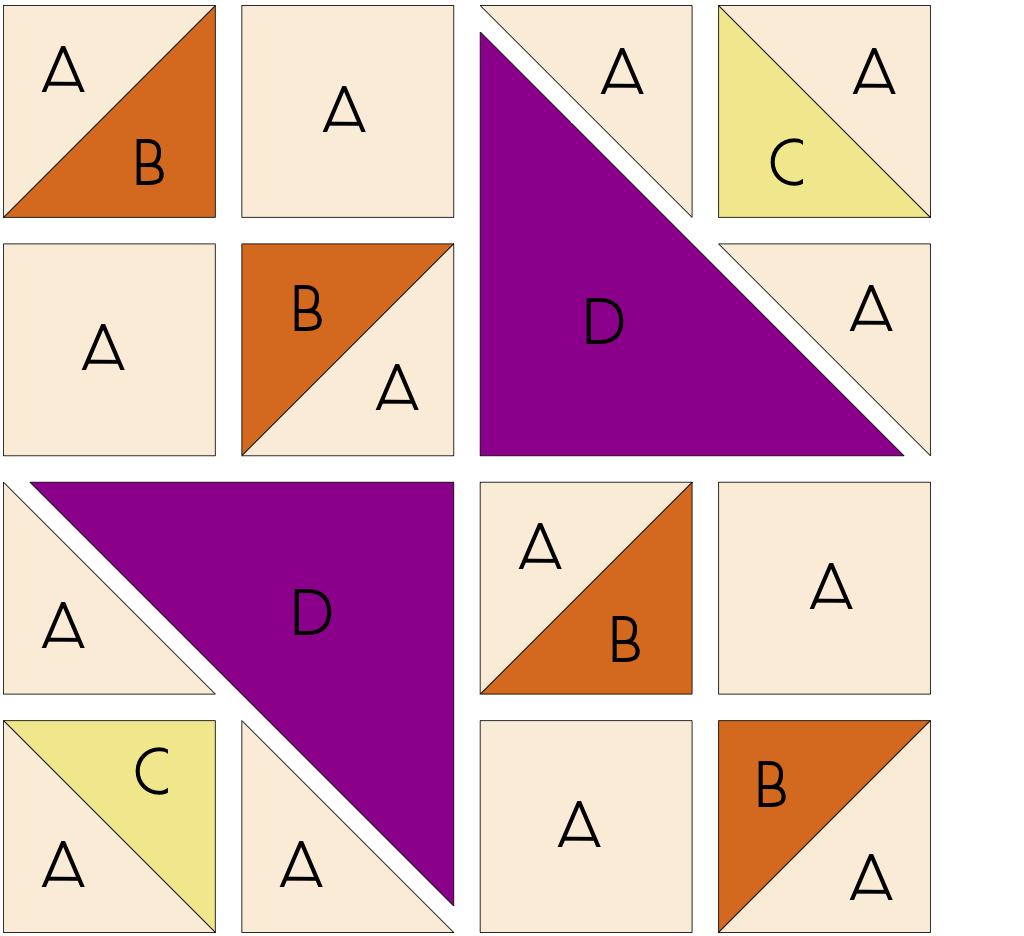
3. Layout the Half-Square Triangle Units, the Fabric A and Fabric D triangles and the remaining Fabric A squares as shown below.
4. First the easy part. Sew the bow tie four-patch blocks together (upper left quadrant and lower right quadrant). Do this by first sewing the rows together, pairing one A/B HST with one A square, according to the layout shown. Then sew the two rows together to make the four-patch block. Repeat for the second quadrant.
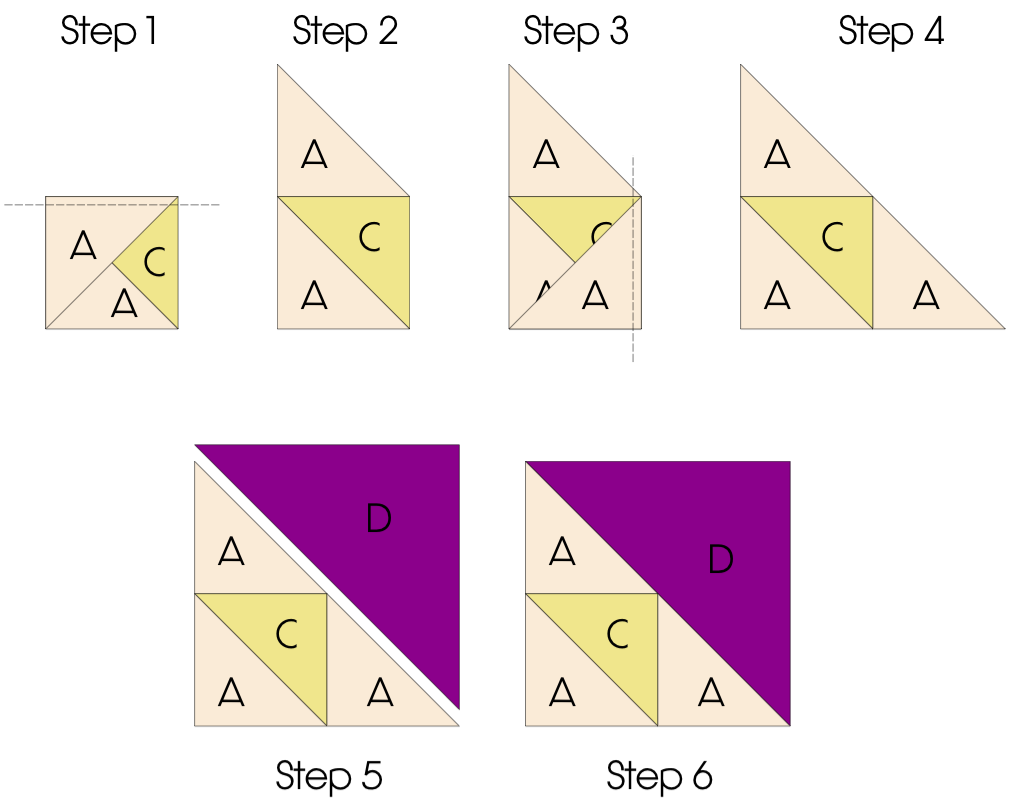
5. Now, on to the triangles. Like the diagram in Step 1 below, place one Fabric A triangle on top of one A/C HST. Stitch across the top of the block as shown. Press the Fabric A triangle up as in Step 2. Place another Fabric A triangle along the right side of the unit from Step 2, as shown in Step 3. Stitch across the right side of the unit as shown. Press the Fabric A triangle to the right as shown in Step 4.
As shown in Step 5, to complete the quadrant, a Fabric D triangle will be sewn to the unit from Step 4. Place the Fabric D triangle directly on top of the Step 4 unit (not shown) and sew along the hypotenuse of the pair. Press the Fabric D triangle open as shown in Step 6. Repeat for the remaining quadrant.
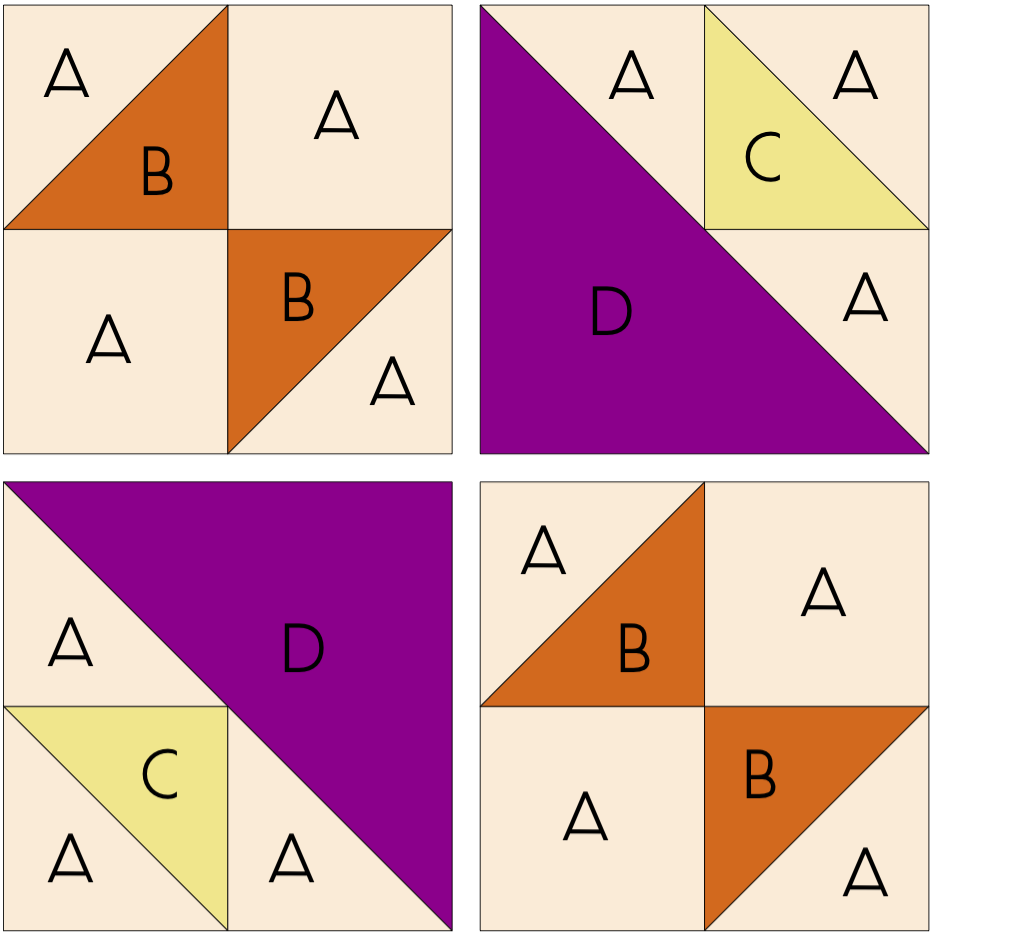
6. Now all 4 sub-assemblies of the block are sewn together. Lay them out as shown below.
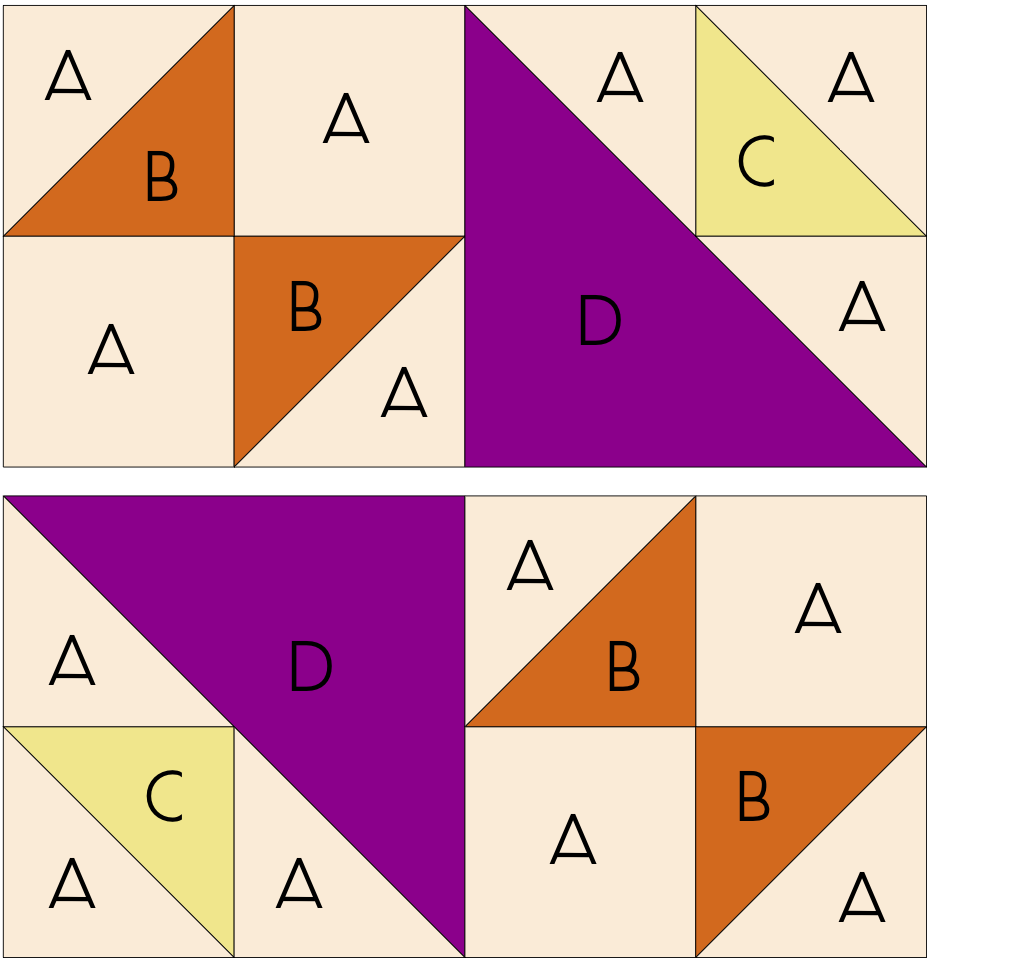
7. Sew each of the two rows together, alternating the direction the seams are pressed.
8. Sew the two rows together to complete the block.
9. Make (2) blocks. They may be identical blocks or made from differing fabrics for a scrappier look.


